Categories
All About Guns

The M-1 Garand

Here is the Man behind the Gun. -Mr. John Garand
Image result for john Garand
  The sad thing about this man. Is that besides his pay & pension from the Government. He never made a dime off of his design of the M-1. Which is a real pity but he never bitched about it. So all I can say is that there was a man!
Inline image 1

  But let us move on!
  What can I saw about this fine work horse of a Rifle that has not been said a couple of thousand times before? Not a whole lot really.
   All I can say that I have two at one in the safe. One in its original caliber of 30 Government or 30-06 for the civilians out there.
  I also have a Navy Garand that was re-figured to shoot the 7.62×51 round or as it is called 308 NATO round. Both of these I got thru the Civilian Marksmanship Program.**
 Both were made by The Springfield arsenal.
  Now again these rifles are not really noted to be super accurate rifles. But hey! They are Main Battle Rifles that are designed to throw out a lot of very heavy bullets. At a very high rate.
I actually almost felt sorry for the BAD Guys that had to attack an entrenched forces that was issued these rifles. Nah!
Image result for japanese banzai charge
Since this is what is going to happen to them.
Image result for wwii german infantry  charge
 The Garand will also generally hit the black of the paper target at 300 yds. But you will at best get a 3 to 4 inch pattern with them at the range. Which is what they are designed for.
 
But even then you are doing some pretty good shooting there partner!
  As that is this what the average size of a man’s chest is. Which is what most trained troops will be aiming at. Since that is usually the biggest & easiest (?) target on the battlefield.
  Because if you get hit there. Generally you will find yourself either dead or really badly wounded. Which is what the American Taxpayer is shelling out the big bucks for.
I also found these U Tube videos on the Grand
https://youtu.be/UX7Nf5q1A0o
https://youtu.be/hxjPope4cgY
Image result for john Garand
Now here is the Technical stuff about this last of the real rifles of the US Military.

M1 Garand

From Wikipedia, the free encyclopedia
“Garand” redirects here. For other uses, see Garand (disambiguation).
U.S. rifle, caliber .30, M1
M1 Garand rifle - USA - 30-06 - Armémuseum.jpg

M1 Garand rifle. From the collections of the Swedish Army Museum, Stockholm, Sweden.
Type Semi-automatic rifle
Place of origin United States
Service history
In service 1936–1959 (as the standard U.S. service rifle)1940s–present (other countries)
Used by See Users
Wars
Production history
Designer John C. Garand
Designed 1928
Manufacturer
Unit cost About $85 (during World War II) ($1,200 in 2016 dollars)
Produced 1934—1956
No. built 5,468,772[3]
Variants M1C, M1D
Specifications
Weight 9.5 lb (4.31 kg) to 11.6 lb (5.3 kg)
Length 43.5 in (1,100 mm)
Barrel length 24 in (609.6 mm)

Cartridge
Action Gas-operatedrotating bolt
Rate of fire 40−50 rounds/min
Muzzle velocity 2,800 ft/s (853 m/s)
Effective firing range 500 yd (457 m)[4]
Feed system 8-round en-bloc clip, internal magazine
Sights
  • Rear: adjustable aperture
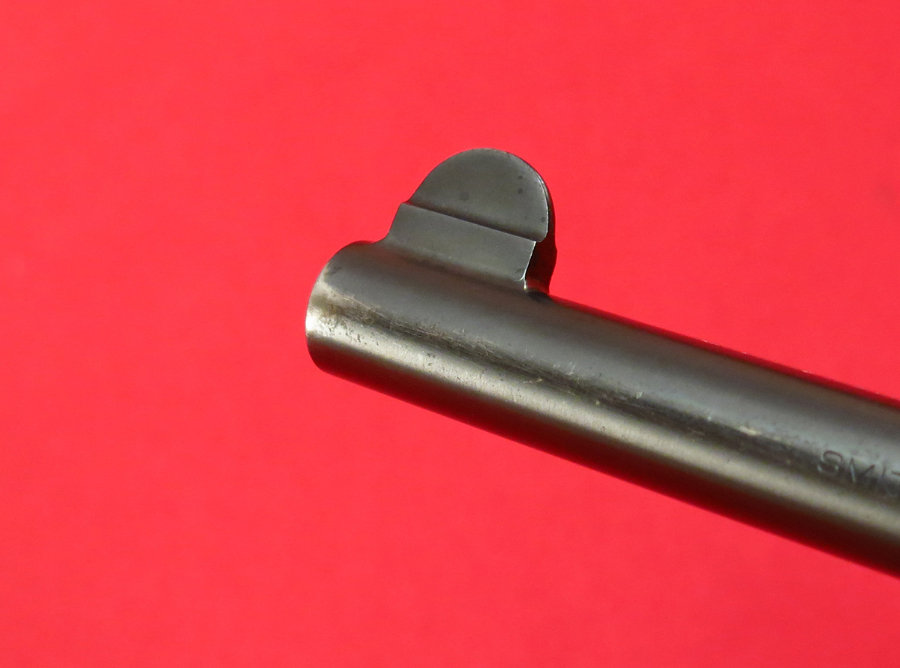
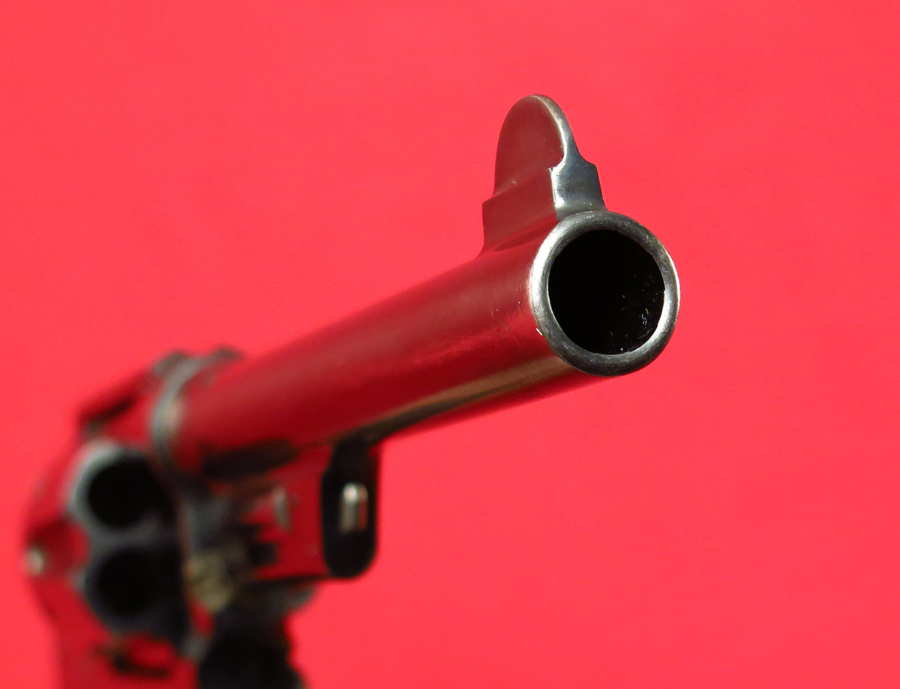
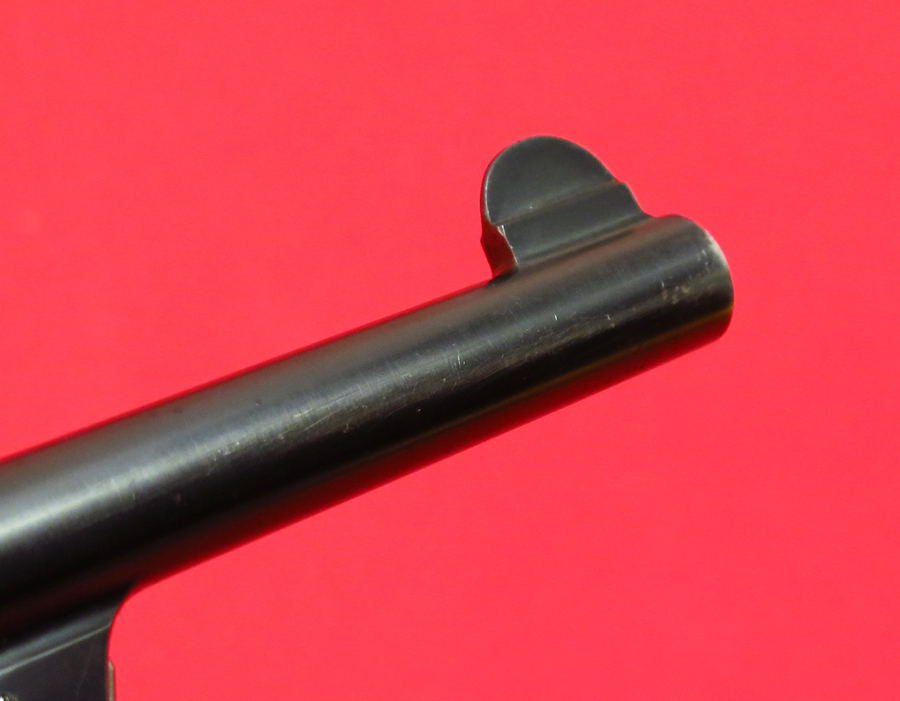
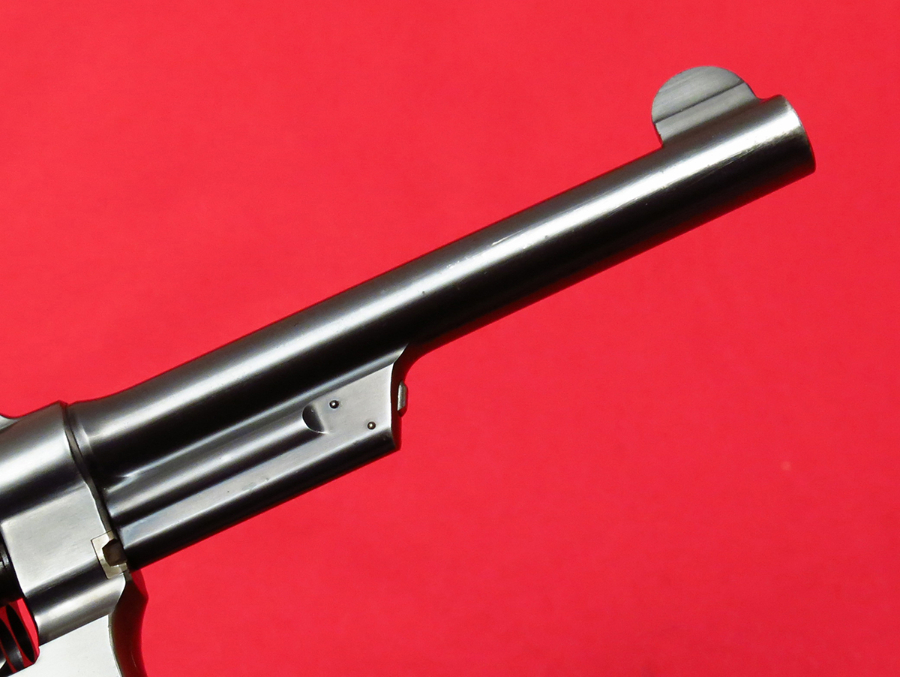
  • Front: wing protected post

The M1 Garand[nb 1] is a .30 calibersemi-automatic rifle that was the standard U.S. service rifle during World War II and the Korean Warand also saw limited service during the Vietnam War. Most M1 rifles were issued to U.S. forces, though many hundreds of thousands were also provided as foreign aid to American allies. The Garand is still used by drill teams and military honor guards. It is also widely used by civilians for hunting, target shooting, and as a military collectible.
The M1 rifle was named after its Canadian-Americandesigner, John Garand. It was the first standard-issue semi-automatic military rifle.[5]By all accounts the M1 rifle served with distinction. General George S. Patton called it “the greatest battle implement ever devised”.[6][7]The M1 replaced the bolt action M1903 Springfield as the standard U.S. service rifle in the mid 1930s, and was itself replaced by the selective fireM14 rifle in the early 1960s.
Although the name “Garand” is frequently pronounced /ɡəˈrænd/, the preferred pronunciation is /ˈɡærənd/ (to rhyme with errand), according to experts and people who knew John Garand, the weapon’s designer.[8][9] Frequently referred to as the “Garand” or “M1 Garand” by civilians, its official designation when it was the issue rifle in the U.S. Army and the U.S. Marine Corps was “U.S. Rifle, Caliber 30, M1” or just “M1” and Garand was not mentioned.

History

M1 Garand with en bloc clips

M1 Garand displayed with en block clip at US Army Museum of Hawaii

Development

French Canadian-born Garand went to work at the United States Army’s Springfield Armory and began working on a .30 caliber primer actuated blowbackModel 1919 prototype. In 1924, twenty-four rifles, identified as “M1922s”, were built at Springfield. At Fort Benningduring 1925, they were tested against models by Berthier, Hatcher-Bang, Thompson, and Pedersen, the latter two being delayed blowback types.[10] This led to a further trial of an improved “M1924” Garand against the Thompson, ultimately producing an inconclusive report.[10] As a result, the Ordnance Board ordered a .30-06 Garand variant. In March 1927, the cavalry board reported trials among the Thompson, Garand, and 03 Springfield had not led to a clear winner. This led to a gas-operated .276 (7 mm) model (patented by Garand on 12 April 1930).[10]
In early 1928, both the infantry and cavalryboards ran trials with the .276 Pedersen T1 rifle, calling it “highly promising”[10] (despite its use of waxedammunition,[11] shared by the Thompson).[12] On 13 August 1928, a semiautomatic rifle board (SRB) carried out joint Army, Navy, and Marine Corpstrials between the .30 Thompson, both cavalry and infantry versions of the T1 Pedersen, “M1924” Garand, and .256 Bang, and on 21 September, the board reported no clear winner. The .30 Garand, however, was dropped in favor of the .276.[13]
Further tests by the SRB in July 1929, which included rifle designs by Browning, Colt–Browning, Garand, Holek, Pedersen, Rheinmetall, Thompson, and an incomplete one by White,[nb 2] led to a recommendation that work on the (dropped) .30 gas-operated Garand be resumed, and a T1E1 was ordered 14 November 1929.
Twenty gas-operated .276 T3E2 Garands were made and competed with T1 Pedersen rifles in early 1931. The .276 Garand was the clear winner of these trials. The .30 caliber Garand was also tested, in the form of a single T1E1, but was withdrawn with a cracked bolt on 9 October 1931. A 4 January 1932 meeting recommended adoption of the .276 caliber and production of approximately 125 T3E2s. Meanwhile, Garand redesigned his bolt and his improved T1E2 rifle was retested. The day after the successful conclusion of this test, Army Chief of StaffGeneral Douglas MacArthur personally disapproved any caliber change, in part because there were extensive existing stocks of .30 M1 ball ammunition.[14] On 25 February 1932, Adjutant General John B. Shuman, speaking for the secretary of war, ordered work on the rifles and ammunition in .276 caliber cease immediately and completely and all resources be directed toward identification and correction of deficiencies in the Garand .30 caliber.[12]:111
On 3 August 1933, the T1E2 became the “semi-automatic rifle, caliber 30, M1”.[10] In May 1934, 75 M1s went to field trials; 50 were to infantry, 25 to cavalry units.[12]:113 Numerous problems were reported, forcing the rifle to be modified, yet again, before it could be recommended for service and cleared for procurement on 7 November 1935, then standardized 9 January 1936.[10] The first production model was successfully proof-fired, function-fired, and fired for accuracy on July 21, 1937.[15]
Production difficulties delayed deliveries to the army until September 1937. Machine production began at Springfield Armory that month at a rate of ten rifles per day,[16] and reached an output of 100 per day within two years. Despite going into production status, design issues were not at an end. The barrel, gas cylinder, and front sight assembly were redesigned and entered production in early 1940. Existing “gas-trap” rifles were recalled and retrofitted, mirroring problems with the earlier M1903 Springfield rifle that also had to be recalled and reworked approximately three years into production and foreshadowing rework of the M16 rifle at a similar point in its development. Production of the Garand increased in 1940 despite these difficulties,[17] reaching 600 a day by 10 January 1941,[10] and the army was fully equipped by the end of 1941.[14] Following the outbreak of World War II in Europe, Winchester was awarded an “educational” production contract for 65,000 rifles,[10] with deliveries beginning in 1943.[10]

Service use

John Garand points out features of the M1 to army generals.

Lance Corporal Cecilia M. Giaise, woman Marine reservist from the 5th Communications Bn. of Long Beach, CA, the first woman qualified as a rifle marksman (with a score of 206×250) and authorized to operate the M1 rifle. Also pictured, Sergeant E.F. Burlem, rifle coach from the WTBn. Photograph taken at Landing Force Training Unit, NAB, Coronado, CA, July, 1961.

U.S. Army infantryman in 1942 with M1, Fort Knox, Kentucky

U.S. Marine Corps Silent Drill Team with M1 rifles

The M1 Garand was made in large numbers during World War II, approximately 5.4 million were made.[18]They were used by every branch of the United States military. By all accounts the M1 rifle served with distinction. General George S. Patton called it “the greatest implement of battle ever devised.”[7] The impact of faster-firing infantry small arms in general soon stimulated both Allied and Axis forces to greatly increase their issue of semi- and fully automaticfirearms then in production, as well as to develop new types of infantry firearms.[19]
Much of the M1 inventory in the post-World War II period underwent arsenal repair or rebuilding. While U.S. forces were still engaged in the Korean War, the Department of Defense determined a need for additional production of the Garand. Springfield Armory ramped up production but two new contracts were awarded. During 1953–56, M1s were produced by International Harvesterand Harrington & Richardson in which International Harvester alone produced a total of 337,623 M1 Garands.[20][21] A final, very small lot of M1s was produced by Springfield Armory in early 1957, using finished components already on hand. Beretta also produced Garands using Winchester tooling.
The British Army looked at the M1 as a possible replacement for its bolt-action Lee–Enfield No.1 Mk III, but it was rejected when rigorous testing suggested that it was an unreliable weapon in muddy conditions.[22][23] However, surplus M1 rifles were provided as foreign aid to American allies; including South Korea, West Germany, Italy, Japan, Denmark, Greece, Turkey, Iran, South Vietnam, etc. Most Garands shipped to allied nations were predominantly manufactured by International Harvester Corporation during the period of 1953-56, and second from Springfield Armory from all periods.[24]
Some Garands were still being used by the United States into the Vietnam War in 1963; despite the M14’s official adoption in 1957, it was not until 1965 the changeover from the M1 Garand was completed in the active-duty component of the army (with the exception of the sniper variants, which were introduced in World War II and saw action in Korea and Vietnam). The Garand remained in service with the Army ReserveArmy National Guard and the Navy, well into the 1970s or longer.
Due to widespread United States military assistance as well their durability, M1 Garands have also been turning up in modern conflicts such as with the insurgencies in Iraq and Afghanistan.[25]
Some military drill teams still use the M1 rifle, including the U.S. Marine Corps Silent Drill Team, the United States Air Force Academy Cadet Honor Guard, the U.S. Air Force Auxiliary, almost all Reserve Officer Training Corps (ROTC) and some Junior Reserve Officer Training Corps (JROTC) teams of all branches of the U.S. military.

Design details

Features

The M1 Garand with important parts labeled.

The M1 rifle is a .30 calibergas-operated, 8 shot clip-fed, semi-automatic rifle.[26] It is 43.6 inches (1,107 mm) long and it weighs about 9.5 pounds (4.31 kg).[27]
The M1’s safety catch is located at the front of the trigger guard. It is engaged when it is pressed rearward into the trigger guard, and disengaged when it is pushed forward and is protruding outside of the trigger guard.[28]
The M1 Garand was designed for simple assembly and disassembly to facilitate field maintenance. It can be field stripped (broken down) without tools in just a few seconds.[29]
The rifle had an iron sight line consisting of rear receiver aperture sight protected by sturdy “ears” calibrated for 100–1,200 yd (91–1,097 m) in 100 yd (91 m) increments. The bullet drop compensation was set by turning the range knob to the appropriate range setting. The bullet drop compensation/range knob can be fine adjusted by setting the rear sight elevation pinion. The elevation pinion can be fine adjusted in approximately 1 MOA increments. The aperture sight was also able to correct for wind drift operated by turning a windage knob that moved the sight in approximately 1 MOA increments. The windage lines on the receiver to indicate the windage setting were 4 MOA apart. The front sighting element consisted of a wing guards protected front post.
During World War II the M1 rifle’s semiautomatic operation gave United States infantrymen a significant advantage in firepower and shot-to-shot recovery time over enemy infantrymen armed primarily with bolt-action rifles. The semi-automatic operation and reduced recoil allowed soldiers to fire 8 rounds as quickly as they could pull the trigger, without having to move their hands on the rifle and therefore disrupt their firing position and point of aim.[30] The Garand’s fire rate, in the hands of a trained soldier, averaged 40–50 accurate shots per minute at a range of 300 yards (270 m). “At ranges over 500 yards (460 m), a battlefield target is hard for the average rifleman to hit. Therefore, 500 yards (460 m) is considered the maximum effective range, even though the rifle is accurate at much greater ranges.”[27]

En bloc clip

An M1 Garand en bloc clip loaded with eight .30-06 Springfield rounds.

Loading the M1.

Unloading an M1 “en bloc” clip.

The M1 rifle is fed by an “en bloc” clip which holds eight rounds of .30-06 Springfield ammunition. When the last cartridge is fired, the rifle ejects the clip and locks the bolt open.[31] The M1 is now ready to reload. Once the clip is inserted, the bolt snaps forward on its own as soon as thumb pressure is released from the top round of the clip, chambering a round and leaving it ready to fire.[32][33]Although it is not absolutely necessary, the preferred method is to place the back of the right hand against the operating rod handle and press the clip home with the right thumb; this releases the bolt, but the hand restrains the bolt from slamming closed on the operator’s thumb (resulting in “M1 thumb”); the hand is then quickly withdrawn, the operating rod moves forward and the bolt closes with sufficient force to go fully to battery. Thus, after the clip has been pressed into position in the magazine, the operating rod handle should be released, allowing the bolt to snap forward under pressure from the operating rod spring. The operating rod handle may be smacked with the palm to ensure the bolt is closed.[28][33]
Contrary to widespread misconception, partially expended or full clips can be easily ejected from the rifle by means of the clip latch button.[28] It is also possible to load single cartridges into a partially loaded clip while the clip is still in the magazine, but this requires both hands and a bit of practice. In reality, this procedure was rarely performed in combat, as the danger of loading dirt along with the cartridges increased the chances of malfunction. Instead, it was much easier and quicker to simply manually eject the clip, and insert a fresh one,[34]which is how the rifle was originally designed to be operated.[33][35][36] Later, special clips holding two or five rounds became available on the civilian market, as well as a single-loading device which stays in the rifle when the bolt locks back.
In battle, the manual of arms called for the rifle to be fired until empty, and then recharged quickly. Due to the well-developed logistical system of the U.S. military at the time, this wastage of ammunition was generally not critical, though this could change in the case of units that came under intense fire or were flanked or surrounded by enemy forces.[35] The Garand’s en-bloc clip system proved particularly cumbersome when using the rifle to launch grenades, requiring removal of an often partially loaded clip of ball ammunition and replacement with a full clip of blank cartridges.
By modern standards, the M1’s feeding system is archaic, relying on clips to feed ammunition, and is the principal source of criticism of the rifle. Officials in Army Ordnance circles demanded a fixed, non-protruding magazine for the new service rifle. At the time, it was believed that a detachable magazine on a general-issue service rifle would be easily lost by U.S. soldiers (a criticism made of British soldiers and the Lee–Enfield 50 years previously), would render the weapon too susceptible to clogging from dirt and debris (a belief that proved unfounded with the adoption of the M1 Carbine), and that a protruding magazine would complicate existing manual-of-arms drills. As a result, inventor John Garand developed an “en bloc” clip system that allowed ammunition to be inserted from above, clip included, into the fixed magazine. While this design provided the requisite flush-mount magazine, the clip system increased the rifle’s weight and complexity, and made only single loading ammunition possible without a clip.
Ejection of an empty clip created a distinctive metallic “pinging” sound.[37] In World War II, reports arose in which German and Japanese infantry were making use of this noise in combat to alert them to an empty M1 rifle in order to ‘get the drop’ on their American enemies. The information was taken seriously enough that U.S. Army’s Aberdeen Proving Groundbegan experiments with clips made of various plastics in order to soften the sound, though no improved clips were ever adopted.[36] According to former German soldiers, the sound was inaudible during engagements and not particularly useful when heard, as other squad members might have been nearby ready to fire.[38] Seasoned U.S. infantry soldiers would sometimes purposely toss an empty en-bloc clip creating the same sound a Garand makes when it has fired its last shot and is empty, in an effort to draw out the enemy, with varying degrees of success.[39]

Gas system

Two of Garand’s patents, showing the original gas trap design and revised gas port system.

Garand’s original design for the M1 used a complicated gas system involving a special muzzle extension gas trap, later dropped in favor of a simpler drilled gas port. Because most of the older rifles were retrofitted, pre-1939 gas-trap M1s are very rare today and are prized collector’s items.[26] In both systems, expanding gases from a fired cartridge are diverted into the gas cylinder. Here, the gases meet a long-stroke piston attached to the operating rod, which is pushed rearward by the force of this high-pressure gas. Then, the operating rod engages a rotating bolt inside the receiver. The bolt is attached to the receiver via two locking lugs, which rotate, unlock, and initiate the ejection of the spent cartridge and the reloading cycle when the rifle is discharged. The operating rod (and subsequently the bolt) then returns to its original position.
The M1 Garand was one of the first self-loading rifles to use stainless steel for its gas tube, in an effort to prevent corrosion. As the stainless metal could not be parkerized, the gas tubes were given a stove-blackening that frequently wore off in use. Unless the gas tube could be quickly repainted, the resultant gleaming muzzle could make the M1 Garand and its user more visible to the enemy in combat.[35]

Accessories

U.S. M5 bayonet with M8 scabbard

U.S. Marine preparing to fire M31 HEAT antitank rifle grenade from M1 rifle in the indirect mode with butt on the ground.

Several accessories were used with the Garand rifle. Several different styles of bayonets fit the rifle: the M1905 and M1942, both with 16-inch (406 mm) blades; the Model 1905E1 with shortened 10-inch (254 mm) blade; the M1 with 10-inch (254 mm) blade; and the


[Message clipped]  View entire message

Attachments area
Preview YouTube video 5 Things You Don’t Know: M1 Rifle

Preview YouTube video How to load the M1 Garand the US Army way

Preview YouTube video Garand Thumb — Facts and Myths

Preview YouTube video Lee Enfield Rifle vs M1903 Springfield Rifle and M1 Garand – With R. Lee Ermey

Categories
All About Guns

I do not have a dog in this fight!

Image result for glock & a colt 1911
BECAUSE
Image result for Well frankly my Dear, I don't give a Damn!"
Since I have shot both of them a few times. From which I had a bad experience with both.
But if you folks out there are Happy with what you got. Then all I can say is this!
 
Image result for god bless you all! meme
But if you want. Here is a pretty good video on the subject!
ME, I going shooting with my Sig Saur at the range!
Grumpy
Image result for sig p226

Categories
Uncategorized

Bill Mauldin

Related image
Now I am willing to bet that a (hopefully) large part of the folks who Read this rantin /Blog of mine. Have never heard of this guy.
Which is a real pity. Since he is the only Non Commissioned Officer (Sergeant) that came the closest to give General  “Old Blood & Guts” george Patton a stroke*. No kidding!
So here is his story. Mauldin came from a dirt Poor farming family. From the South West part of The Great Depression America. Who discovered that he was good at drawing things. So his family sent him to an Art School in Chicago.
Then he joined the Army National Guard and specifically the hard Fighting 45th Infantry Division. He then served in the brutal Italian Campaign of WWII.
During this time. He became part at first of the 45th Division’s Newspaper. He then moved up the feeding chain of journalism.
After the end of the war, He then came home and really made a name for himself as a cartoonist. Up until his tragic death took him.
So here is some of his work. To me they really ring true. As I firmly believe that the US Army in many ways NEVER CHANGES!
Inline image 3
 
Inline image 4
Inline image 1
Inline image 5
Inline image 7
Image result for Patton & bill mauldin
Inline image 6
Inline image 1
He won the Pulitzer Prize for this cartoon
Inline image 2
 

  • *He drew the Cartoons of Willie & Joe, Who were the classic example of what a WWII Infantry Soldier looked like. They never fit what Patton thought a good soldier should look like.
  • Eisenhower had to literally tell Patton to leave him alone. Since he wa so good for the Infantry’s morale.

 
Image result for Patton & bill mauldin
 
This is his story written by himself. I think that it is one of the best books about him and the US Army in WWII from the Enlisted Side.
Image result for Bill Mauldin the brass ring
 
here is some more on his life.

Bill Mauldin

From Wikipedia, the free encyclopedia
Bill Mauldin
Bill Mauldin in a helmet.jpg

Bill Mauldin in 1945
Born William Henry Mauldin
October 29, 1921
Mountain Park, New Mexico, U.S.
Died January 22, 2003 (aged 81)
Newport Beach, California, U.S.
Occupation Cartoonist, Infantryman, Actor
Spouse(s) (Norma) Jean Humphries; Natalie Sarah Evans; Christine Lund
Children Bruce, Tim (with Humphries); Andy, David, John, Nathaniel (with Evans); Kaja, Sam (with Lund)
Parent(s) Sidney Albert Mauldin & Katrina Bemis Mauldin Curtis

William Henry “Bill” Mauldin (/ˈmɔːldən/; October 29, 1921 – January 22, 2003) was an American editorial cartoonist who won two Pulitzer Prizes for his work. He was most famous for his World War II cartoons depicting American soldiers, as represented by the archetypal characters Willie and Joe, two weary and bedraggled infantry troopers who stoically endure the difficulties and dangers of duty in the field. His cartoons were popular with soldiers throughout Europe, and with civilians in the United States as well.

Childhood and youth[edit]

Mauldin was born in Mountain Park, New Mexico into a family with a tradition of military service. His father served as an artilleryman in World War I, and his paternal grandfather had been a civilian cavalry scout in the Apache Wars. After growing up there and in Phoenix, Arizona, Mauldin took courses at the Chicago Academy of Fine Arts under the tutoring of Ruth VanSickle Ford. While in Chicago, Mauldin met Will Lang Jr. and became fast friends with him. Lang Jr. later became a journalist and a bureau head for Life magazine. Mauldin entered the US Army in 1940 via the Arizona National Guard.

World War II cartoonist[edit]

While in the 45th Infantry Division, Mauldin volunteered to work for the unit’s newspaper, drawing cartoons about regular soldiers or “dogfaces“. Eventually he created two cartoon infantrymen, Willie and Joe, who represented the average American GI.
During July 1943, Mauldin’s cartoon work continued when, as a sergeant of the 45th Division’s press corps, he landed with the division in the invasion of Sicily and later in the Italian campaign.[1] Mauldin began working for Stars and Stripes, the American soldiers’ newspaper; as well as the 45th Division News, until he was officially transferred to the Stars and Stripes in February 1944.[1] Egbert White, editor of the Stars and Stripes, encouraged Mauldin to syndicate his cartoons and helped him find an agent. [2]By March 1944, he was given his own jeep, in which he roamed the front, collecting material. He published six cartoons a week.[3] His cartoons were viewed by soldiers throughout Europe during World War II, and were also published in the United States. The War Office supported their syndication,[4] not only because they helped publicize the ground forces but also to show the grim side of war, which helped show that victory would not be easy.[5] While in Europe, Mauldin befriended a fellow soldier-cartoonist, Gregor Duncan, and was assigned to escort him for a time. (Duncan was killed at Anzio in May 1944.)[6]
Mauldin was not without his detractors. His images—which often parodied the Army’s spit-shine and obedience-to-orders-without-question policy—offended some officers. After a Mauldin cartoon ridiculed General George Patton‘s decree that all soldiers be clean-shaven at all times, even in combat, Patton called Mauldin an “unpatriotic anarchist” and threatened to “throw [his] ass in jail” and ban Stars and Stripes from his Third Army jurisdiction. General Dwight Eisenhower, Patton’s superior, told Patton to leave Mauldin alone; he felt the cartoons gave the soldiers an outlet for their frustrations. “Stars and Stripes is the soldiers’ paper,” he told him, “and we won’t interfere.”[7]
In a 1989 interview, Mauldin said, “I always admired Patton. Oh, sure, the stupid bastard was crazy. He was insane. He thought he was living in the Dark Ages. Soldiers were peasants to him. I didn’t like that attitude, but I certainly respected his theories and the techniques he used to get his men out of their foxholes.[8]
Mauldin’s cartoons made him a hero to the common soldier. GIs often credited him with helping them to get through the rigors of the war. His credibility with the common soldier increased in September 1943, when he was wounded in the shoulder by a German mortar while visiting a machine gun crew near Monte Cassino.[1] By the end of the war he received the Army’s Legion of Merit for his cartoons. Mauldin wanted Willie and Joe to be killed on the last day of combat, but Stars and Stripes dissuaded him.[3]

Postwar activities[edit]

Mauldin in 1945

In 1945, at the age of 23, Mauldin won a Pulitzer Prize for his wartime body of work, exemplified by a cartoon depicting exhausted infantrymen slogging through the rain, its caption mocking a typical late-war headline: “Fresh, spirited American troops, flushed with victory, are bringing in thousands of hungry, ragged, battle-weary prisoners”.[9] The first civilian compilation of his work, Up Front, a collection of his cartoons interwoven with his observations of war, topped the best-seller list in 1945. After war’s end, the character of Willie was featured on the cover of Time Magazine for the June 18, 1945 issue. Mauldin made the cover of the July 21, 1961 issue.
After the war, Mauldin turned to drawing political cartoons expressing a generally civil libertarian view associated with groups such as the American Civil Liberties Union. These were not well received by newspaper editors, who were hoping for apolitical cartoons. Mauldin’s attempt to carry Willie and Joe into civilian life was also unsuccessful, as documented in his memoir Back Home in 1947. In 1951, he appeared with Audie Murphy in the John Huston film The Red Badge of Courage, and in Fred Zinnemann‘s Teresa.[10]
In 1956, he ran unsuccessfully for the United States Congress as a Democrat in New York’s 28th Congressional District. Mauldin said about his run for Congress:

“I jumped in with both feet and campaigned for seven or eight months. I found myself stumping around up in these rural districts and my own background did hurt there. A farmer knows a farmer when he sees one. So when I was talking about their problems I was a very sincere candidate, but when they would ask me questions that had to do with foreign policy or national policy, obviously I was pretty far to the left of the mainstream up there. Again, I’m an old Truman Democrat, I’m not that far left, but by their lives I was pretty far left.”[11]

Mauldin’s famous cartoon following the Kennedy assassination

In 1959 Mauldin won a second Pulitzer Prize, while working at the St. Louis Post-Dispatch, for a cartoon depicting Soviet author Boris Pasternak in a Gulag, asking another prisoner, “I won the Nobel Prize for literature. What was your crime?”[9]Pasternak had won the Nobel Prize for his novel Doctor Zhivago, but was not allowed to travel to Sweden to accept it. The following year Mauldin won the National Cartoonist Society Award for Editorial Cartooning. In 1961, he received their Reuben Award as well.
In addition to cartooning, Mauldin worked as a freelance writer. He also illustratedmany articles for Life magazine, The Saturday Evening Post,Sports Illustrated, and other publications. He brought back Joe as a war correspondent, writing letters to the stateside Willie. He made cartoons of Willie and Joe together only in tributes to the “soldiers’ generals”: Omar Bradley and George C. Marshall, after their deaths; for a Life article on the “New Army”; and as a salute to the late cartoonist Milton Caniff.
In 1962, Mauldin moved to the Chicago Sun-Times. One of his most famous post-war cartoons was published in 1963, following the assassination of President John F. Kennedy. It depicted the statue of Abraham Lincoln at the Lincoln Memorial, with his head in his hands.[12]
In 1969, Mauldin was commissioned by the National Safety Council to illustrate its annual booklet on traffic safety. These pamphlets were regularly issued without copyright, but for this issue the Council noted that Mauldin’s cartoons were under copyright, although the rest of the pamphlet was not.
In 1985, Mauldin won the Walter Cronkite Award for Excellence in Journalism.[13] Mauldin remained with the Sun-Timesuntil his retirement in 1991.
He was inducted into the St. Louis Walk of Fame on May 19, 1991.[14] On September 19, 2001, Sergeant Major of the Army Jack L. Tilley presented Mauldin with a personal letter from Army Chief of Staff General Eric K. Shinseki, and a hardbound book with notes from other senior Army leaders and several celebrities, including TV broadcasters Walter Cronkite and Tom Brokaw, and actor Tom Hanks. Tilley also promoted Mauldin to the honorary rank of first sergeant.[15]
Mauldin drew Willie and Joe for publication one last time on Veterans Day in 1998 for a Peanuts comic strip, in collaboration with its creator Charles M. Schulz, also a World War II veteran. Schulz signed the strip “Schulz, and my hero…” with Mauldin’s signature underneath.[16]
New Mexico native Mauldin frequently returned to his home state. On at least one occasion he made a few drawings on the wall of the El Paraqua restaurant in Española. The restaurant has since hung frames around these.[17]

Death and legacy[edit]

Mauldin died on January 22, 2003, from complications of Alzheimer’s disease and a bathtub scalding.[18] He was buried in Arlington National Cemetery on January 29, 2003.[19] Married three times, he was survived by seven children. (His daughter Kaja had died of non-Hodgkin lymphoma in 2001.)[3]
On March 31, 2010, the United States Post Office released a first-class denomination ($0.44) postage stamp in Mauldin’s honor depicting him with Willie & Joe.[20]
In 2005, Mauldin was inducted into the Oklahoma Cartoonists Hall of Fame in Pauls Valley, Oklahoma by Michael Vance. The Oklahoma Cartoonists Collection, created by Vance, is located in the Toy and Action Figure Museum.

Books[edit]

Grab your Socks!, foreword by Mauldin

  • Star Spangled Banter – 1941
  • Sicily Sketchbook – 1943
  • Mud, Mules, and Mountains – 1944
  • News of the 45th (with Don Robinson) – 1944
  • Up Front – 1944
  • This Damn Tree Leaks – 1945
  • Back Home – 1947
  • A Sort of a Saga – 1949
  • Bill Mauldin’s Army – 1951
  • Bill Mauldin in Korea – 1952
  • Up High with Bill Mauldin – 1956
  • What’s Got Your Back Up? – 1961
  • I’ve Decided I Want My Seat Back – 1965
  • Bill of Rights Day Celebration – 1969
  • The Brass Ring – 1971
  • Name Your Poison – 1975
  • Mud and Guts –1978
  • Let’s Declare Ourselves Winners and Get the Hell Out – 1985

In April 2008, Fantagraphics Books released a two-volume set of Mauldin’s complete wartime Willie and Joe cartoons, edited by Todd DePastino, titled Willie & Joe: The WWII Years (ISBN 978-1-56097-838-1).

Peanuts[edit]

From 1969 to 1998, cartoonist Charles M. Schulz (himself a veteran of World War II) regularly paid tribute to Bill Mauldin in his Peanuts comic strip on Veterans Day. In the strips, Snoopy, dressed as an army vet, would annually go to Mauldin’s house to “quaff a few root beers and tell war stories.” By the end of the strip Schulz had depicted 17 of Snoopy’s visits. Schulz also paid tribute to Rosie the Riveter in 1976, and Ernie Pyle in 1997 and 1999.[21]

Filmography[edit]

The films Up Front (1951) and Back at the Front (1952) were based on Mauldin’s Willie and Joe characters; however, when Mauldin’s suggestions were ignored in favor of making a slapstick comedy, he returned his advising fee; he said he had never seen the result.[18]
Mauldin also appeared as an actor in the 1951 films The Red Badge of Courage and Teresa, and as himself in the 1998 documentary America in the ’40s. He also appeared in on-screen interviews in the Thames documentary The World at War.[22]

Also here is some information about the 45th Infantry Division.
(I have served with some of these guys. They were some great guys and even better soldiers!)
 

45th Infantry Division (United States)

From Wikipedia, the free encyclopedia
45th Division
45th Infantry Division
45thIBCTSSI.png

45th Infantry Division shoulder sleeve insignia.
Active 1920–45
1946–68
Country  United States
Branch  United States Army
Type Infantry
Size Division
Part of  Oklahoma Army National Guard
Garrison/HQ Oklahoma City, Oklahoma
Nickname(s) “Thunderbird”[1]
Motto(s) Semper Anticus
(Latin: “Always Forward”)[2]
Engagements World War II

Commanders
Notable
commanders
Troy H. Middleton
Dwight E. Beach
Philip De Witt Ginder
Insignia
Distinctive unit insignia (1920-46) 45thDivDUI.png
Distinctive unit insignia (1946-68) The DUI of the 45th Division is one of only a few that are authorized a mirror image.

The 45th Infantry Division was an infantry division of the United States Army, part of the Oklahoma Army National Guard, from 1920 to 1968. Headquartered mostly in Oklahoma City, the guardsmen fought in both World War IIand the Korean War. They trace their lineage from frontier militias that operated in the Southwestern United Statesthroughout the late 1800s.[citation needed]
The 45th Infantry Division guardsmen saw no major action until they became one of the first National Guard units activated in World War II in 1941. They took part in intense fighting during the invasion of Sicily and the attack on Salernoin the 1943 Italian Campaign. Slowly advancing through Italy, they fought in Anzio and in Monte Cassino. After landing in France during Operation Dragoon, they joined the 1945 drive into Germany that ended the War in Europe.
After brief inactivation and subsequent reorganization as a unit restricted to Oklahomans, the division returned to duty in 1951 for the Korean War. It joined the United Nations troops on the front lines during the stalemate of the second half of the war, with constant, low-level fighting and trench warfare against the People’s Volunteer Army of China that produced little gain for either side. The division remained on the front lines in such engagements as Old Baldy Hill and Hill Eerie until the end of the war, returning to the U.S. in 1954.
The division remained a National Guard formation until its inactivation in 1968 as part of a downsizing of the Guard. Several units were activated to replace the division and carry on its lineage. Over the course of its history, the 45th Infantry Division sustained over 25,000 battle casualties, and its men were awarded nine Medals of Honor, twelve campaign streamers, the Croix de Guerre and the Republic of Korea Presidential Unit Citation.

History[edit]

With the outbreak of World War I, troops of the National Guard were formed into the units which exist today, with the Colorado Guard forming the 157th Infantry Regiment, the Arizona Guard forming the 158th Infantry Regiment, and the New Mexico Guard forming the 120th Engineer Regiment. These units were attached to the 40th Infantry Division and deployed to France where they were used as “depot” forces to provide replacements for front-line units. They returned home at the end of the war.[3] The Oklahoma Guard units that would later become the 179th Infantry Regiment and 180th Infantry Regiment were assigned to the 36th Infantry Division and would earn a combat participation credit during the Meuse-Argonne Campaign (26 September – 11 November 1918) in France as the 142nd Infantry.[4]

Inter-war years[edit]

1923–1940 “Square” Organization [5]

On 19 October 1920, the Oklahoma State militia was organized as the 45th Infantry Division of the Oklahoma Army National Guard, and manned with troops from ArizonaColoradoNew Mexico, and Oklahoma.[6] The division was formed and federally recognized as a National Guard unit on 3 August 1923 in Oklahoma City, Oklahoma.[7] It was assigned the 89th Infantry Brigade of the Colorado and Arizona National Guards, and the 90th Infantry Brigade of the Oklahoma National Guard.[8] As a consequence of these militia roots, when the division was properly organized, many of its members were marksmen and outdoorsmen from the remote frontier regions of the Southwestern United States.[9] The division’s first commander was Major General Baird H. Markham.[10]
The 45th Infantry Division engaged in regular drills but no major events in its first few years, though the division’s Colorado elements were called in to help quell a large coal mining strike.[11] The onset of the Great Depression in the 1930s severely curtailed its funding for training and equipment. Major General Roy Hoffman took command in 1931, followed by Alexander M. Tuthill, Alexander E. McPherren in 1935, and William S. Key in 1936.[10] In 1937, the division’s troops were once again called up, this time to help manage a locustplague affecting Colorado.[11]

A red diamond with a yellow swastika inside it

Before the 1930s, the division’s symbol was a red square with a yellow swastika, a tribute to the large Native American population in the southwestern United States.

The division’s original shoulder sleeve insignia, approved in August 1924,[12] featured a swastika, a common Native American symbol, as a tribute to the Southwestern United States region which had a large population of Native Americans. However, with the rise of the Nazi Party in Germany, with its infamous swastika symbol, the 45th Division stopped using the insignia.[13] Following a long process of submissions for new designs, a new shoulder sleeve insignia, designed by a Carnegie, Oklahoma native named Woody Big Bow,[14] featuring the Thunderbird, another Native American symbol, was approved in 1939.[1]
In August 1941, the 45th Infantry Division took part in the Louisiana Maneuvers, the largest peacetime exercises in U.S. military history.[15] It was assigned to VIII Corps with the 2nd Infantry Division and the 36th Infantry Division, camped near Pitkin, Louisiana.[16] Still operating with outmoded equipment from World War I, the division did not perform well during these exercises.[17] With poor weather and bad equipment, the undertrained 45th Infantry Division was criticized by officers who considered it “feeble”.[16] In spite of these deficiencies, less than one month later, the men were recalled to the active duty force, much to their chagrin, because of concerns of an impending American entry into World War II.[15]

World War II[edit]

A large plaque with an inscription

A monument in Abilene, Texas commemorating the 45th Infantry Division’s time in Texas as it trained at Camp Barkeley in 1940.

On 16 September 1941, the 45th Infantry Division, under Major General William S. Keys, was federalized from state control into the regular army force.[7] It was one of four National Guard divisions to be federalized, alongside the 30th, the 41st and 44th Infantry Divisions, originally for a one-year period.[18] Its men immediately began basic combat training at Fort SillOklahoma.[19] Throughout 1942, it continued this training at Camp BarkeleyTexas,[20] before moving to Fort DevensMassachusetts, to undergo amphibious assault training in preparation for an invasion of Italy.[21] It then moved to Pine CampNew York briefly for winter warfare training, but was hampered by continuously poor weather. In January 1943 it moved to Fort PickettVirginia, for its final training.[22] The division, now commanded by Major General Troy H. Middleton, a Regular Army soldier and highly distinguished World War I veteran, moved to the Hampton Roads Port of Embarkation‘s Camp Patrick Henry to await combat loading on the transports.[23]
The division’s two combat commands, the 89th and 90th Infantry Brigades, were not activated, as the army favored smaller and more versatile regimental commands for the new conflict.[8] The 45th Infantry Division was instead based around the 157th179th, and 180th Infantry Regiments.[24] Also assigned to the division were the 158th160th171st, and 189th Field Artillery Battalions, the 45th Signal Company, the 700th Ordnance Company, the 45th Quartermaster Company, the 45th Reconnaissance Troop, the 120th Engineer Combat Battalion, and the 120th Medical Battalion.[24]

Sicily[edit]

1942–1963 “Triangular” Organization[25]

The 45th Division sailed from the Hampton Roads Port of Embarkation for the Mediterranean region on 8 June 1943, combat loaded aboard thirteen attack transports and five cargo attack vessels as convoy UGF-9 headed by the communications ship USS Ancon.[21][23] By the time the 45th Division landed in North Africa on 22 June 1943, the Allies had largely secured the African theater. As a result, the division was not sent into combat upon arrival and instead commenced training at ArzewFrench Morocco,[26] in preparation for the invasion of Sicily. Allied intelligence estimated that the island was defended by approximately 230,000 troops, the majority of which were drawn mostly from weak Italian formations and two German divisions which had been reconstituted after being destroyed earlier. Against this, the Allies planned to land 180,000 troops,[27] including the 45th Infantry Division, which was assigned to Lieutenant General Omar Bradley‘s II Corps, part of the U.S. Seventh Army under Lieutenant General George S. Patton, for the operation.[28]

Troops of the 45th Infantry Division in a transport bound for Sicily, June 1943.

The division was subsequently assigned a lead role in the amphibious assault on Sicily, coming ashore on 10 July.[29][30]Landing near Scoglitti, the southernmost U.S. objective on the island, the division advanced north on the U.S. force’s eastern flank.[31] After initially encountering resistance from armor of the Herman Goering Division, the division advanced, supported by paratroopers of the 505th Parachute Regimental Combat Team, part of the 82nd Airborne Division, who landed inland on 11 July.[32] The paratroopers, conducting their first combat jump of the war, then set up to protect the 45th’s flank against German counterattack, but without weapons to counter heavy armor, the paratroopers had to rely on support from the 2nd Armored Division to repulse the German Tiger I tanks.[32] As the division advanced towards its main objective to capture the airfields at Biscari, and Comiso, German forces pushed back.[33] For most of the first two weeks while the division moved slowly north, it encountered only light resistance from Italian forces fighting delaying actions.[34] Italian and German forces resisted fiercely at Motta Hill on 26 July, however, and for four days the 45th Division was held up there.[35] After this, the division was allocated to drive towards Messina, being ordered by the Seventh Army commander to cover the distance as quickly as possible.[36] The 45th Division spent a few days in that city, but on 1 August, the division was withdrawn from the front line for rest and rear-guard patrol duty,[26] after which the division was assigned to Major General Ernest J. Dawley‘s VI Corps, part of the U.S. Fifth Army, under Lieutenant General Mark W. Clark, in preparation for the invasion of mainland Italy.[37]

Salerno[edit]

On 3 September 1943, Italy surrendered to the Allied powers. Hoping to occupy as much of the country as possible before the German Army could react, the U.S. Fifth Army prepared to attack Salerno.[38] On 10 September, elements of the division conducted its second landing at Agropoli and Paestum with the 36th Infantry Division, on the southernmost beaches of the attack.[37] Opposing them were elements of the German 29th Panzergrenadier Division and XVI Panzer Corps.[37] Against stiff resistance, the 45th pushed to the Calore River after a week of heavy fighting.[39] The Fifth Army was battered and pushed back by German forces until 20 September, when Allied forces were finally able to break out and establish a more secure beachhead.[37][40]

Men of the 45th Division crossing the Volturno, 3 November 1943.

On 3 November it crossed the Volturno River and took Venafro.[39] The division had great difficulty moving across the rivers and through the mountainous terrain, and the advance was slow. After linking up with the British Eighth Army, which had advanced from the south, the combined force, under the 15th Army Group, commanded by British General Sir Harold Alexander, was stalled when it reached the Gustav Line.[41] Until 9 January 1944, the division, now under Major General William W. Eagles (replacing Major General Middleton who, struck down with arthritis, was sent to England to command VIII Corps in the Normandy invasion), inched forward into the mountains reaching St. Elia, north of Monte Cassino, before moving to a rest area.[39]

Anzio[edit]

Chaplain Lieutenant Colonel William King leads troops of the 45th in Christmas Day services in Italy, 25 December 1943.

Allied forces conducted a frontal assault on the Gustav Line stronghold at Monte Cassino, and VI Corps, under Major General John P. Lucas from 20 September, was assigned to Operation Shingle, detached from the 15th Army Group to land behind enemy lines at Anzio on 22 January 1944.[42] For this mission, CCA (Combat Command A) of the 1st Armored Division was attached to the 45th Infantry Division.[43] Landing on schedule, VI Corps surprised the Germans, but Major General Lucas’s decision to consolidate the beachhead instead of attacking gave the Germans time to bring the LXXVI Panzer Corps forward to oppose the landings.[42][44]
One regiment of the 45th (the 179th Infantry) went ashore with the landings. In company with the British 1st Infantry Division, they advanced north along the Anzio-Albano road and captured the Aprilia “factory”, but encountered ingrained resistance from German armored units a few miles further on. Lucas then ordered the rest of the division ashore. The 45th Division was deployed on the southeastern side of the beachhead, along the lower Mussolini Canal.[45]
On 30 January 1944, when VI Corps advanced from the beaches, it encountered heavy resistance and took heavy casualties.[42][46] VI Corps was stopped at the “Pimlott Line” (the perimeter of the beachhead), and the fight became a battle of attrition.
The first major German counterattack came in early February, was against the British 1st Division. Two regiments of the 45th (the 179th and 157th Infantry) were sent to the Aprilia sector to reinforce the British. The 179th Infantry and a tank battalion of CCA tried to recapture Aprilia but were repulsed. Lucas then moved the rest of the 45th Division to the left-center of the perimeter, at Aprilia and along the west branch of the Mussolini Canal.[45] For the next few months the 45th Infantry Division was mostly stuck in place, holding its ground during repeated German counterattacks, and subjected to bombardment from aircraft and artillery.[39]
On 16 February, a major German attack struck the 45th, and nearly broke through the 179th Infantry on 18 February. Lucas sent famed U.S. Army Ranger leader Colonel William Orlando Darby to assume command of the 157th Infantry, and the Germans were repulsed.[45] The next three months were spent on the defensive, with the 45th engaged in trench warfare, alike to that in World War I.
On 23 May, VI Corps, now commanded by Major General Lucian Truscott, went on the offensive, breaking out of the beachhead to the northeast, with the 45th Division forming the left half of the attack. By 31 May, the German defenses were shattered, and the 45th Division turned northwest, toward the Alban Hills and Rome.[47] On 4 June the 45th Division crossed the Tiber River below Rome, and entered the city along with other VI Corps troops.[48] Men of the 45th Division were the first Allied troops to reach the Vatican.
On 16 June, the 45th Division withdrew for rest in preparation for other operations.[39] At this time, VI Corps was attached to the Seventh Army, under Lieutenant General Alexander Patch, itself part of the 12th Army Group under Lieutenant General Jacob L. Devers.[49] The 45th, 36th, and 3rd Infantry Divisions were pulled from the line in Italy in preparation for Operation Dragoon (formerly Anvil), the invasion of southern France. Dragoon was originally planned to coincide with the Normandy landings in the north, but was delayed until August because of a shortage of landing craft.[50]

France and Germany[edit]

A map of southern France with the 45th Infantry Division landing at the center of a large invasion force.

The 45th Infantry Division participated in its fourth amphibious assault landing during Operation Dragoon on 15 August 1944, at St. Maxime, in Southern France.[39] The 45th Infantry Division landed its 157th and 180th regimental combat teams and captured the heights of the Chaines de Mar before meeting with the 1st Special Service Force.[51] The German Army, reeling from the Battle of Normandy, in which it had suffered a major defeat, pulled back after a short fight, part of an overall German withdrawal to the east following the landings.[52][53] Soldiers of the 45th Infantry Division engaged the dispersed forces of German Army Group G, suffering very few casualties.[48] The U.S. Seventh Army, along with Free French forces, were able to advance north quickly. By 12 September, the Seventh Army linked up with Lieutenant General George S. Patton‘s U.S. Third Army, advancing from Normandy, joining the two forces at Dijon.[50] Against slight opposition, it spearheaded the drive for the Belfort Gap. The 45th Infantry Division took the strongly defended city of Epinal on 24 September.[39] The division was then reassigned to V Corps, under the command of Major General Leonard T. Gerow, for its next advance.[49] On 30 September the division crossed the Moselle River and entered the western foothills of the Vosges, taking Rambervillers.[39] It would remain in the area for a month waiting for other units to catch up before crossing the Mortagne River on 23 October.[39] The division remained on the line with the U.S. 6th Army Group the southernmost of three army groups advancing through France.[54]

Men of the 1st Battalion, 157th Infantry Regiment manning a roadblock during the Battle of the Bulge, December 1944.

After the crossing was complete, the division was relieved from V Corps and assigned to Major General Wade H. Haislip‘s XV Corps.[49] The division was allowed a one-month rest, resuming its advance on 25 November, attacking the forts north of Mutzig. These forts had been designed by Kaiser Wilhelm II in 1893 to block access to the plain of Alsace. The 45th Division next crossed the Zintzel River before pushing through the Maginot Line defenses.[39] During this time much of the division’s artillery assets were attached to the 44th Infantry Division to provide additional support.[55] The 45th Infantry Division, now commanded by Major General Robert T. Frederick, who had previously commanded the 1st Special Service Force, was reassigned to VI Corps on New Year’s Day.[49] From 2 January 1945, the division fought defensively along the German border, withdrawing to the Moder River.[39] It sent half of its artillery to support the 70th Infantry Division.[55] On 17 February the division was pulled off the line for rest and training. Once this rest period was complete, the division was assigned to XV Corps for the final push into German territory.[49] The 45th moved north to the Sarreguemines area and smashed through the Siegfried Line, on 17 March taking Homburg on the 21st and crossing the Rhine between Worms and Hamm on the 26th.[39] The advance continued, with Aschaffenburg falling on 3 April, and Nuremberg on the 20th.[39] The division crossed the Danube River on 27 April, and liberated 32,000 captives of the Dachau concentration camp on 29 April 1945.[39] The division captured Munich during the next two days, occupying the city until V-E Day and the surrender of Germany.[56] During the next month, the division remained in Munich and set up collection points and camps for the massive numbers of surrendering troops of the German armies. The number of POWs taken by the 45th Division during its almost two years of fighting totalled 124,840 men.[39] The division was then slated to move to the Pacific theater of operations to participate in the invasion of mainland Japan on the island of Honshu, but these plans were scrubbed before the division could depart after the surrender of Japan, on V-J Day.[57]

Casualties[edit]

  • Total battle casualties: 20,993[58]
  • Killed in action: 3,547[58]
  • Wounded in action: 14,441[58]
  • Missing in action: 478[58]
  • Prisoner of war: 2,527[58]

Criminal allegations[edit]

After the war, courts-martial were convened to investigate possible war crimes by members of the division. In the first case, dubbed the Biscari massacre, American troops from C Company, 180th Infantry Regiment, were alleged to have shot 74 Italian and two German prisoners in Acate in July 1943 following the capture of an airfield in the area. Lieutenant General George Patton, the Seventh Army commander, asked Major General Omar Bradley, commanding II Corps, to get the case dismissed to prevent bad press, but Bradley refused. A non-commissioned officer later confessed to the crimes and was found guilty, but an officer who claimed he had only been following orders was acquitted.[59][60][61]

Dead German troops near Dachau Concentration Camp, allegedly killed in the Dachau massacre in 1945.

In a second incident, the Army considered court-martialling several officers of the 157th Infantry Regiment under Lieutenant Colonel Felix L. Sparks after servicemen were accused of massacring German soldiers who were surrendering at the Dachau concentration camp in 1945. Some of the German troops were camp guards; the others were sick and wounded troops from a nearby hospital. The soldiers of the 45th Division who liberated the camp were outraged at the malnourishment and maltreatment of the 32,000 prisoners they liberated, some barely alive, and all victims of the Holocaust. After entering the camp, the soldiers found boxcars filled with dead bodies of prisoners who had succumbed to starvation or last-minute executions, and in rooms adjacent to gas chambers they found naked bodies piled from the floor to the ceiling.[62] The cremation ovens, which were still in operation when the soldiers arrived, contained bodies and skeletons as well. Some of the victims apparently had died only hours before the 45th Division entered the camp, while many others lay where they had died in states of decomposition that overwhelmed the soldiers’ senses.[63] Accounts conflict over what happened and over how many German troops were killed. After investigating the incident, the Army considered court-martialling several officers involved, but Patton successfully intervened. Seventh Army was being disbanded and Patton had been appointed Military Governor of Bavaria, placing the matter in his hands.[64] Some veterans of the 45th Infantry Division have said that only 30 to 50 German soldiers were killed and that very few were killed trying to surrender, while others have admitted to killing or refusing to treat wounded German guards.[65]

After the war[edit]

Callsigns of the 45th Division [66][67]

  • 45TH DIV…………..POWER
  • 45TH DIV ARTY…PARASOL
  • 189TH FA BN…….PARK
  • 160TH FA BN…….PATIENCE
  • 158TH FA BN…….POLISH
  • 171ST FA BN…….POST
  • 157TH INF RGT…POISON (WWII)
  • 179TH INF RGT…PAGAN
  • 180TH INF RGT…PASSPORT
  • 279TH INF RGT…POISON (KOREA)

Battalions of the Infantry Regiments

  • 1st INF BN…………RED
  • 2nd INF BN………..WHITE
  • 3rd INF BN…………BLUE

Regimental Tanks and Mortars

  • TANK CO………….GREEN
  • MORTAR CO……..BROWN

During World War II, the 45th Division fought in 511 days of combat.[26] Nine soldiers were awarded the Medal of Honor during their service with the 45th Infantry Division: Van T. Barfoot,[68] Ernest Childers,[69] Almond E. Fisher,[70] William J. Johnston,[71] Salvador J. Lara,[72] Jack C. Montgomery,[73] James D. Slaton,[69] Jack Treadwell,[74] and Edward G. Wilkin.[75] Soldiers of the division also received 61 Distinguished Service Crosses, three Distinguished Service Medals, 1,848 Silver Star Medals, 38 Legion of Merit medals, 59 Soldier’s Medals, 5,744 Bronze Star Medals, and 52 Air Medals. The division received seven distinguished unit citations and eight campaign streamers during the conflict.[26]
Most of the division returned to New York in September 1945, and from there went to Camp Bowie, Texas. On 7 December 1945, the division was deactivated from the active duty force and its members reassigned to other Army units. The following year, on 10 September 1946, the 45th Infantry Division was reconstituted as a National Guard unit.[76] Instead of comprising units from several states, the post-war 45th was an all-Oklahoma organization.[77] During this time the division was also reorganized and as a part of this process the 157th Infantry was removed from the division’s order of battle and replaced with the 279th Infantry Regiment.[78]
During this time, the U.S. Army underwent a drastic reduction in size. At the end of World War II, it contained 89 divisions, but by 1950, there were just 10 active divisions in the force, along with a few reserve divisions such as the 45th Infantry Division which were combat-ineffective.[79] The division retained many of its best officers as senior commanders as the force downsized, and it enjoyed a good relationship with its community. The 45th in this time was regarded as one of the better-trained National Guard divisions.[80] Regardless, by mid-1950 the division had only 8,413 troops, less than 45 percent[n 1] of its full-strength authorization.[81] Only 10 percent of the division’s officers and 5 percent of its enlisted men had combat experience with the division from World War II.[82]

Korean War[edit]

At the outbreak of the Korean War in June 1950, the U.S. Army looked to expand its force again to prepare for major conflict. After the North Korean People’s Army invaded the Republic of Korea four understrength U.S. divisions on occupation duty in Japan were rushed to South Korea to stand alongside the Republic of Korea Army. These were the 7th Infantry Division, the 1st Cavalry Division, the 24th Infantry Division, and the 25th Infantry Division, which were all under the control of the Eighth United States Army. Due to drastic reductions in U.S. military spending following the end of World War II, these divisions were equipped with worn-out or obsolete weaponry and suffered from a shortage of anti-armor weapons capable of penetrating the hulls of the North Korean T-34 tanks.[83][84]

Reinforcement pool[edit]

Initially, the division was used to provide a pool of reinforcements for the divisions which had been sent to the Korean War theater, and in January 1951 it provided 650 enlisted fillers for overseas service. Later that month, it was given 4,006 new recruits for its three infantry regiments and artillery assets, and each unit created a 14-week training program to prepare these new soldiers for combat.[85] Because of heavy casualties and slow reinforcement rates, the Army looked to the National Guard to provide additional units to relieve the beleaguered Eighth Army. At the time, the 45th Infantry Division was comprised overwhelmingly of high school students or recent graduates and only about 60 percent of its divisional troops had conducted training and drills with the division for a year or more. Additionally, only about 20 percent of its personnel had prior experience of military service from World War II.[86] Nevertheless, the division was one of four National Guard divisions identified as being among the most prepared for combat based on the effectiveness of its equipment, training, and leadership.[87] As a result, in February 1951, the 45th Infantry Division was alerted that it would sail for Japan.[88]
In preparation for the deployment, the division was sent to Fort PolkLouisiana, to begin training and to fill its ranks.[89]After its basic training was complete, the division was sent to Japan in April 1951 for advanced training and to act as a reserve force for the Eighth United States Army, then fighting in Korea.[90] The involvement of the National Guard in the fighting in Korea was further expanded when the 40th Infantry Division of the California Army National Guard received warning orders for deployment as well.[91]

Initial struggles[edit]

A man in military uniform constructs a net in a hilly outdoor environment

A soldier of the 120th Engineer Battalion, 45th Infantry Division sets up camouflage net near the front lines in Korea in 1952.

On 1 September 1951, the 45th Infantry Division was activated as the first National Guard division to be deployed to the Far East theater since World War II.[89][92] Nevertheless, it was not deployed to Korea until December 1951, when its advanced training was complete.[90][93] Following its arrival, the division moved to the front line to replace the 1st Cavalry Division, who were then delegated to the Far East reserve, having suffered over 16,000 casualties in less than 18 months of fighting.[94]
Though the 45th remained de facto segregated as an all-white unit in 1950,[95]individual unit commanders went to great lengths to integrate reinforcements from different areas and ethnicity into their units.[96] By 1952, it was fully integrated.[97]Additionally, in an effort to reduce the burden on the National Guard,[n 2] troops from the division were often replaced by enlisted and drafted soldiers from the active duty force. When it arrived in Korea, only half the division’s manpower were National Guard troops, and over 4,500 guardsmen left between May and July 1952, continually replaced by more active duty troops, including an increasing number of African Americans.[98] Though the division was no longer an “All-Oklahoma” unit, leaders opted to keep its designation as the 45th Infantry Division.[99][n 3]
By the time the division was in place, the battle lines on both sides had largely solidified, leaving the 45th Infantry Division in a stationary position as it conducted attacks and counterattacks for the same ground.[100] The division was put under the command of Eighth Army’s I Corps for most of the conflict.[101] It was deployed around Chorwon and assigned to protect the key routes from that area into Seoul. The terrain was difficult and the weather was poor in the region.[102] The division suffered its first casualty on 11 December 1951.[103]
Initially, the division did not fare well, though it improved quickly.[90] Its anti-aircraft and armor assets were used as mobile artillery, which continuously pounded Chinese positions. The 45th, in turn, was under constant artillery and mortar attack.[104] It also conducted constant small-unit patrols along the border seeking to engage Chinese outposts or patrols. These small-unit actions made up the majority of the division’s combat in Korea.[105] Chinese troops were well dug-in and better trained than the troops of the inexperienced 45th, and it suffered casualties and frequently had to disengage when it was attacked.[106]
In the division’s first few months on the line, Chinese forces conducted three raids in its sector. In retaliation, the 245th Tank Battalion sent nine tanks to raid Agok.[100] Two companies of Chinese forces ambushed and devastated a patrol from the 179th Infantry a short time later.[100] In the spring, the division launched Operation Counter, which was an effort to establish 11 patrol bases around Old Baldy Hill. The division then defended the hill against a series of Chinese assaults from the Chinese 38th Army.[100]

Final engagements and the end of the war[edit]

A topographic map showing a series of hills surrounded by defensive perimeters.

Map of the area surrounding Old Baldy Hill, which the division defended for much of its tour in Korea.

The 45th Infantry Division, along with the 7th Infantry Division, fought off repeated Chinese attacks all along the front line throughout 1952, and Chinese forces frequently attacked Old Baldy Hill into the fall of that year.[107] Around that time, the 45th Infantry Division relinquished command of Old Baldy Hill to the 2nd Infantry Division. Almost immediately the Chinese launched a concentrated attack on the hill, overrunning the U.S. forces.[108] Heavy rainstorms prevented the divisions from retaking the hill for around a month, and when it was finally retaken it was heavily fortified to prevent further attacks.[109] The 245th Tank Battalion was sent to assault Chinese positions throughout late 1952, but most of the division held a stationary defensive line against the Chinese.[107]
In early 1953, North Korean forces launched a large-scale attack against Hill 812, which was then under the control of K Company, 3rd Battalion, 179th Infantry.[110]The ensuing Battle of Hill Eerie was one of a series of larger attacks by Chinese and North Korean forces which produced heavier fighting than the previous year had seen. These offensives were conducted largely in order to secure a better position during the ongoing truce negotiations.[110] Chinese forces continued to mount concentrated attacks on the lines of the UN forces, including the 45th Infantry Division, but the division managed to hold most of its ground, remaining stationary until the end of the war in the summer of 1953.[111]
During the Korean War the 45th Infantry Division suffered 4,004 casualties, consisting of 834 killed in action and 3,170 wounded in action.[90] The division was awarded four campaign streamers and one Presidential Unit Citation.[112] One soldier from the division, Charles George, was awarded the Medal of Honor while serving in Korea.[113]

After Korea[edit]

A stadium full of soldiers sits behind a podium of commanders in military uniform

Soldiers of the 45th Infantry Brigade Combat Team, the successor organization to the 45th Infantry Division, hold a ceremony ahead of a deployment to Operation Enduring Freedom in February 2011.

The division briefly patrolled the Korean Demilitarized Zone following the signing of the armistice ending the war, but most of its men returned home and reverted to National Guard status on 30 April 1954.[76] Its colors were returned to Oklahoma on 25 September of that year, formally ending the division’s presence in Korea.[99]
The division remained as a unit of the Oklahoma National Guard, and participated in no major actions throughout the rest of the 1950s save regular weekend and summer training exercises. In 1963, the formation was reorganized in accordance with the Reorganization Objective Army Divisions plan, which saw the establishment of a 1st, 2nd and 3rd Brigade within the division. These brigades would see no major deployments or events, and were deactivated five years later in 1968.[114] That same year, due to the perceived lack of need for so many large formations in the Army National Guard, the 45th Infantry Division was deactivated, as part of a larger move to reduce the number of Army National Guard divisions from 15 to eight, while increasing the number of separate brigades from seven to 18.[115] In its place, the independent 45th Infantry Brigade (Separate) was established.[76][116] The 45th Infantry Brigade received all of the 45th Division’s lineage and heraldry, including its shoulder sleeve insignia.[2] Also activated from division assets were the 45th Field Artillery Group, later redesignated the 45th Fires Brigade, and the 90th Troop Command.[117][118]

Honors[edit]

The 45th Infantry Division was awarded eight campaign streamers and one unit award in World War II and four campaign streamers and one unit decoration in the Korean War, for a total of twelve campaign streamers and two unit decorations in its operational history.[7]

Conflict Streamer Inscription Year(s)
A red ribbon with four vertical dark green stripes in the center. French Croix de Guerre, World War II (With Palm) Embroidered “Acquafondata 1943–1944
European-African-Middle Eastern Campaign Medal streamer.png European-African-Middle Eastern Campaign Streamer Sicily (with Arrowhead) 1943
NaplesFoggia (with Arrowhead) 1943
Anzio (wirth Arrowhead) 1943
Rome–Arno 1944
Southern France (with Arrowhead) 1944
Rhineland 1944–1945
Ardennes–Alsace 1944–1945
Central Europe 1945
A white ribbon with vertical green and red stripes on its edges and a red and blue circle in the middle Republic of Korea Presidential Unit Citation For service in Korea 1952–1953
Korean Service Medal - Streamer.png Korean Service Campaign Streamer Second Korean Winter 1951–1952
Korea, Summer–Fall 1952 1952
Third Korean Winter 1952–1953
Korea, Summer 1953 1953

Commanding Generals[edit]

MG Baird H. Markham 15 Feb 1923 6 Apr 1931
MG Roy V. Hoffman 13 Jun 1931 13 Jun 1933
MG Alexander M. Tuthill 14 Jun 1933 21 Oct 1935
MG Charles E. McPherren 25 Nov 1935 29 Jul 1936
MG William S. Key 29 Jul 1936 13 Oct 1942
MG Troy H. Middleton 14 Oct 1942 21 Nov 1943
MG Marion L. Finley 20 Nov 1943 23 Nov 1945
MG William W. Eagles 22 Nov 1943 30 Nov 1944
MG Robert T. Frederick 1 Dec 1944 10 Sep 1945
BG H.J.D. Meyer 11 Sep 1945 7 Dec 1945
MG James C. Styron 5 Sep 1946 20 May 1952
MG David Ruffner 21 May 1952 15 Mar 1953
MG Philip De Witt Ginder 16 Mar 1953 30 Nov 1953
MG Paul D. Harkins 1 Dec 1953 15 Mar 1954
BG Harvey H. Fischer 18 Mar 1954 27 Apr 1954
MG Hal L. Muldrow, Jr 10 Sep 1952 31 Aug 1960
MG Frederick Alvin Daugherty 1 Sep 1960 20 Nov 1964
MG Jasper N. Baker 21 Nov 1964 31 Jan 1968

Note: Similarity of dates for General Muldrow and commanders beginning with General Ruffner is because 45th Infantry Division, AUS, was retained in Korea while twin unit, 45th Infantry Division, NGUS, was activated in Oklahoma.[119]


Categories
Uncategorized

R. Lee Ermey Videos

Now I have found the Gunny to be like a lot of Senior Non Commissioned Officers that I served with in the Army. All of them are the real crown jewels of the  military.
 
As they are the folks who get things done. God Bless them all!
 
So here is some of his best on YOUTube.
Enjoy!
 

Attachments area
Preview YouTube video The History of Colt Handguns with R. Lee Ermey

Preview YouTube video MG42 vs M60 With R. Lee Ermey

Preview YouTube video Bren Mk1 vs Browning Automatic Rifle With R. Lee Ermey

Preview YouTube video Lee Enfield Rifle vs M1903 Springfield Rifle and M1 Garand – With R. Lee Ermey

Preview YouTube video MP40 vs Thompson submachine gun (Tommygun) with R. Lee Ermey

Preview YouTube video GunnyTime w Sawman & the Stoner 63 Machinegun

Preview YouTube video Lock n’ Load with R. Lee Ermey – 01 Artillery

Preview YouTube video Army Sniper Legend, Ed Eaton, R Lee Ermey & Sawman on GunnyTime!

Preview YouTube video Shooting M32 Grenade Launchers | Kirsten Joy Weiss & The Gunny (R Lee Ermey)

Preview YouTube video Longbow vs Crossbow with R. Lee Ermey

Categories
All About Guns

The Most Lethal Pistol in History for so far at least!

This pistol is the one that was used to Kill the Archduke Ferdinand of the Austrian-Hungarian Empire & his wife in 1914.
This event in turn became the source of the First World War. Or as I call it, Europe’s first serious attempt at Suicide.
 

This what the Old boy looked like before he got shot. All by accounts he was a pretty decent guy.
 
Related image
 
Image result for archduke ferdinand shot
Related image
This is what the punk / terrorist / freedom Fighter that pulled the Trigger looked like. He died in a Austrian prison from disease during the war.
 
So indirectly this nondescript looking semi automatic pistol. Is the root cause of the death of about  16 million. Also the First World War led in turn to WWII  and the death of another 60 million. Give or take.
 
This was stolen via A Herd of The Turtles.com

Categories
All About Guns

Now for some from the Past – The Matchlock

Image result for match lock guns
Literally a Blast from the past!
Related image
I sure would not want to get hit by one of these soft lead musket balls!
Related image
Related image
 
Back back in the really / terrible old days of say the 1450’s to say the 1570’s Europe or Japan. Folks did not have the kind of firearms that we do not have today.
But this does not mean that they were stupid or anything even close to it. Now having discovered Gunpowder and what it can do. Thanks to the Chinese!
The ruling Class quickly began to invest on how to use it in their arguments with each other and the peasantry*. (*For most folks today that would of been us)
So the bright boys of the realm began to collectively to put their brains on this problem.
Image result for invention of gunpowder
Here is what they came up with!
The Matchlock Musket
Okay here is what it is. Surprisingly enough. The have the basic form of today’s rifles. With a Lock to ignite the powder. The Stock to hold it up and aim with. Then the barrel to place the ammunition and help guide it toward its target.
Image result for musketeer
As you no doubt have guess it already. This is a muzzle loading weapon and is a very slow and inaccurate weapon. But it was miles ahead of anything else out there at the time.
The major problems were the poor quality of gunpowder available, that you have a slow burning sulphur soaked cord near a lot of gunpowder. That and poorly bored barrels that cut down the musketeers accuracy.
Also the weather can really mess with the match. That and you could literally see the enemy coming from all the smoke.
 
So here is a video about how to load this puppy. Sorry its in French. But you will get the general idea about how slow reloading is.


Related image
Image result for match lock guns
Also if you really want to get a good taste of this era. You might also want to get the DVD of the 3 & 4 Musketeers that was made in 1974. Here is a little peek enjoy!
 

You also might like this one too.
 

Here is some more & probably better written information about the Matchlock
 

From Wikipedia, the free encyclopedia

 
The matchlock was the first mechanism, or “lock”, invented to facilitate the firing of a hand-held firearm. Before this, firearms (like the hand cannon) had to be fired by applying a lit match (or equivalent) to the priming powder in the flash pan by hand; this had to be done carefully, taking most of the soldier’s concentration at the moment of firing, or in some cases required a second soldier to fire the weapon while the first held the weapon steady. Adding a matchlock made the firing action simple and reliable by a single soldier, allowing him to keep both hands steadying the gun and eyes on the target while firing.

Description[edit]

Engraving of musketeers from the Thirty Years’ War

The classic European matchlock gun held a burning slow match in a clamp at the end of a small curved lever known as the serpentine. Upon the pulling of a lever (or in later models a trigger) protruding from the bottom of the gun and connected to the serpentine, the clamp dropped down, lowering the smoldering match into the flash pan and igniting the priming powder. The flash from the primer travelled through the touch hole igniting the main charge of propellant in the gun barrel. On release of the lever or trigger, the spring-loaded serpentine would move in reverse to clear the pan. For obvious safety reasons the match would be removed before reloading of the gun. Both ends of the match were usually kept alight in case one end should be accidentally extinguished.
Earlier types had only an “S”-shaped serpentine pinned to the stock either behind or in front of the flash pan (the so-called “serpentine lock”), one end of which was manipulated to bring the match into the pan.[1][2]
Most matchlock mechanisms mounted the serpentine forward of the flash pan. The serpentine dipped backward, toward the firer, to ignite the priming. This is the reverse of the familiar forward-dipping hammer of the flintlock and later firearms.
A later addition to the gun was the rifled barrel. This made the gun much more accurate at longer distances but did have drawbacks, the main one being that it took much longer to reload because the bullet had to be pounded down into the barrel.[3]
A type of matchlock was developed called the snap matchlock,[4] in which the serpentine was held in firing position by a weak spring,[5] and released by pressing a button, pulling a trigger, or even pulling a short string passing into the mechanism. As the match was often extinguished after its relatively violent collision with the flash pan, this type fell out of favour with soldiers, but was often used in fine target weapons.

Various Japanese (samurai) Edo period matchlocks (tanegashima).

An inherent weakness of the matchlock was the necessity of keeping the match constantly lit. The match was steeped in potassium nitrate to keep the match lit for extended periods of time.[3] Being the sole source of ignition for the powder, if the match was not lit when the gun needed to be fired, the mechanism was useless, and the weapon became little more than an expensive club. This was chiefly a problem in wet weather, when damp match cord was difficult to light and to keep burning. Another drawback was the burning match itself. At night, the match would glow in the darkness, possibly revealing the carrier’s position. The distinctive smell of burning match-cord was also a giveaway of a musketeer’s position (this was used as a plot device by Akira Kurosawa in his movie Seven Samurai). It was also quite dangerous when soldiers were carelessly handling large quantities of gunpowder (for example, while refilling their powder horns) with lit matches present. This was one reason why soldiers in charge of transporting and guarding ammunition were amongst the first to be issued self-igniting guns like the wheellock and snaphance.
The matchlock was also uneconomical to keep ready for long periods of time. To maintain a single sentry on night guard duty with a matchlock, keeping both ends of his match lit, required a mile of match per year.[6]

History[edit]

8-shot matchlock revolver (Germany ca. 1580)

Japanese foot soldiers (ashigaru) firing tanegashima (matchlocks)

The Janissary corps of the Ottoman army were using matchlock arms from the 1440s onwards.[7] Improved versions of the arquebus were transported to India by Babur in 1526.[8][9]
The matchlock appeared in Europe in the mid-15th century (the matchlock was obsolete around 1700 in Europe),[10] with the idea of a serpentine appearing in an Austrian manuscript. The first dated illustration of a matchlock mechanism dates to 1475 (making it the first firearm with a trigger[11]) and by the 16th century they were universally used. During this time the latest tactic in using the matchlock was to line up and send off a volley of musket balls at the enemy. This volley would be much more effective than single soldiers trying to hit individual targets.[3]
China is credited with inventing both gunpowder and firearms but the matchlock was claimed to have been introduced to China by the Portuguese. Europeans refined the hand cannons that had arrived in Europe in the early 15th century and added the matchlock mechanism. The Chinese obtained the matchlock arquebus technology from the Portuguese in the 16th century and matchlock firearms were used by the Chinese into the 19th century.[12] The Chinese used the term “bird-gun” to refer to muskets and Turkish muskets may have reached China before Portuguese ones.[13]
In Japan the first documented introduction of the matchlock which became known as the tanegashima was through the Portuguese in 1543.[14] The tanegashimaseems to have been based on snap matchlocks that were produced in the armory of Goa in Portuguese India, which was captured by the Portuguese in 1510.[15]While the Japanese were technically able to produce tempered steel (e.g. sword blades), they preferred to use work-hardened brass springs in their matchlocks. The name tanegashima came from the island where a Chinese junk with Portuguese adventurers on board was driven to anchor by a storm. The lord of the Japanese island Tanegashima Tokitaka (1528–1579) purchased two matchlock rifles from the Portuguese and put a sword smith to work copying the matchlock barrel and firing mechanism. Within a few years the use of the tanegashima in battle forever changed the way war was fought in Japan.[16]
Despite the appearance of more advanced ignition systems such as that of the wheellock and the snaphance, the low cost of production, simplicity, and high availability of the matchlock kept it in use in European armies until about 1720. It was eventually completely replaced by the flintlock as the foot soldier’s main armament.
There is evidence that matchlock rifles may have been in usage among some peoples in Christian Abyssinia in the late Middle Ages. Although modern rifles were imported into Ethiopia during the 19th century, contemporary British historians noted that along with slingshots the elderly used matchlock rifle weapons for self-defense and by the militaries of the Ras.[17][18]

Modern use[edit]

Tibetans with matchlock rifle (1905 painting)

In Taiwan under Qing rule the Hakka on Taiwan owned matchlock muskets. Han people traded and sold matchlock muskets to the Taiwanese aborigines. During the Sino-French War the Hakka and Aboriginals used their matchlock muskets against the French in the Keelung Campaign and Battle of Tamsui.
The Hakka used their matchlock muskets to resist the Japanese invasion of Taiwan (1895) and Han Taiwanese and Aboriginals conducted an insurgency against Japanese rule.
Tibetan nomad fighters used arquebuses for warfare during the Chinese invasion of Tibet as late as the second half of the 20th century. Tibetan nomads still use matchlock rifles to hunt wolves and other predatory animals. These matchlock arquebuses typically feature a long, sharpened retractable forked stand and are part of Tibetan traditional Nomad regalia. Some of these arquebuses are engraved with silver and gold inlays and/or have damascened barrels. Early 20th century explorer Sven Hedin also encountered Tibetan tribesmen on horseback armed with matchlock rifles along the Tibetan border with Xinjiang.

Categories
Uncategorized

Why some Folks should not be allowed near the Range

Categories
All About Guns

Why I like Sporterized or Custom Rifles

 Now I am sure that some of you folks out there are thinking of some of the clunkers we have all seen out there.
Like this poor puppy. (Sorry if this is your rifle It’s nothing personal)

Inline image 1Inline image 3Inline image 2
  Now granted that some of us are not really flush with cash. Hey! I get it as I have been there & done that.
  So I shall not inflict upon you some of the horrors that I have bought and shot.
 Now here is what I figured out a few years ago. As since todays the prices for your basic rifle is frankly just ridiculous. Just take a look one of these days at this!
  Granted that steel is a lot more expensive and so is the other things needed to build a gun. Plus the folks involved need to ate. So I accept that. As this is just the way the world is now.
For Example this should give one a clue.
Image result for old rifle prices back in the 1970's
  So here is what I do. I generally make a circuit of the local gun shops.
Image result for gunshops
The reason why is two fold.
  In that the Owners learn to know me and what I like. Also to see what is up for sale and what the general prices are.
  I also try hard to go to the local gun shows. Where it’s hard to concentrate due to the usual sensory overload of the place.
Image result for gunshows
As there usually someone wanting to sell dear old (who ever) departed guns.
What to look for in buying one.
Image result for sherlock holmes
  Now I am a sucker for good wood stocks.
Image result for wood gun stocks
  If the rifle has it. Then usually it means somebody has put a lot of love and effort into this piece. I can overlook the usually dings caused by use in the field if they are not too bad.
  Also if the lines of the rifle looks good is another good sign. That & if no serious signs of abuse is a good thing.
Related image
Image result for mauser 98 sporter
(Yes I like thumb holes. Since they work for me!)
  If you have followed me this far. Then ask nicely to pick it up and check it out. Manners by the way  are very important in a gun show. Remember that a lot of folks are armed here. (An Armed Society is a Polite Society)
  Usually the Show will have the gun in a inoperative manner by a plastic ban put on by the staff. If you are really interested ask to have it taken of. Then check the action and the internal condition.
Image result for gun that killed jesse james
  One must also consider the caliber of the gun. Especially considering the availability and price of it. I bought a Winchester 43 in 218 Bee really cheap.
Inline image 4
  But then found out how hard it  and expensive the ammo was.  By the by, it was very accurate but finding ammo was too much effort. So I sadly sold it for a handsome profit.
Models that I have the most luck with
Mauser 98’s – I have about a dozen of these in various calibers. From 22-250 thru 30-06 and each of them are great additions to my humble collection.
Inline image 5
(I wish that I owned this one)
1903 Springfield- I think that I am on very safe ground here. A the Famous Griffin & Howe use to make a lot of rifles from the action of the 03’s for the great and famous. Teddy Roosevelt took one on his African Safari.
Inline image 6
(This one became TR’s Son Kermit’s 1903)
  My stance on this is that if its good enough for him. I think that I would be a fool not to have a couple also one time or another. In 22-250, 243 Win, 25-06, 308. 35 Whelen and of course 30-06.
Like this one (Not Mine either but it comes close)
Inline image 7
1917 Enfield
 As it use to be before we became a major Arms Dealer. Our country was always under equipped when it came to our military. This was true in WWI or as some called it. The War to end all wars. Please stop laughing as I am not kidding! They actually thought that until Hitler & **TRIGGER WARNING** The Japs showed up
Inline image 9
Inline image 10
  So what we did was to take the Enfield rifles that we were making for the **TRIGGER WARNING***  British Empire.
  Where upon the US Army just changed the caliber to 30-06. The amazing thing was that it was the primary battle rifle for the Dough boys. After the war serious thought was made of making it the primary rifle for the peacetime Army. But the forces backing the 1903 prevailed instead.
 Now the good news for you & I. This was one of the strongest actions ever made by Winchester and Remington. So eventually a lot of them were converted to various Dangerous Game Calibers. I.E. 300 H&H , 300 Win Mag and even up to 458 Win Magnum. **TRIGGER WARNING*** (I owned a 458 a long time ago and turned a squirrel into pink mist once with it.)
  Another interesting item about them. Was that I was told by a gunsmith that the barrels were screwed in with the pressure of one ton. So that the only way to re-barrel one is to carefully cut off the GI barrel.  I was also told a lot of foolish folks got hurt by this over time.
  None the less it is a very solid if not ugly looking rifle. That can still really shoot well if it has been taken care of over the years. They are also usually very priced to sell also.
Martini Cadet
  Once upon a time. I was over in Phoenix as the Wife is a rabid Chicago Cubs fan. So while she is at the Spring Training games. I get to check out the local gun shops.
  While doing so I spied a very strange looking rifle . It turning out to be a Martini Cadet  Rifle that had be done over as a very heavy 22 LR Target / Bench Rest Rifle.
Looking like this one.
Inline image 8
  Now I have been a huge fan of the Movie Zulu since I was a young snot. I was very intrigued by it. Needless to say I paid a huge price for it. (The Son & Heir thought that I had finally & totally lost it.)
  But when it finally got home to the Peoples Republic and on the range. Where upon it turned out to be a tack driver of a rifle. So as the Aussies would say “Keep Her!”
  Some day I am going to build me a another one in 357 Magnum. But right now I am vastly too broke to proceed.
 As a side note. Back in the Old Queens day.
  Some body had the really bright idea to reduce the Martini Henry Rifle to a smaller 22 caliber rifle . To be used as a training rifle out in the ***Trigger Warning*** White Colonies. So as to help train the youngsters in rifle marksmanship.
  I could not even think of having a youngster shhot the fear some old 577/450 round. Since it kicks like a mule!
  It was also then a hell of a lot cheaper to too as 22 LR back then was dirt cheap. Compared to the standard 577/450 Martini Henry round.
Here is a small a scene from the Movie Zulu. Hopefully you will enjoy it as much as I do.
Attachments area
Preview YouTube video Zulu – Final Attack

Categories
Other Stuff

Snake Bites

Snakes can be friendly

 
First Aid & Treatment
Snake venom is actually a kind of highly evolved salivary secretion which is used to both kill and digest prey. Venom was not made against man. There are two basic types of snake venom. One affects the nerves (venom of cobra and common krait); the other one blood (that of vipers). Polyvalent anti-venom serum is effective against the bites of the Big Four – cobra, saw-scaled viper, common krait, Russell’s viper. If a venomous snake bites someone, just remember two things: don’t panic; go to a hospital and get anti-venom serum.

  • Keep the victim calm, restrict movement.
  • Assure the victim and do not let him panic. When under panic, it will enhance heart rate and would circulate the venom faster in the body.
  • Remove any rings or constricting items; the affected area may swell.
  • Stop lymphatic spread of venom – bandage firmly, splint and immobilise. The limb, which has been affected by the bite, should be immobilized with splint. Victim to keep the hand as close to the level of the heart as possible – this reduces the flow of venom to major areas. A compression bandage (as firm as you would put on a sprained ankle) should cover the entire limb with the splint. The wrapping should start from the digits and extend till armpit in case of hands and groin in case of bite to the leg.
  • A snakebite victim is under tremendous psychological stress. It is necessary to keep the patient warm. However, no alcohol/hot beverages should be given.
  • •The patient should not be allowed to exert himself in any manner. Do not allow the victim to eat or to drink water in order to keep metabolism at low rate. No water No food is the golden rule.
  • • DO NOT COVER THE BITE AREA AND PUNCTURE MARKS. The wound should be gently cleaned with antiseptic.
  • • Try to aspirate the venom out of the puncture marks with standard suction devices. It has been identified that a suction more than 270 mmHg can initiate the flow from the puncture marks. Suction instruments often are included in commercial snakebite kits. But, the suction should be applied within 5 minutes of the bite.
  • The only remedy for venomous snakebite is the anti-venom serum, which is available at most government hospitals and public health centers. Some private nursing homes have also started stocking it and treat snakebite cases.

How NOT to Treat Snakebite

  •  No ice or any other type of cooling action on the bite. Research has shown it to be potentially harmful.
  • No electric cable, string or rubber tourniquets to be used, this cuts off blood flow completely and may result in amputation of the affected limb.
  • No electric shock, this method is under study and has yet to be proven effective. It could harm the victim.
  • No incision in the bite site. Such measures have NOT been proven useful and causes needless additional injury, loss of blood, infection, waste of time.
  • Do not burn the wound, as it would not have any effect on the venom, which has already entered the bloodstream.
  • Do not suck the wound with mouth. A suction device may be applied over the bite to help draw venom out of wound without making cuts.
  • Potassium permanganate should never be used.

Know About Snakebite

  • All snakes are not venomous – so every snakebite is not going to result in death – it would save people from quacks. And reduce the amount of panic and chaos.
  • Even a venomous bite is not always fatal – because the severity of snakebite depends on many factors like the size of the snake, whether the bite could be completed, whether it was a drybite or not, the age, physique and affected limb of the victim.
  • First Aid would enable a person to buy more time to reach medical aid on time.
  • The only cure which is available is anti-venom serum injection and not quacks.
  • First Aid – if not done properly could cause more harm than benefit.

How to Prevent a Snake Bite

  •  Any unknown snake is potentially dangerous; do not play, avoid any contact with any snake including those of small size, baby, lethargic, dead. A cut off head can keep poisonous activities for several minutes. Make yourself familiar with the description of poisonous snakes in the place where you live.
  • Use torchlight at night – all local poisonous snakes are active in the evening and at night. Pay more attention in the forest, close to bushes, tall plants, etc.
  • Snakes usually don’t bite you without alarm:
    • Cobra – lifts vertically front part of the body (1/3), opens hood, makes hiss, rushes to the aim.
    • Vipers – make a spiral from a tail, bend like zigzag front part of the body, and make a strong hiss.
  • If you meet a snake, go back slowly, don’t do sudden movements, do not turn your back to the snake, do not run, and give the possibility for a snake to go away

Remember

  • Never try to assess whether it was venomous snakebite or not. As a layman one should treat every snakebite as venomous snakebite, as some snake venom (like that of common krait) does not show immediate effect even in the case of a serious bite, it is wise to rush to a hospital.
  • Not all bites from venomous snakes lead to death; many venomous snakes (and as many as 85% of snakes are non venomous) deliver only a dry bite to humans. Even in the case of a full bite, with appropriate first-aid, care and treatment a snakbite victim can fully recover. Very few venomous snakebites are fatal. Just as every mosquito bite does not cause malaria, so every snakebite does not cause death.
  • No attempt should be made to kill the snake to carry it along to the hospital. It would result in delaying the arrival of the patient to the hospital and is potentially dangerous for the person who will attempt killing the snake. Qualified doctor can diagnose observing the patient for clinical symptoms and pathologial tests.
Categories
Uncategorized

I think that this some advice about doing First Aid in the Field

wikiHow to Do Basic First Aid

Four Methods:Performing the Three CsCaring for an Unconscious PersonTreating Common Problems In First Aid ScenariosTreating Rarer Cases in First Aid ScenariosCommunity Q&A

Basic first aid refers to the initial process of assessing and addressing the needs of someone who has been injured or is in physiological distress due to choking, a heart attack, allergic reactions, drugs or other medical emergencies. Basic first aid allows you to quickly determine a person’s physical condition and the correct course of treatment. You should always seek professional medical help as soon as you are able, but following correct first aid procedures can be the difference between life and death. Follow our entire tutorial, or find specific advice by checking out the sections listed above.

1

Performing the Three Cs

  1. Image titled Do Basic First Aid Step 1
    1

    Check the surroundings. Evaluate the situation. Are there things that might put you at risk of harm? Are you or the victim threatened by fire, toxic smoke or gasses, an unstable building, live electrical wires or other dangerous scenario? Do not rush into a situation where you could end up as a victim yourself. This refers to the D (Danger) in DRABC (Danger, Response, Airways, Breathing and Circulation).[1]

    • If approaching the victim will endanger your life, seek professional help immediately; they have higher levels of training and know how to handle these situations. First aid becomes useless if you can’t safely perform it without hurting yourself.
  2. Image titled Do Basic First Aid Step 2
    2

    Call for help. Call out for help 3 times before you begin assisting the casualty. If someone is with you or approaches, instruct them to call the authorities and be prepared to relay information to them so they can update the responders. It is not recommended that you leave the casualty unless absolutely required, but put them in the recovery position if you need to leave them for any reason.[2]
  3. Image titled Do Basic First Aid Step 3
    3

    Care for the person. Caring for someone who has just gone through serious trauma includes both physical treatment and emotional support. Remember to stay calm and try to be reassuring; let the person know that help is on its way and that everything will be alright. Other ways to reassure the casualty include asking for their name, if they know what has happened, and then about their interests.

2

Caring for an Unconscious Person

  1. Image titled Do Basic First Aid Step 4
    1

    Determine responsiveness. If a person is unconscious, try to rouse them by speaking to them; do not be afraid to speak up. If they do not respond to activity, sound, touch, or other stimulation, determine whether they are breathing.
  2. Image titled Do Basic First Aid Step 5
    2

    Check for breathing and a pulse.[3] If unconscious and unable to be roused, check for breathing: look for a rise in the chest area; listen for the sound of air coming in and out; feel for air using the side of your face. If no signs of breathing are apparent, place two fingers under the chin and gently guide the face pointing upwards to open up their airways. If any debris such as vomit can be seen, it is appropriate to move them onto their side to allow it to get out, which is achieved with the recovery position.[4] Check for a pulse.
  3. Image titled Do Basic First Aid Step 6
    3

    If the person remains unresponsive, prep for CPR. Unless you suspect a spinal injury, carefully roll them onto their back and open their airway.[5] If you suspect a spinal injury, leave the person where they are, provided they are breathing.[6]

    • Keep the head and neck aligned.
    • Carefully roll them onto their back while holding their head.
    • Open the airway by lifting the chin.
  4. Image titled Do Basic First Aid Step 7
    4

    Perform 30 chest compressions and two rescue breaths as part of CPR. In the center of the chest, just below an imaginary line running between the nipples, put your two hands together and compress the chest down approximately 2 inches (5.1 cm) at a rate of 100 compressions per minute (or to the beat of “Staying Alive”). After 30 compressions, give two rescue breaths, done by opening the airways, closing the nose and fully covering the mouth hole. Then check vitals. If the breaths are blocked, reposition the airway. Make sure the head is tilted slightly back and the tongue is not obstructing it. Continue this cycle of 30 chest compressions and two rescue breaths until someone else relieves you.[7]
  5. Image titled Do Basic First Aid Step 8
    5

    Remember your ABCs of CPR. The ABCs of CPR refer to the three critical things you need to look for.[5]Check these three things frequently as you give the person first aid CPR.

    • Airway. Does the person have an unobstructed airway?
    • Breathing. Is the person breathing?
    • Circulation. Does the person show a pulse at major pulse points (wrist, carotid artery, groin)?
  6. Image titled Do Basic First Aid Step 9
    6

    Make sure the person is warm as you wait for medical help. Drape a towel or a blanket over the person if you have one; if you don’t, remove some of your own clothing (such as your coat or jacket) and use it as a cover until medical help arrives. However, if the person has a heatstroke, do not cover him or keep him warm. Instead try to cool him by fanning him and damping him.
  7. Image titled Do Basic First Aid Step 10
    7

    Pay attention to a list of don’ts. As you administer first aid, be sure to be aware of these things that you should not do in any case:

    • Do not feed or hydrate an unconscious person. This could cause choking and possible asphyxiation.
    • Do not leave the person alone. Unless you absolutely need to signal or call for help, stay with the person at all times.
    • Do not prop up an unconscious person’s head with a pillow.
    • Do not slap or splash with water an unconscious person’s face. These are movie gimmicks.
    • If the person appears in danger due to an electric shock, you may attempt to move it, but only with a non-conductive object.

3

Treating Common Problems In First Aid Scenarios

  1. Image titled Do Basic First Aid Step 11
    1

    Protect yourself from bloodborne pathogens. Bloodborne pathogens can threaten your health and wellbeing by causing sickness and disease. If you have a first aid kit, sanitize your hands and put on sterile gloves. If sterile gloves and sanitizer are not available, protect your hands with extra gauze or cotton. Avoid direct contact with the other person’s blood. If you do end up making contact, make sure to clean yourself off as soon as possible. Eliminate any remaining sources of contamination.
  2. Image titled Do Basic First Aid Step 12
    2

    Stop the bleeding first. After you have established that the victim is breathing and has a pulse, your next priority should be to control any bleeding. Control of bleeding is one of the most important things you can do to save a trauma victim. Use direct pressure on a wound before trying any other method of managing bleeding. Read the linked article for more detailed steps you can take.

    • Treat a bullet wound. Bullet wounds are serious and unpredictable. Read on for special considerations when treating someone who has suffered a gunshot wound.
  3. Image titled Do Basic First Aid Step 13
    3

    Treat shock next. Shock, often caused a loss of blood flow to the body, frequently follows physical and occasionally psychological trauma. A person in shock will frequently have cool, clammy skin, be agitated or have an altered mental status, and have pale color to the skin around the face and lips. Untreated, shock can be fatal. Anyone who has suffered a severe injury or life-threatening situation is at risk for shock.
  4. Image titled Do Basic First Aid Step 14
    4

    Provide first aid for a broken bone. A broken bone, however common, can be treated with the following steps:

    • Immobilize the area. Make sure that the broken bone doesn’t have to move or support any other body parts.
    • Numb the pain. Often, this can be done with an ice-pack covered by a towel.
    • Make a splint. A bundle of newspapers and sturdy tape will do just the trick. A broken finger, for example, can also use another finger as a stabilizing splint.
    • Make a sling, if necessary. Tie a shirt or a pillowcase around a broken arm and then around the shoulder.
  5. Image titled Do Basic First Aid Step 15
    5

    Help a choking victim. Choking can cause death or permanent brain damage within minutes. Read this article for ways to help a choking victim. The article addresses helping both children and adult choking victims.

    • One of the ways to help a choking victim is the Heimlich maneuver. The Heimlich maneuver is performed by straddling the victim from behind and bear-hugging them with your hands interlocked above their belly-button but beneath their breastbone. Thrust upward to expel air from the lungs and repeat until you are successful in clearing the object from the windpipe. IF THIS WORKS, THE PERSON WILL NEED TO VISIT THE HOSPITAL QUICKLY, INTERNAL BLEEDING CAN BE CAUSED WITH THIS METHOD.
  6. Image titled Do Basic First Aid Step 16
    6

    Learn how to treat a burn. Treat first- and second-degree burns by immersing or flushing with cool water for at least 10 minutes (no ice). Don’t use creams, butter or other ointments, and do not pop blisters. Third degree burns should be covered with a damp cloth. Remove clothing and jewelry from the burn, but do not try to remove charred clothing that is stuck to burns.
  7. Image titled Do Basic First Aid Step 17
    7

    Look out for a concussion. If the victim has suffered a blow to the head, look for signs of concussion. Common symptoms include:

    • Loss of consciousness following the injury
    • Disorientation or memory impairment
    • Vertigo
    • Nausea
    • Lethargy.
  8. Image titled Do Basic First Aid Step 18
    8

    Treat a Spinal Injury Victim. If you suspect a spinal injury, it is especially critical that you not move the victim’s head, neck or back unless they are in immediate danger. You also need to take special care when performing rescue breathing or CPR. Read this article to learn what to do.

4

Treating Rarer Cases in First Aid Scenarios

  1. Image titled Do Basic First Aid Step 19
    1

    Help someone who is having a seizure. Seizures can be scary things for people who’ve never experienced them before. Luckily, helping people with seizures is relatively straightforward.

    • Clear the surroundings to protect the person from hurting themselves.[8]
    • Activate emergency medical services if the seizure lasts more than 5 minutes or if the person is not breathing afterwards.
    • After the episode has ended, help them to the floor and put something soft or flat under their head. Turn them onto their side to ease breathing, but do not hold the person down or try to stop their movements.
    • Be friendly and reassuring as their consciousness returns and do not offer food or water until fully alert.
  2. Image titled Do Basic First Aid Step 20
    2

    Help someone survive a heart attack. It helps to know the symptoms of heart attack, which include rapid heartbeat, pressure or pain in the chest, and general unease or nausea. Rush the person to the hospital immediately while giving them an aspirin or a nitroglycerin, which the person should chew.
  3. Image titled Do Basic First Aid Step 21
    3

    Identify someone having a stroke. Again, knowing the symptoms of stroke is important. They include temporary inability to talk or understand what is being said; confusion; loss of balance or dizziness; and severe headache with no precursor, among others. Rush a person you suspect has had a stroke to the emergency room immediately.
  4. Image titled Do Basic First Aid Step 22
    4

    Treat poisoning. Poisoning can occur as a result of natural toxins (i.e. snake bite) or chemical combinations. If an animal may be responsible for poisoning, try to (safely) kill it, bag it, and bring it with you to poison control.