Brett and Kate McKay | November 30, 2015 Manly Skills, Tactical Skills
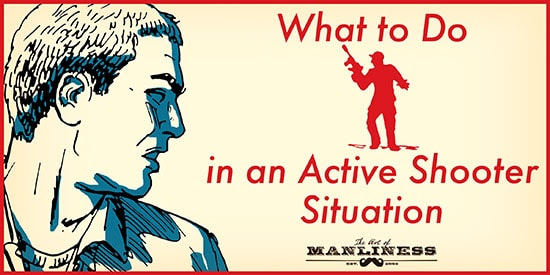
It’s a sad fact of life in the 21st century that active shootings have become a regular occurrence in the United States. In other parts of the world, terrorist groups are using active shootings to, well, terrorize. While the media focuses on the firestorm of political debate these events cyclically create, I’ve rarely seen them discuss what people are actually supposed to do in these situations.
According to the FBI, active shootings in public places are becoming increasingly common. Which means it would serve everyone to understand how to respond if they ever find themselves in the line of fire.
Over the years I’ve talked to a lot of military, tactical, and law enforcement professionals who’ve spent their careers training and dealing with violent individuals: U.S. marshals, SWAT officers, and special forces operators. And I’ve asked them all this same question: What’s an average joe civilian like me supposed to do when faced with a gunman who’s indiscriminately firing on people?
They’ve all answered the same way.
In today’s article, I share expert-backed advice on how best to react if you ever find yourself in a situation with an active shooter. Learning how to survive a shooting is much like learning how to survive an airplane crash: such an event is statistically unlikely to happen to you, and simple chance may make you a victim before you’re able to take any volitional action. But if there are things you can do to increase your odds of survival even slightly, you ought to know and practice them.
Something to Keep in Mind: You’re Probably On Your Own
In a study done by the FBI in 2014, it was discovered that most active shootings end in 2 minutes or less. That’s not enough time for law enforcement to arrive. So when you start hearing gunshots in places you shouldn’t be hearing gunshots, understand that you don’t have very much time to think about what you should do.
That’s why…
You’ve Got to Know What You’d Do Before It Actually Happens
When any sort of emergency situation strikes, be it an active shooter or even a fire, the natural response for most people, surprisingly enough, is not to do anything. We highlighted several of the reasons for this passivity in our article about why most people freeze up in emergency situations. For example, the “normalcy bias” causes victims to act like everything is fine even though things are far from it. Our brain is predisposed to assume that things will carry on in a predictable way. When the pattern is broken, it takes a long time for the brain to process this aberration. This is why many people who witness traumatic events report that it felt surreal, like they were watching a movie and it wasn’t really happening. They also often say that at first they thought the gunshots were fireworks or a car backfiring or a book falling — things that would fit better in their usual paradigm of daily life.
Another bias that keeps us from taking action is our natural tendency to follow the crowd. If we see that everyone else is cowering in fear or locked up by inertia, then our natural tendency is to act the same.
The way you overcome these inclinations towards passivity is deciding exactly what you’ll do in the event of a shooting — before one ever happens. You’ve got to have a plan.
I know it seems morbid, but you really should visualize what you would do in various situations were an active shooter to suddenly intrude upon the scene. What would your plan be if you were in the office and heard shots coming from the floor beneath you? Would you have time to run? If so, where would you go? If you heard the shots just down the hallway and there’s no place to run or hide, what would be your next step? Visualize your plan in as much detail as possible.
In an active shooter situation, seconds matter. You don’t have time to figure out what you’re going to do when a guy starts spraying a building full of gunfire. By having a general preconceived plan, you give yourself a head start. This all goes back to our article on the OODA Loop. Remember, in any conflict there are multiple loops going on. It’s your loop versus the shooter’s, and the first to complete their respective decision-making cycle usually wins the fight.
OODA Loops can begin way before an actual encounter starts. By coming up with a plan of what you would do in an active shooter situation before one ever happens, you’re already engaged in the second step: Orienting. Should you encounter a shooter, you can act immediately because you’ve already begun the cycle and already have a plan in place. Remember, ABO: Always Be Orienting.
Maintain Situational Awareness Wherever You Go
Besides having a general idea of what you’d do in an active shooter situation, another thing you must do to increase your chances of surviving is constantly maintaining situational awareness.
We’ve written in detail about situational awareness before, so rather than getting into the nitty gritty here, let’s review a few important principles as they apply to shootings:
Stay in condition yellow. Condition Yellow is best described as “relaxed alert.”There’s no specific threat situation, but you have your head up and you’re taking in your surroundings with all your senses. Most people associate situational awareness with just visual stimulation, but you can also learn a lot about a particular scenario from sounds. This is especially true for active shootings. If you hear gunshots — or something that sounds an awful lot like gunshots — that should be a sign that you need to start immediately preparing to take action.
Though your senses are slightly heightened in Condition Yellow, it’s also important to stay relaxed. Staying relaxed ensures that you maintain an open focus, which allows you to take in more information about what’s going on around you. Research shows that when we get nervous or stressed, our attention narrows, causing us to concentrate on just a few things at a time. A narrow focus can therefore cause us to miss important details in our environment.
Bottom line: Don’t have your nose constantly in your smartphone and don’t zone out; rather, you should open your eyes, ears, and nose, and calmly and constantly scan your environment to take in what’s going on.
Establish baselines and look for anomalies. As Patrick Van Horne notes in his book Left of Bang, a key component of situational awareness is establishing baselines and looking for anomalies. A baseline is what’s “normal” in a given situation, and it will differ from person to person and environment to environment. A baseline in an office would be people working at their desks or chatting in a lobby. A baseline at a restaurant would be people in uniforms coming in and out of the kitchen and customers entering and exiting the restaurant through the front door.
We establish baselines so that we can look for anomalies. Hearing gunshots at a college campus is definitely out of the ordinary, and should immediately trigger your active shooter plan of action. But let’s take a look at a subtler anomaly. If you’re at a movie theater and you see a guy entering the theater from the exit near the screen, that should definitely put you on alert. It could just be a guy sneaking in for a free movie, but it could also be a gunman. You don’t need to go and immediately tackle the guy, but you’d certainly want to keep your eye on him and make sure you’re prepared to quickly move out.
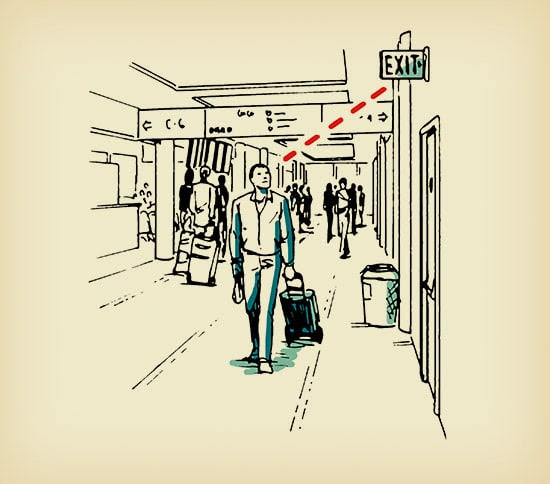
Know where all your exits are. If there’s one actionable takeaway you get from this article, let it be this. Wherever you are, always know the locations of the nearest exits. As we’ll see in a moment, running should be your first line of action in an active shooter situation. You want to get as far away from the gunman as possible and that often means getting out of the building where he’s shooting. So whenever you enter a building, the first thing you should do is look for exit signs and make mental notes of them.
You also need to consider not-so-visible exits. For example, most grocery stores will have an exit door in the very back in the “employee only” section. If you’re near the back of the store and you hear gunshots from the front, you’ll want to head directly to this rear exit. Another example of not-so-obvious exits is in restaurants. Most restaurants will have an exit in the back of the kitchen. If you’re near the kitchen and you hear gunshots near the front of the place, you’d want to hightail it to this back door. Because these exits are in places considered “employee only,” people have been conditioned not to even consider using them. But in an active shooter situation, these kinds of norms obviously go out the window, and preparing yourself to disregard them is a must.
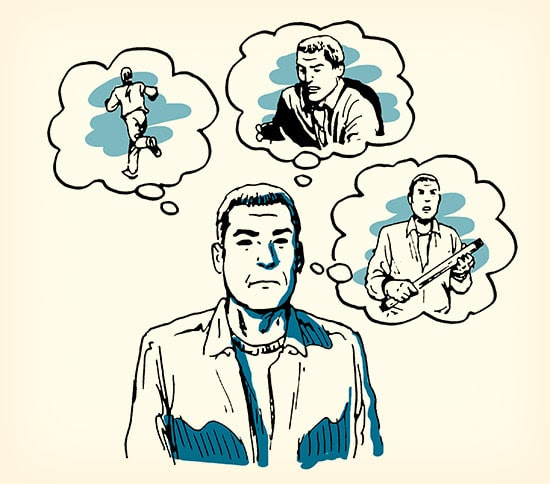
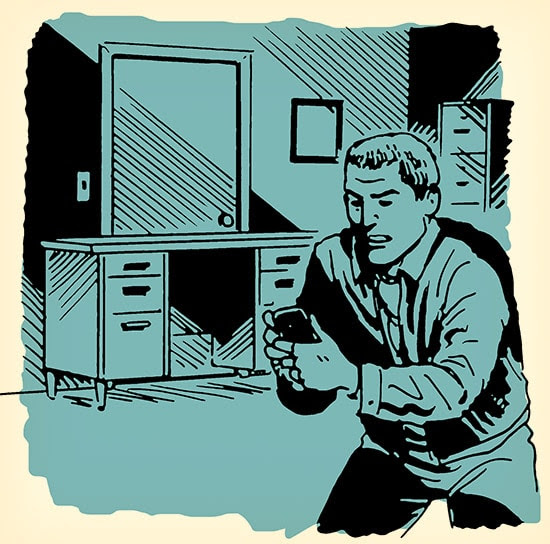
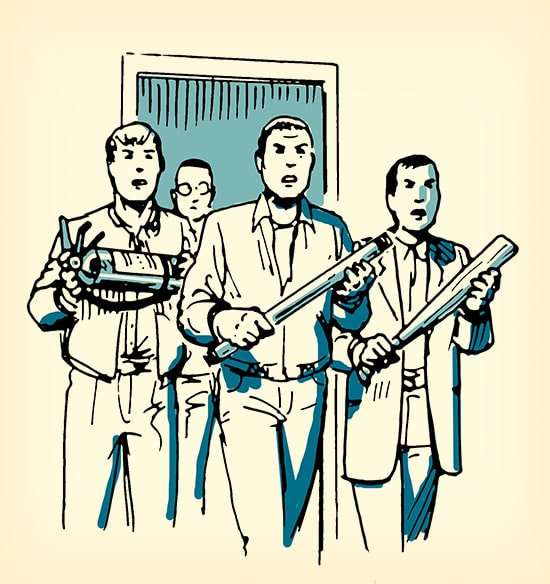
Your Active Shooter Triage: Run, Hide, Fight
So you’ve heard shots and screams. There’s an active shooting happening. What should you do? All the experts agree that you have three possible actions: run, hide, and fight.
Run
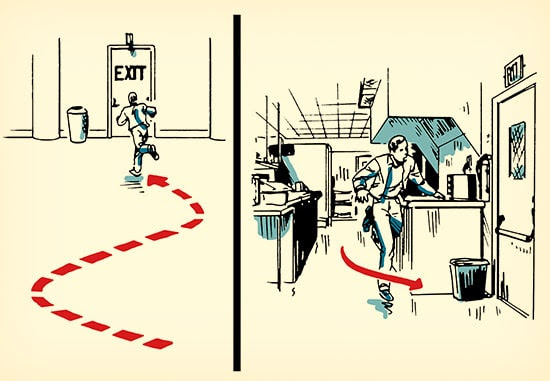
Running away should always be your first line of action. As soon as you hear gunfire, leave the premises immediately using your preconceived escape plan and get as far away from the shooter as possible. Ideally, you’ll be able to escape without having to cross the shooter’s path.
Keep in mind that in an active shooter situation, most people won’t want to leave because 1) they’re cowed in fear, 2) they’ve let the normalcy bias take over, or 3) they think hiding should be their first recourse. But you need to run, regardless of what others are doing. Do all you can to convince them to come with you, but if they don’t comply, leave them, and get out of the building or danger area as soon as possible.
Don’t try to gather your belongings. You can replace your laptop; you can’t replace your life.
As you make your exit, tell others to come along with you. Once you’re out of the danger area, prevent others (except for law enforcement) from entering the premises.
When you’re running, keep your hands visible. Law enforcement will be checking you to decide if you’re a threat.
This may go against every humane compulsion you have, but don’t try to move or assist the wounded while you’re making your exit. It leaves you vulnerable to attack; turning one casualty into two won’t ultimately help things. Even the first law enforcement officers to arrive at the scene will initially ignore the wounded so they can take out the shooter. Just as their top priority is to stop the gunman, your top priority is to get to safety.
If you’re in an open area and there’s distance between you and the shooter, run as fast as you can in a zig-zag pattern. Shooting a moving target is hard even for experienced marksman, and many mass shooters have little or no experience with firearms. So move as much as possible and take cover behind barriers that can stop bullets (cement pillars, vending machines, etc.).
As soon as you get to safety, call 911. Don’t assume someone already has.
Hide
Sometimes running isn’t an option. Maybe the shooter is in front of the only exit and you can’t jump out the window because you’re on the fourth floor. If you can’t make an escape, the next best thing to do is to hide in a secure location.
You want to hide in a place that’s out of the shooter’s view and that can provide protection if shots are fired in your direction. If you’re in an office or school building, find a room that has a lockable door. If you can’t lock the door of the room you’re in, barricade it with a table and chairs. You want to make it as hard as possible for the shooter to enter; he’s often looking for easy victims, and will move on rather than bother pushing through the barrier.
Turn off the lights in the room and be as quiet as possible. Be sure to put your cell phone on silent. You don’t even want it on vibrate.
Stay away from the door and crouch behind items that could offer protection from bullets like cabinets or desks. Hide in a bathroom or closet if you can.
If possible, dial 911 and let the authorities know there’s an active shooter in your building. If you can’t speak because the shooter is nearby, leave the line open so the dispatcher can hear what’s going on.
Don’t open the door unless absolutely necessary or if you can confirm it’s the authorities who are knocking. According to Clint Emerson, Navy SEAL and author of the book 100 Deadly Skills, shooters will often knock on doors or yell for help in the hopes of convincing people who are hiding to show themselves.
If you can’t find a room in which to secure yourself, hide in a location that offers cover and concealment from the shooter, but still allows you to see him. If the shooter passes you, you can make a run for it. If he doesn’t, it puts you in a position to attack if necessary.
Fight!

When running or hiding have failed or aren’t viable options, it’s time to resort to plan C: Fight!
Most civilians don’t think they can take on an active shooter because, well, the shooter has a gun and they likely do not. But here’s the thing: it is possible for unarmed individuals to subdue or chase away an armed shooter. Anthony Sadler, Spencer Stone, and Alek Skarlatos — the 3 friends who rushed a terrorist aboard a train to Paris — did it, saving dozens of lives. So did Frank Hall, a football coach who ran down a shooter and chased him out of a high school in Ohio before he could wreak massive carnage.
Yes, some studies have suggested that armed civilians can reduce the number of fatalities in an active shooter situation compared to situations where there were no armed civilians. But what these same studies suggest is that just having civilians — armed or not — quickly take action against a shooter can reduce the number of victims too. So even if you don’t plan on carrying a firearm yourself, commit to the idea that if you absolutely have to (and, again, we’re talking last resort here), you’ll attack an active shooter quickly and devastatingly.
Will you get shot? Possibly. But it’s possible to survive multiple gunshot wounds, and doing nothing will probably get you killed anyway. Sadly, history has shown that many active shooters will unflinchingly shoot people begging for their lives while they’re curled up in the fetal position. As Chris Norman, a Briton who assisted the 3 Americans in their attack of the train terrorist described his reason for taking action:
“My thought was, ‘OK, I’m probably going to die anyway, so let’s go.’ I’d rather die being active, trying to get him down, than simply sit in the corner and be shot. Either you sit down and you die or you get up and you die. It was really nothing more than that.”
How to Fight an Active Shooter
So you’ve made the decision that running and hiding are no longer options and that fighting is your last recourse. What’s the best way to fight an active shooter?
If you’re armed yourself, there are certain techniques you should employ in returning fire. A tutorial on how to take down a gunman lies outside the purview of this post, and must be practiced in the real world.
If you’re not armed, real world practice in hand-to-hand fighting will be an enormous asset, not only in giving you concrete skills to employ, but in offering you a greater comfort level with violence and a confidence in taking action. It’s not a coincidence that Spencer Stone — a U.S. Airman who was the first of the 3 Americans to rush the train-bound terrorist and choked him out while his buddies gave him a beat down — was trained in Brazilian Jiu-Jitsu. Stone unequivocally attributed his training in martial arts to his survival, adding that even a cursory knowledge of self-defense is highly beneficial: “I 100% believe that Brazilian Jiu-Jitsu saved my life at that moment. Every move I used on him was very, very basic — you can learn in five minutes. If we had a course like that in the Air Force for people to learn basic moves, it could help anyone in a situation like that.”
But even if you’re the most average of average joes — you’ve got neither a gun nor a black belt — you should still attempt to take on a gunman as a last resort, keeping these principles in mind:
Understand your advantages. Most violent gunmen work under the assumption that because they have a gun, people will do what they want or just hide. They don’t expect someone to come charging after them. As we discussed in our article on the OODA Loop, an important part of winning any fight is resetting or disrupting your opponent’s loop. As former US Air Marshal Curtis Sprague told me, you want your opponent to have an “uhhhh…” moment. By doing the unexpected (attacking), Sprague argues that “you’re disrupting the gunman’s OODA Loop which slows him down — even if it’s just a few seconds — and gives you more time to complete your OODA Loop and win the battle.”
So simply charging your gunman puts you at an advantage because he’s definitely not expecting it.
In 100 Deadly Skills, Emerson notes another advantage to keep in mind: “a gun can only be shot in one direction at any one time.” If you approach the shooter from behind or from the side, it’s going to be very hard for him to shoot you. What’s more, if you attack the shooter as a team (which you should), he can’t shoot everyone at the same time. An attack by multiple people, from multiple angles, will be difficult for a lone gunman to fend off.
Be aggressive and violent. This isn’t the time for pussy footing. Once you decide to fight, attack with violence and aggression. Alek Skarlatos grabbed the train-bound terrorist’s rifle and pounded him repeatedly in the head with its muzzle. This kind of violence may not be pleasant to contemplate, but remember, old ingrained norms like never hurting others go out the window in a crisis; victory will go to the swift and relentless. Use lethal force, and don’t stop fighting until you’re dead or the shooter stops moving.
Control the weapon and then control the shooter. The sooner you can get the weapon out of the shooter’s hands, without endangering others, the better. Without his gun, he can’t shoot anymore. Once the weapon has been secured, turn your attention to completely containing the perpetrator. Keep in mind every fight is different. Sometimes you’re not going to be in a position to secure the weapon first, so your priority would be to inflict as much violence as possible on the shooter until you can get the gun away from him.
Even if you can’t get the gun completely out of the attacker’s hands, do what you can to control it. Grab the gun so that you can exercise some influence over where it’s pointed. If the shooter has a semi-automatic pistol, use this tip I picked up from UFC fighter and Army Ranger Tim Kennedy at the Atomic Athlete Vanguard. Grab the barrel as hard as you can. First, this allows you to control where the gun is pointed. And second, if the gun does fire, it will prevent the slide from going back and chambering another round, thus preventing the shooter from re-firing.
Use improvised weapons. Just because you don’t have a gun, doesn’t mean you don’t have a weapon. A weapon can multiply force and almost anything in your environment can be turned into one: chairs, fire extinguishers, umbrellas, belts, coffee mugs. Heck, even a pen can be used as an improvised weapon.
Throw stuff at the shooter. Even if it doesn’t disable him, you’re creating hesitation which will give you more time to get closer to end the fight. Remember, disrupt that loop!
If it’s available, use items that can blind the shooter: flash a high-beam tactical flashlight in his eyes, spray a fire extinguisher or chemicals in his face, or throw a pot of scalding hot coffee his way. Be creative! Once the shooter is disoriented, rush him and take him down.
Work as a team. The more people you can get to help you in attacking the shooter, the better your chances of ending the ordeal with fewer casualties. But remember, most people’s natural reaction in these sorts of situations is to not do anything. You’ll need to be assertive and take the lead. Courage is contagious.
Conclusion
While active shootings are increasing, they’re still rare. We shouldn’t be cowered in our homes in fear. But there’s no downside to being prepared. Sometimes there’s nothing you can do to survive a shooting; you’re in the wrong place, at the wrong time, and you’re killed without warning. But you may get a chance to act, and will only have seconds to figure out what to do. Your stress will be through the roof and the situation will be utter chaos. If you hope in that moment to be able to protect your life and the lives of others, ready yourself now and have a plan of action wherever you go.
_____________________
Sources:
100 Deadly Skills by Clint Emerson
Left of Bang by Patrick van Horne
How to Survive the Most Critical 5 Seconds of Your Life by Tim Larkin
Active Shooter: How to Respond by The Department of Homeland Security


 DO NOT even get me started about Consultants and their Snake Oil ideas about teaching ! As usually they are friends of somebody in the District and the Taxpayers usually get raped by them.