.jpg_thumbnail0.jpg)
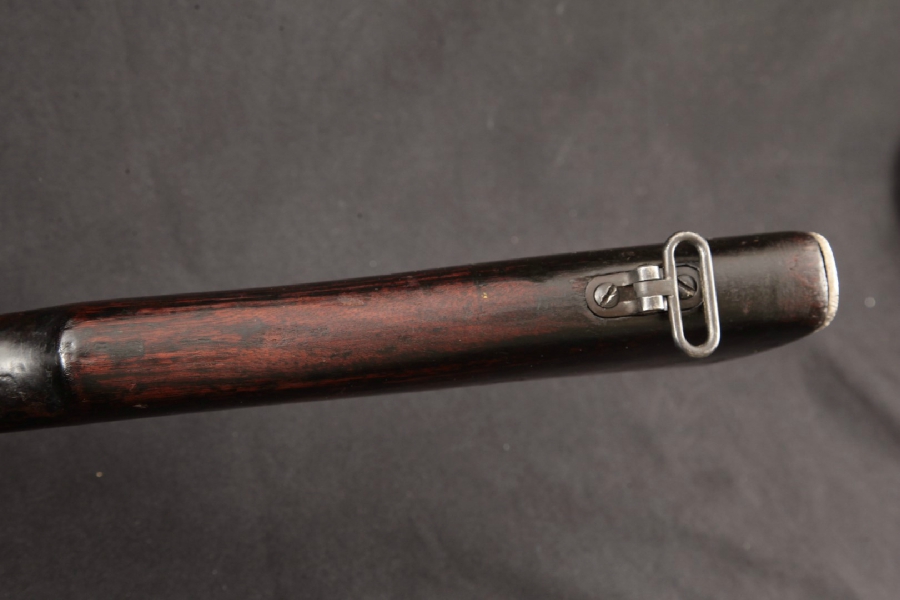
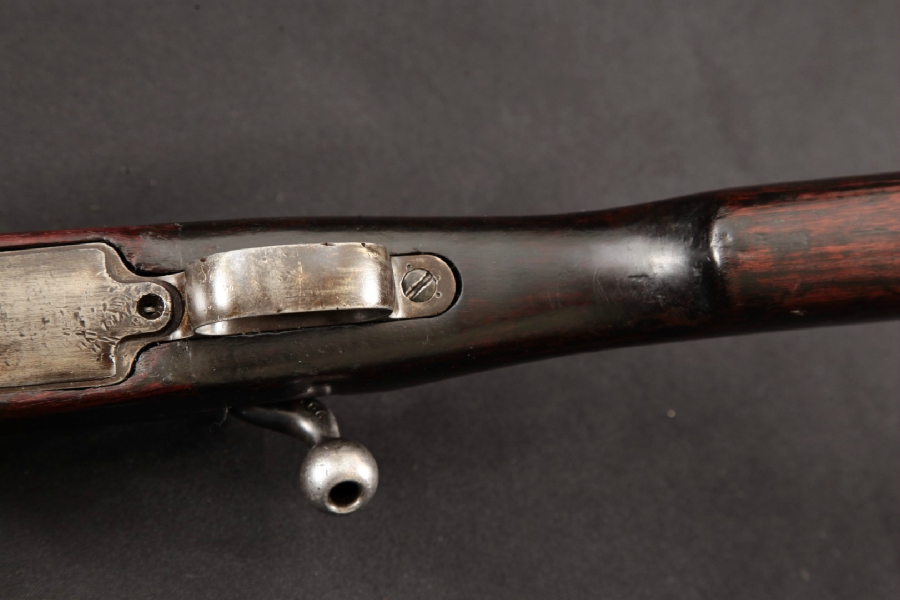
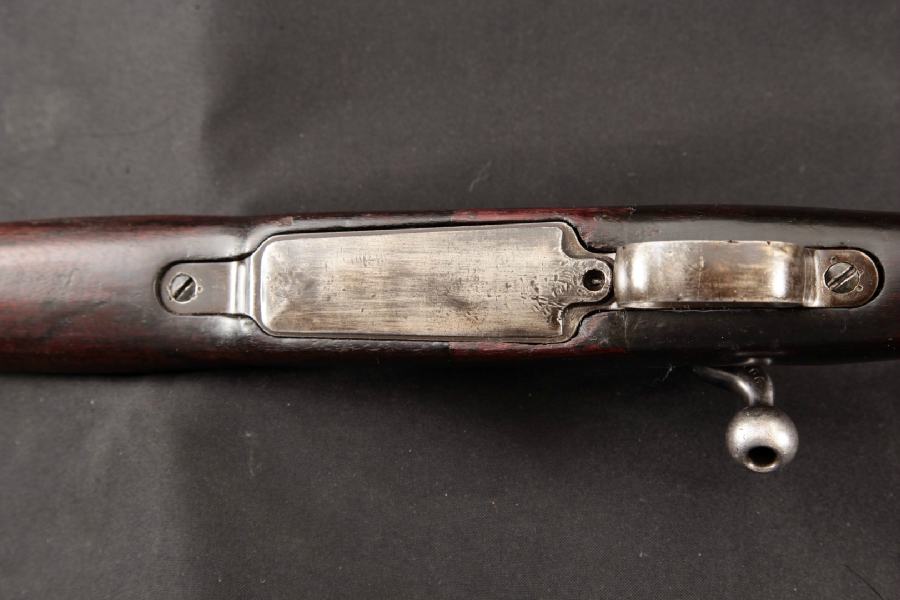
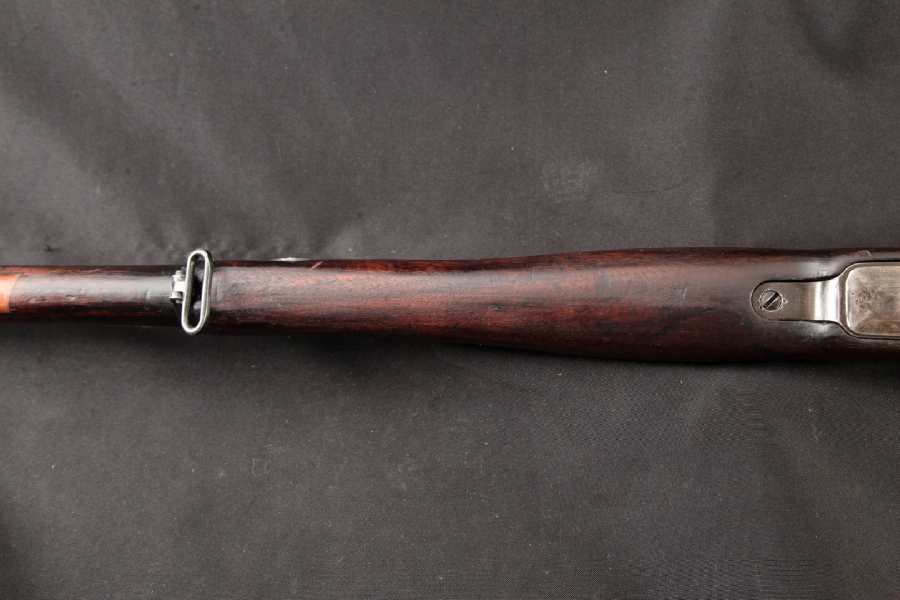
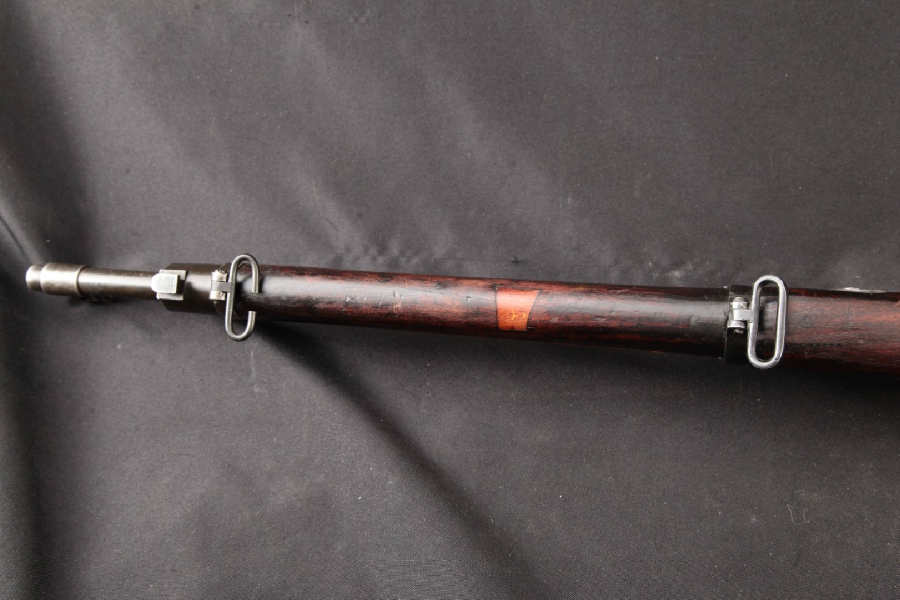
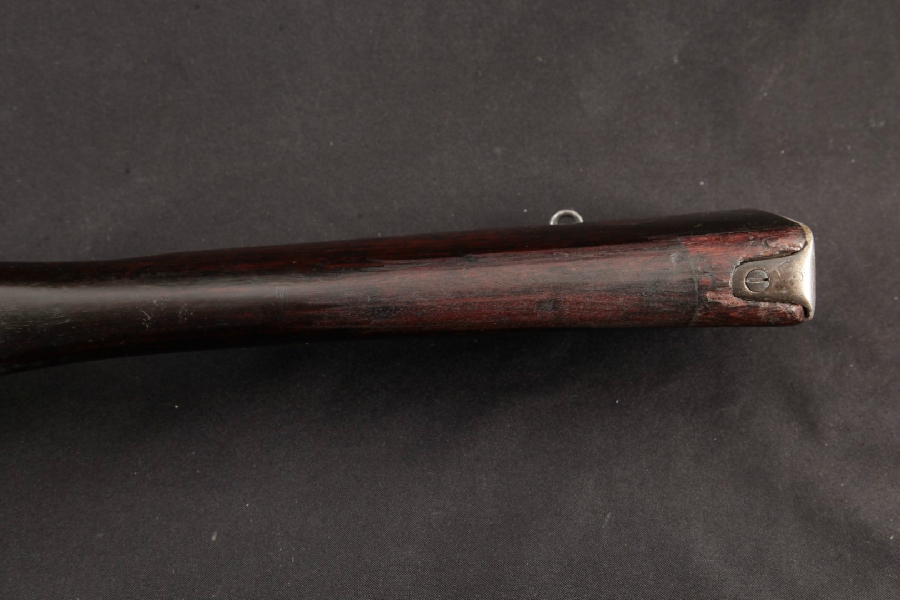
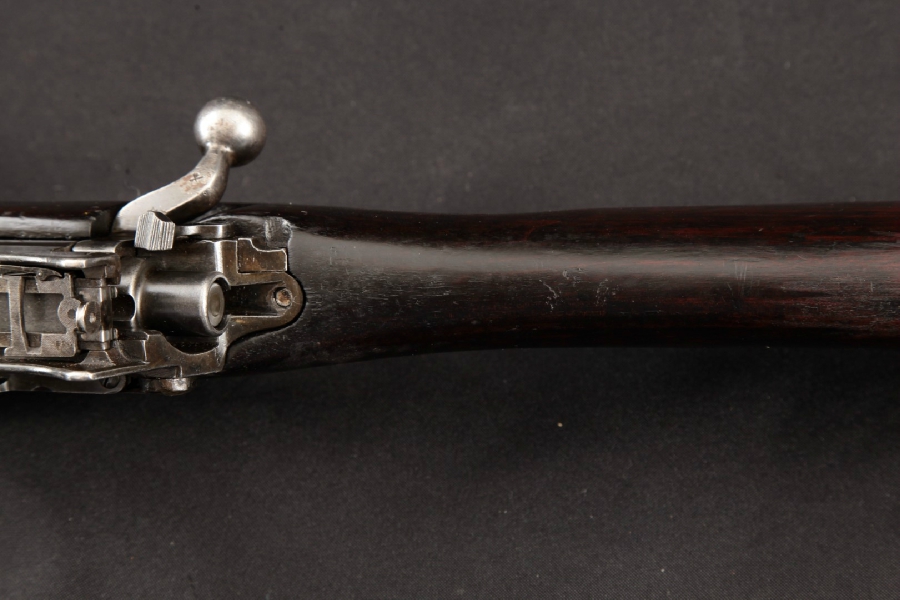
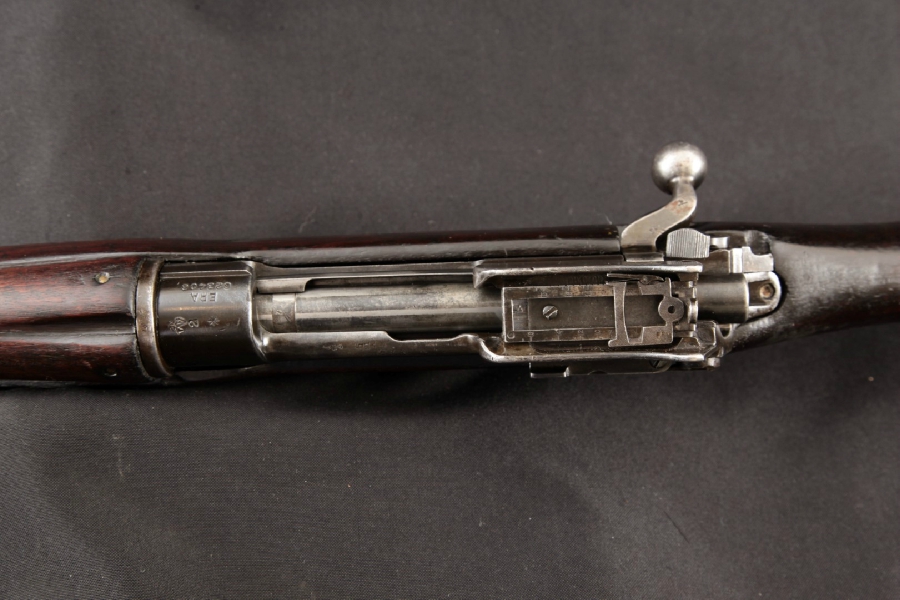
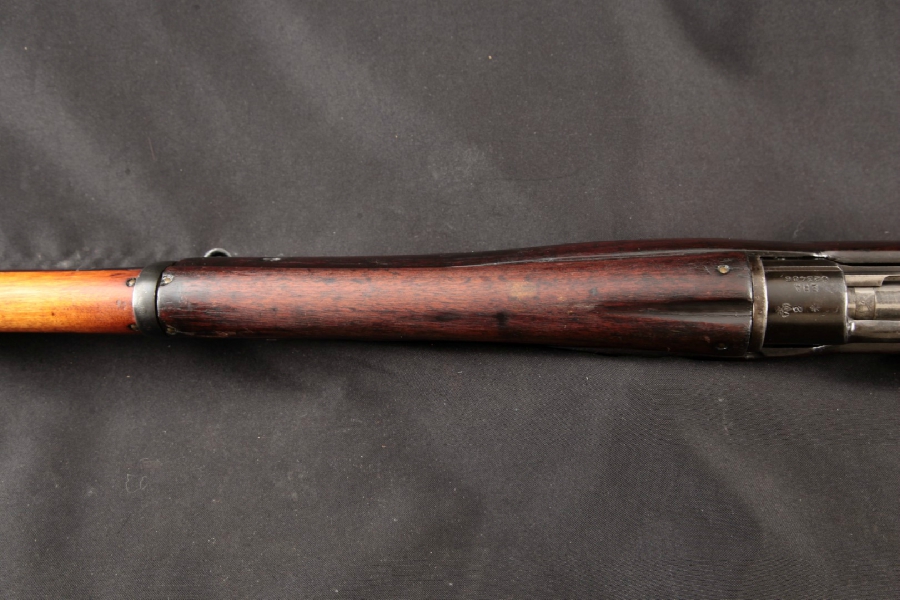
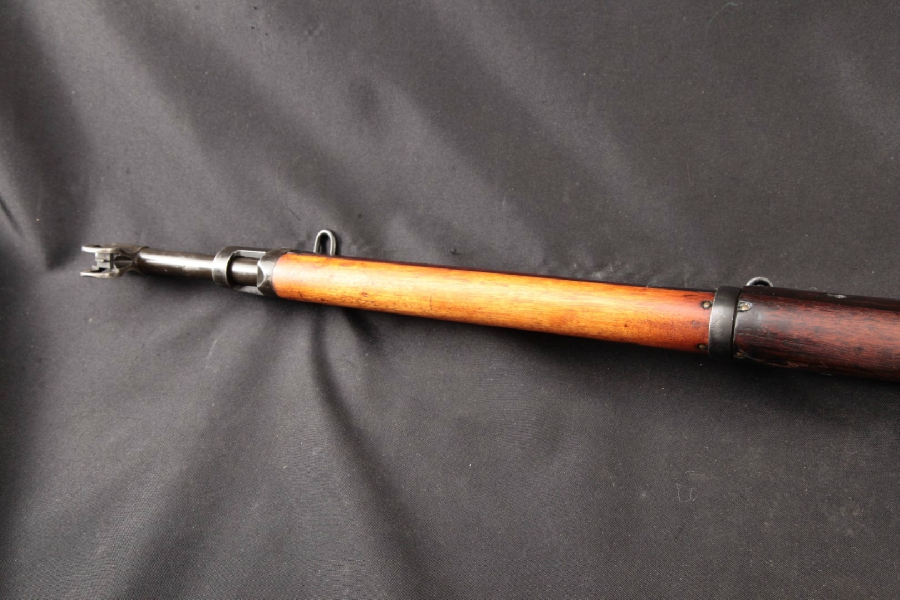
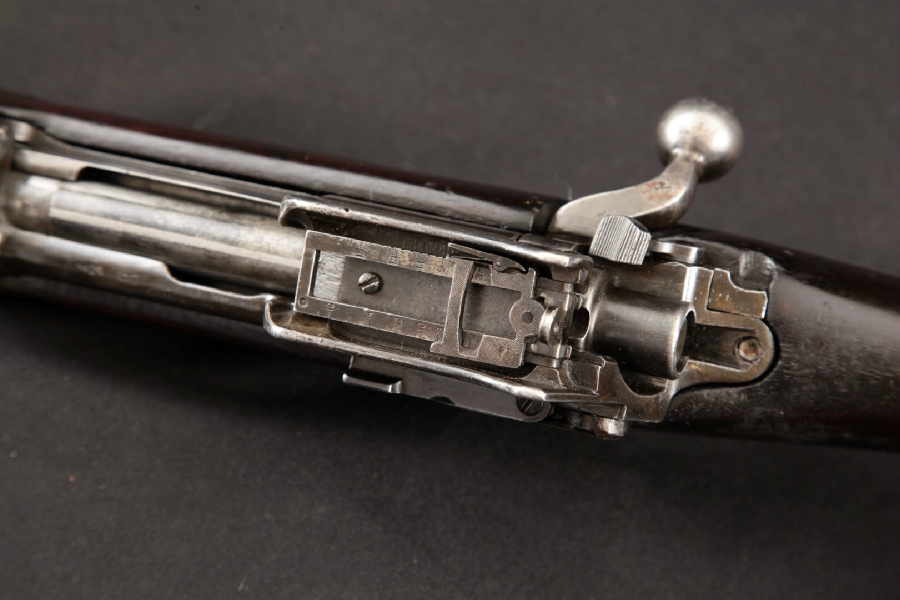
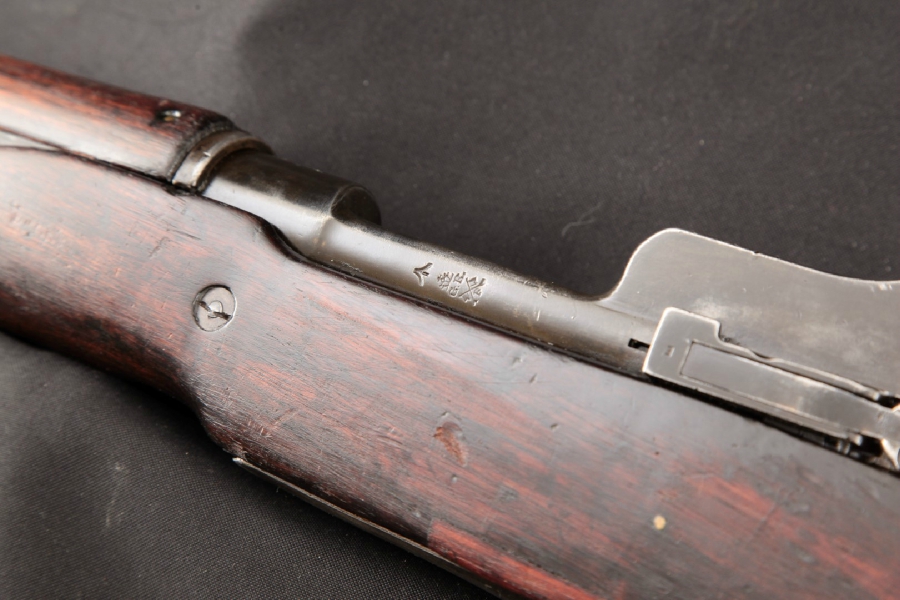
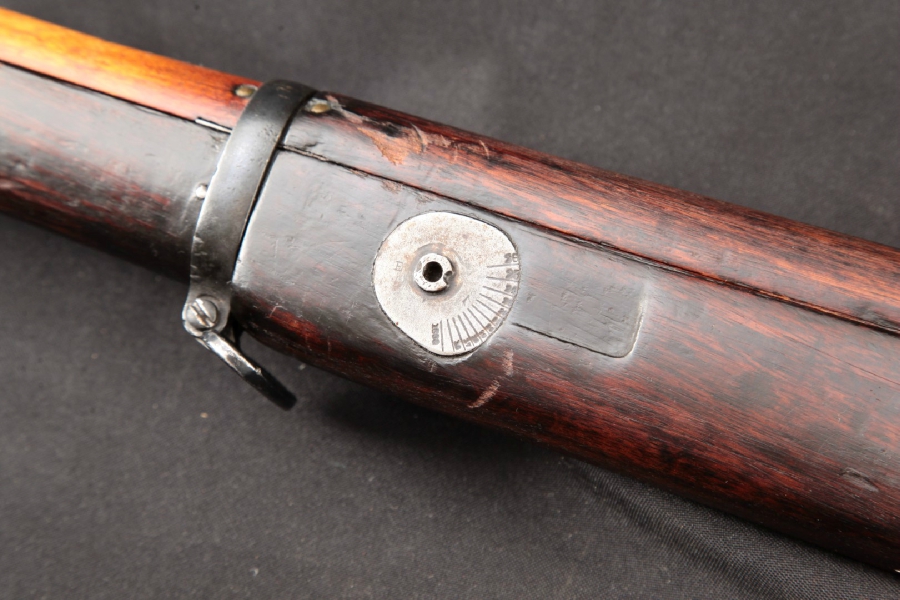
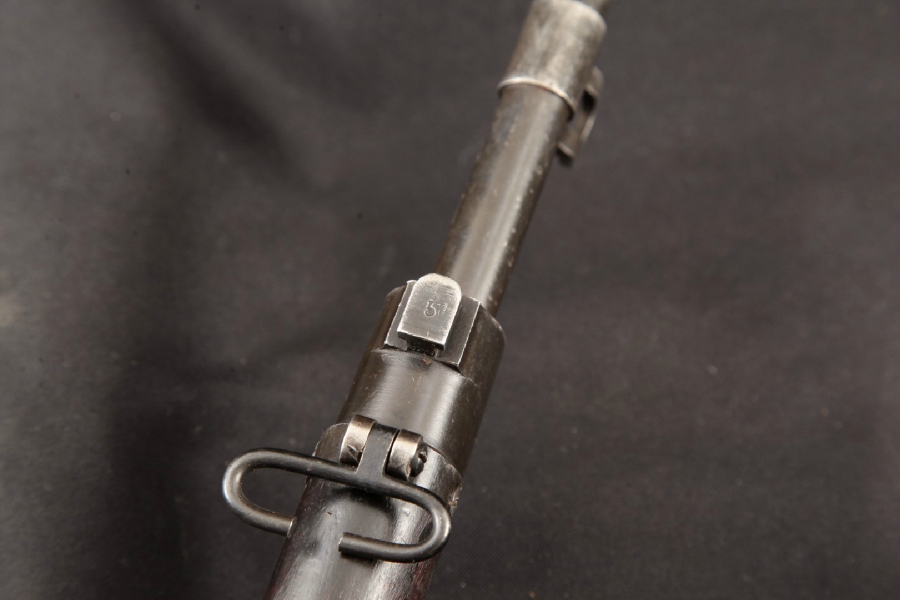
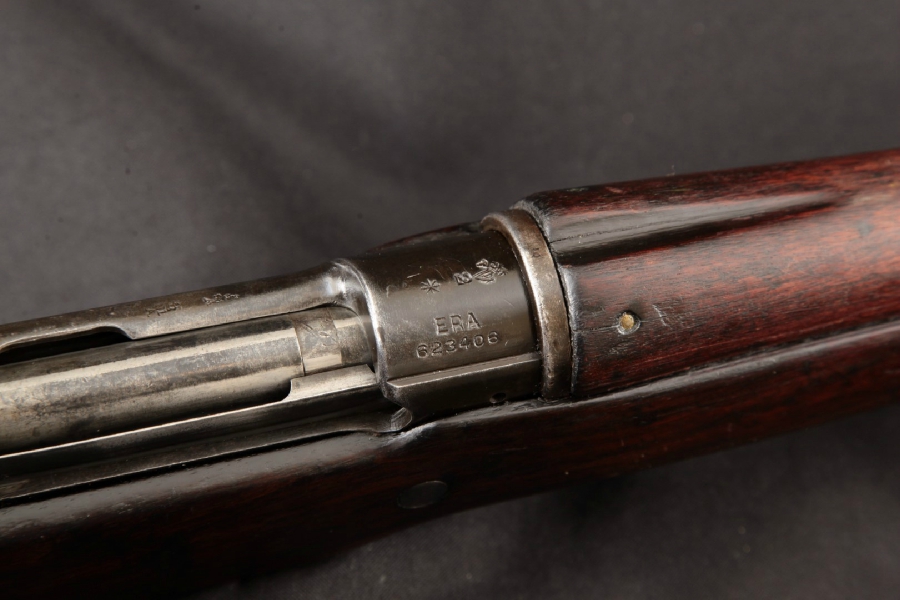
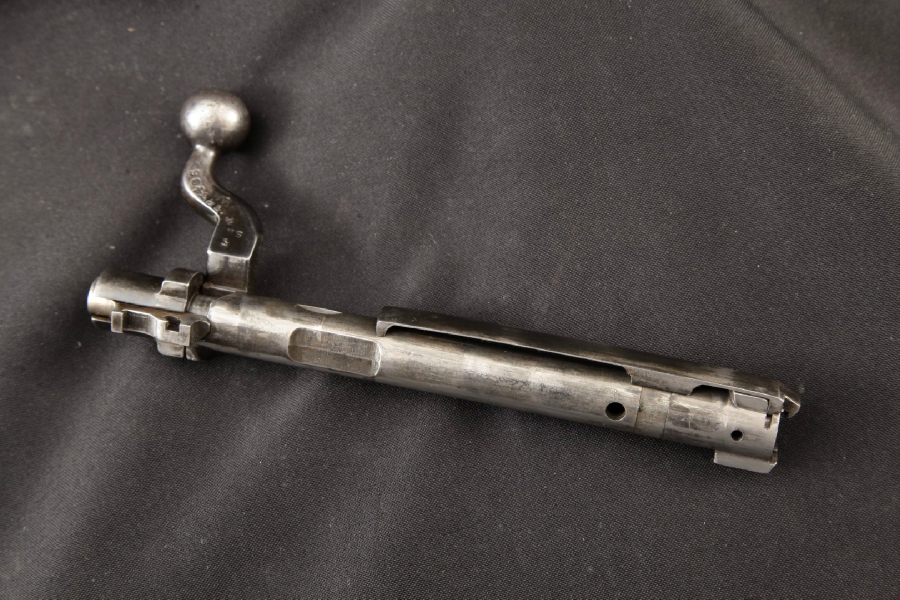
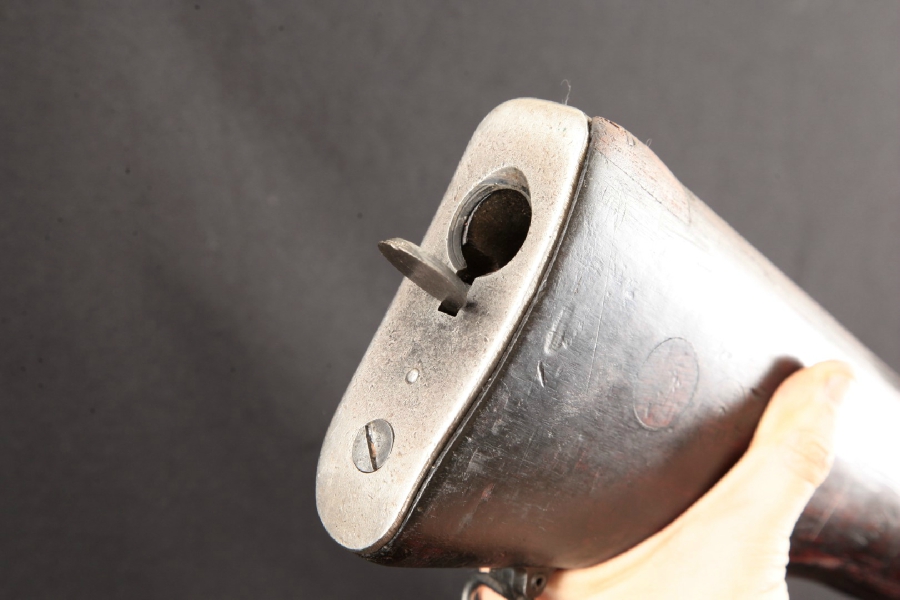
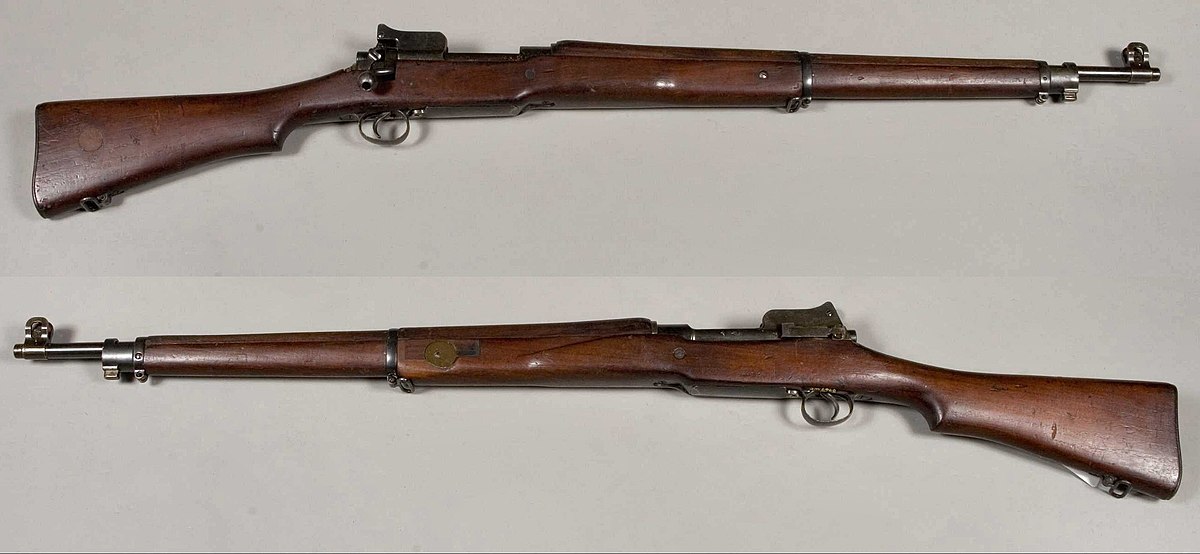
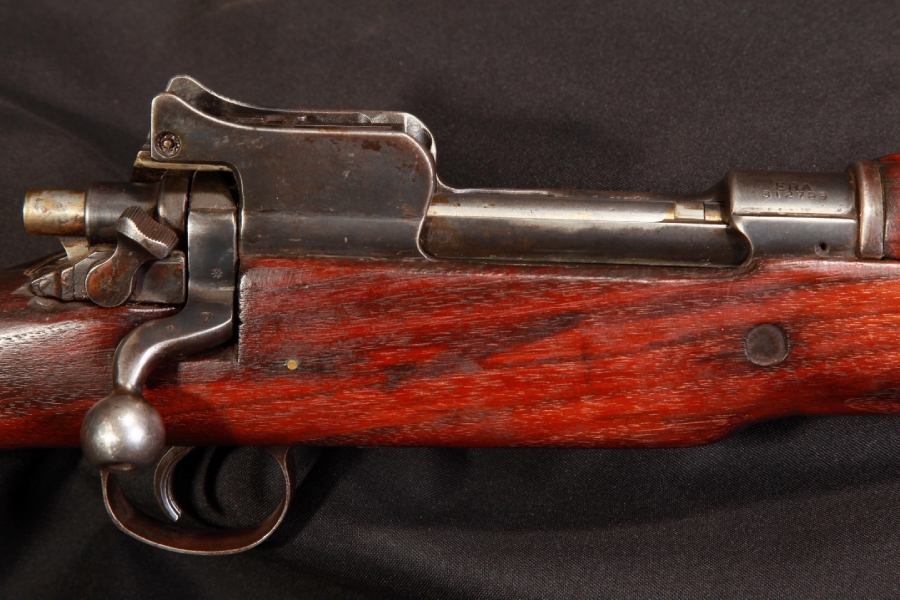
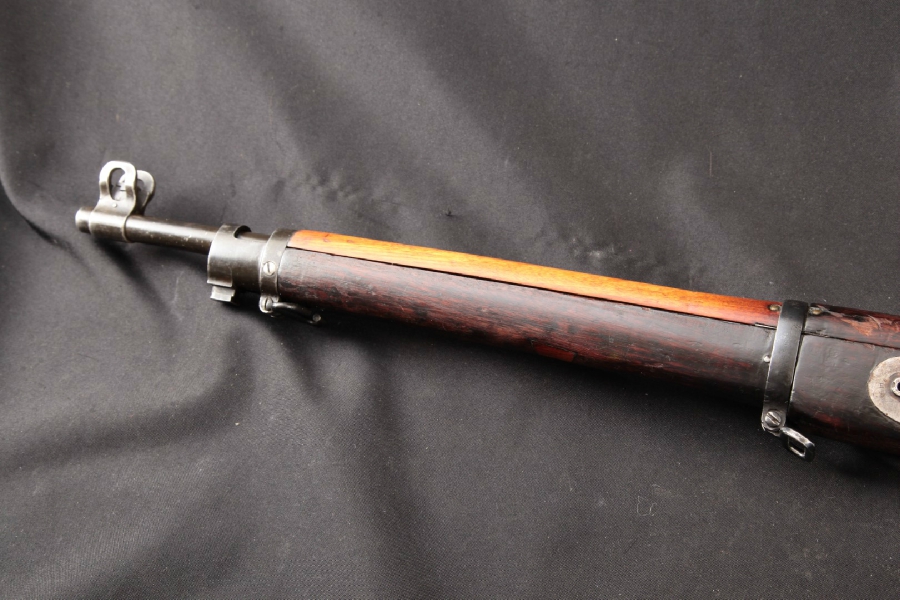
This Pattern 1914 rifle was made as a contract rifle for the British during World War I.
The primary contractor (Vickers) was unable to produce more than a handful of rifles, so the P14 became a de facto afterthought.
As the UK had an urgent need for rifles, and contracts for the new rifle were placed with arms companies in the United States. T
hey decided to ask these companies to produce the new rifle design in the old .303 caliber for convenience of supply. The new rifle was termed the “Pattern 14”.
In the case of the P14 rifle, Winchester and Remington were selected.
A third manufacturer, Eddystone Arsenal – a subsidiary of Remington – was tooled up at the Baldwin Locomotive Works in Eddystone, Pennsylvania. Thus, three variations of the P14 and M1917 exist, labeled “Winchester,” “Remington” and “Eddystone”.”
Month: June 2018
Canada’s long-running and unlikely Sherman obsession
In World War II, Canada actually rolled their own tanks, producing 1420 locally-built Valentines at the Canadian Pacific Railway’s Angus Shop in Montreal. While most of the V’s went to the Soviet Union for use on the Eastern Front, the Montreal Locomotive Works built a modified version of the M3 Lee medium tank as the Ram to equip Canuck units in Northern Africa early in the war.
In 1943, MLW switched from the Lee/Ram to the Sherman (called “Grizzly” in Canadian service), which included British radio gear, a 2-inch smoke mortar mounted on the turret and a cast hull as opposed to the more common welded-hull version.
The 1st Canadian Armoured Brigade was equipped with Grizzlies in time for the invasion of Sicily in July 1943.
In all, MLW made 188 Canuck Grizzlies while others were acquired from allies.
The novice Canadian Armored Corps in Italy caught hell from both the terrain and German PzKpfw IV’s when 36 Shermans from the Three Rivers Regiment (Tank), CASF (now the 12e Régiment blindé du Canada) took on the brunt of the veteran German 16th Panzer Corps near Termoli in one of the most epic armored engagements of Canadian military history.
The 2nd Canadian Armoured Brigade, and the 4th Canadian Armoured Division, training in Britain for Operation Overlord, had their Ram tanks swapped out with the new tank just before D-Day.
They also caught hell in Northwestern Europe.

A rare colorchrome of a Sherman V of the Canadian 29th Reconnaissance regiment (The South Alberta Regiment). The Tank was commanded by Major David Currie (VC), and the tank was named ‘Clanky’. This photo was taken in Normandy around Arromanches in July of 1944. Photo via TheShermanTank.com

A pair of burnt-out Canadian M4A2 Shermans of the 10th Armored Regiment (The Fort Garry Horse) at the foot of the church at Rots – June 1944
Some Grizzlies were converted into the Skink anti-aircraft tank with a turret mounting four 20 mm Polsten guns– a very effective anti-personnel and AAA platform.

“Tank AA, 20 mm Quad,” better known as the Skink was Canadian self-propelled anti-aircraft gun, developed in 1943-44 fully enclosed mounting on the chassis of the Grizzly Canadian-built M4A1 Sherman
Other variants included the Badger flame tank and Kangaroo APC, both made from Sherman hulls.
When Hitler was vanquished, the Canadians left their Grizzlies/Shermans in Europe while in 1946 they picked up 294 “Easy Eight” M4A2(76)W HVSS Shermans cheap– just $1,460 each (Late model Shermans cost $200,000 to make in 1945). They were left overs from Lend Lease production meant for Uncle Joe in Moscow but by that stage of the 1940s, the U.S. would rather sell them at scrap prices that give them to the Soviets.
The batch of M4A2(76)W’s (M4A3E8’s) were kept in Canada proper for training purposes, even though they were different from the Shermans forward deployed along the Rhine.
When Korea came, the Canadians borrowed 20 Shermans from the U.S. Army and Marines in-country and, after using them in often very heavy combat and tense DMZ patrol from 1951 to November 1954, returned all 20 back to the U.S.

Trooper Andy Parenteau of the Lord Strathcona’s Horse (Royal Canadians) sleeps on the back of a Canadian Sherman M4A3(76)W HVSS tank, Korea. Note the American ration box and United Nations/Canada crest on the tail
British forces used Centurions in the conflict– speaking of which…
In 1952, the Canadian Army bought the first of what would be 274 Centurion Mk 3 Tanks and split these MBTs between the active units in Germany (with their Grizzles being passed on to Portugal) and at home, later adding 120 Mk 5’s to the arsenal– while transferring the Easy Eight Shermans to reserve units.
They remained in service until 1978 when Canada replaced their aging Centurions with 127 new German-built Leopard C1 (equivalent to Leopard 1A3 with laser rangefinder) MBTs and, as the buy was limited and 114 were based in West Germany, just a handful were sent home to Canadian Forces Base Gagetown, New Brunswick for training.
The days of large tank lots in Canada had come to an end.
This led to the retirement of the last Canadian reserve force Shermans in the 1970s, one of the last Western countries to do so.

You have to admit, the camo scheme looks good on these tanks…and they were an instant WWII veterans parade every time they left the armory
After retirement, many Canadian Shermans remained in use well into the 1980s– as targets.
It should be noted that as late as 1989, the Finning Tank Drill, a rock drill used in logging road construction, was produced in British Columbia from Sherman hulls while BC’s Morpac Industries, Inc., still produces heavy-duty, off-road load crawlers based on Sherman components. It is very likely these civilian mods will be in the wilds of Canada’s western forests for decades to come.
Here is a Finning caught in its natural state:
Today some 60~ intact models are thought to still exist in the country as gate guards and museum pieces and they pop up from time to time in both their Grizzly and later Easy Eight variants for sale at reasonable prices.
The Ontario Regiment (RCAC) Museum in Oshawa, Ontario has a pair of great working Shermans, (“Bart” #78-904 and “Billy #78-856).
Overall, not a bad track record for the often derided Sherman.
When I first dipped my toes into precision rifle competition the very first match that I attended did not allow competitors to use laser rangefinders to get distances to the target. This was familiar territory for me since I’d been trained in range estimation using the reticle in the Leupold M3A and Steiner binos. Getting an accurate range estimation using just a reticle requires a good deal of skill and prior information though, such as the dimensions of the target. If you didn’t know the dimensions of the target you were in a bit of a pickle but laser rangefinders don’t suffer that disadvantage. Although you don’t have to know the size of the target to get a range, using a laser rangefinder isn’t always as easy as point and click. Laser rangefinders were once expensive luxuries but the newer models are smaller, range farther, and pack more features than the models from just a decade ago. However, it’s a good idea to research the options that are out there now to make sure that your money is well spent and that the unit will meet your needs.

New laser rangefinders pack in a lot of bang for the buck. The Leica 1200 CRF at the top was good for its day but newer models like the Sig KILO below provide the ability to range farther, range in meters or yards, account for angles, and adjust the brightness of the display
How Does It Work?
In simple terms, the laser rangefinder will emit an infrared beam towards a target while another sensor looks for the reflection coming back. Once the sensor has detected that reflection it calculates the range based on the time it took to get back to the unit and displays it for the user. Current generations of rangefinders can not only do that in less than a second but also provide the angle to the target by way of an internal inclinometer as well as differentiate between clutter and the actual target. The rangefinders that have a “brush” mode accomplish this by programming the rangefinder to essentially ignore close readings and display the farthest distance. This is especially helpful for long range hunters that may have to punch through scrubs or foliage in order to get a reading on an animal. Nearly all of the off-the-shelf rangefinders work the same way so what sets a $300 rangefinder apart from a $3,000 one?
Emitter and Sensor Quality
In the world of electronic devices, you tend to get what you pay for and laser rangefinders are no different. One area that sets apart good laser rangefinders from great ones is the quality of their sensor and emitter package. You may find that rangefinders at the lower end of the pricing spectrum use an emitter with a less focused beam coupled with a sensor that isn’t as sensitive to the reflected signal. The result is a rangefinder that can maybe do 800 yards off of a reflective target in perfect conditions as opposed to 1000+ yards. More expensive laser rangefinders with a higher maximum distance rating will use an emitter that has a tighter beam divergence in addition to a sensor that is better able to pick up the reflection off a variety of materials.
If you notice that some rangefinders use a Class 1 laser and some use a Class 3R laser I wouldn’t get too wrapped around the axle about it. Class 1 lasers are more or less eye safe while Class 3R lasers are less so but still ok around humans as long as you take precautions. The laser classification doesn’t necessarily mean that a rangefinder with one type is going to be better than the other one. Again, the overall performance is going to be determined by the focus of the beam and the quality of the sensor used to pick up the return.
Optical Performance
The optical performance of the rangefinder is going to play a part in how well you can range objects, mostly in how well you can see the target. All laser rangefinders have some level of magnification, most of the monocle rangefinders have 7X but sometimes you’ll see 6X and 8X too. I like the 7X magnification, it offers a good balance between being able to see targets against brush or in shadows while still having a good field of view. Some of the binocular laser rangefinders will have a higher magnification, typically 10X or so, which is just about perfect for hunting situations where you may have to look through brush or scan a far hillside.
Going hand in hand with the magnification of the unit is the quality of the glass. I try not to be a glass snob but it really can make all the difference in a laser rangefinder. I’ve used laser rangefinders before where the image looking through the unit was so dark it almost seemed like you were wearing sunglasses. Now most rangefinders do have a coating on the lens to help you see the display inside but you’ll want a laser rangefinder with good glass quality. Good enough that you can spot a gray, shot up piece of steel against a far hill while it’s sitting in the shadows of the brush. That might sound a little far-fetched but that very scenario occurs at nearly every match I’ve been to.
Beam Divergence
I mentioned it a little bit earlier but when I was talking about the focusing of the laser I was talking about beam divergence. Laser beams do not stay as focused points of light forever and ever. If you take a laser pointer and aim it a close object you’ll probably see a nice point of light there. Now, aim that same laser at a far wall and you’re likely to see an oblong patch of light instead of that defined point. The beam from the laser pointer spreads out and the same thing happens to the beam in a laser rangefinder, this is called beam divergence. The manufacturer can focus the beam in different dimensions to suit the overall requirements of the laser rangefinder. Ideally, you want the tightest beam divergence that you can get, since too wide of a divergence can cause the unit to provide false readings. The beam divergence in my Leica 1200 CRF is .5 X 2.5 mils, which translates to 1′-6″ X 7′-6″ at 1,000 yards. That’s not too bad as rangefinders go, I can still range trees at over 1,000 yards, but my Leica is over a decade old, many of the newer models have a much tighter beam divergence for better ranging.

I used my Leica 1200 CRF to range a piece of farm equipment more than 130 yards beyond it’s stated maximum range. The combination of high quality emitter and sensor along with ideal lighting conditions helped push the boundaries of this compact laser rangefinder. The beam divergence at this range is approximately 2′-0″ X 10′ – 0″, luckily the farm equipment was huge.
Rangefinder Features
We’ve talked about the aspects of a laser rangefinder that help explain how it provides the range, now let’s talk about some of the things it should do. When you’re out looking for a new rangefinder my first piece of advice is to start looking for one that has a maximum distance rating 20-30% more than what you think you need. If you get a unit that will range farther than you need it to, you can count on it to be able to hit those targets you need to get a range on in less than perfect conditions. The rangefinder should also be able to give you the slope distance to the target, which is extremely important for a rifleman that’s shooting in steep terrain. Whether you’re shooting uphill or downhill the actual distance the bullet is affected by gravity is less than the gun-to-target distance because gravity is pulling straight down. Knowing this slope distance is very important when shooting at steep angles because just using the gun to target distance could result in a miss. Integral ballistic computers are also becoming more and more common with laser rangefinders, something precision rifleman and hunters alike can appreciate. Some units only display relatively generic ballistic information while others can offer custom gun profiles. Probably one of the best full-featured rangefinders on the market is the Sig KILO2400ABS, a compact laser rangefinder with a built-in Applied Ballistics computer.

The Sig KILO can range to the 1/10th yard and automatically provides the adjusted range for slope when in AMR mode. This takes the guesswork out of adjusting the range for high angle shots.
Challenges
Laser rangefinders can be hamstrung but a number of factors that can dramatically reduce their range and effectiveness. Ambient lighting conditions can be the Achilles Heel of a rangefinder, with bright sunny days being the worst for trying to max out a laser rangefinder. On really bright sunny days I’ve had my Leica 1200 CRF, which I know can range past 1,200 yards, fail to range anything past 900 yards. In my experience, ideal conditions for a rangefinder are when the light is more diffused such as on overcast days or in the evening as the sun is going down.

Overcast lighting conditions such as this are ideal for laser rangefinders if you want hit the limits of their ranging ability. Bright, sunny conditions can reduce the effective range of some laser rangefinders by 30%.
Additionally, things like the orientation, color, and size of the target can all play into how well you’ll get a reading at distance. A laser rangefinder works best when hitting a flat surface since it gives it the best chance of reflecting back a good signal. If the target is angled away this can increase the chances of the sensor not picking up the beam. Likewise, dark colors also do not do particularly well when trying to reflect a beam back to the unit, lighter colors work best in this regard. I think it also goes without saying that trying to range small objects that are far away can also be challenging so try to pick large objects with lightly colored flat sides if you can.
Rangefinder Best Practices
To get the most out of your rangefinder here are some things that you can do to help get an accurate distance reading.
- First, hold the rangefinder as steady as you can. If at all possible, mount the rangefinder to a tripod since this will be about as stable as you can get it. Some rangefinders come with a built-in 1/4-20 but if you have to use a two-handed grip, brace against something for more stability.

Using a tripod is the best way to get accurate long range readings with a laser rangefinder, especially if the target is small. Some rangefinders have a built-in 1/4-20 attachment point, however, in some cases you may have to use a secondary mount. This universal optics mount from Precision Rifle Solutions is an excellent way to mount laser rangefinders for a steady hold on a long-range target.
- Make sure the batteries are fresh. If you have been getting irregular readings or no readings on objects you know it should hit, switch the battery out for a fresh one.
- Choose your target wisely. As it was mentioned above, choose your target wisely to ensure you have a good chance of getting a good reflection. Avoid small targets, angled away from you that are dark in color. If you are ranging vegetation, choose the densest part that you can find.
- Range objects multiple times. When you are ranging a target, hit it multiple times to make sure the beam isn’t hitting an object in front of or behind the target. If you get two hits that are the same, aim the reticle off the side and get another reading. If that reading is a lot different then the other two you know the first two readings probably good to go.
- Keep the laser rangefinder protected. Scratched or damaged lenses can degrade the performance of the unit so when not in use keep the rangefinder in a protective case. Remember, a clean lens is a happy lens.
- Read the instructions. To get the most out of the features your rangefinder might have, read the instructions and then go out and practice with it. Learn its limitations, what the buttons do, and the best ways to hold it to get an accurate range reading.
- It should go without saying but the laser rangefinder does emit a laser beam that can be harmful if directed at someone’s eyes. Don’t point the rangefinder at someone’s face and hit the range button, this isn’t kindergarten or an infantry platoon.
In Conclusion
As you may have guessed by now laser rangefinders are an incredibly effective tool for long range shooting, but they are not miracle workers. That being said if you are going to get a laser rangefinder to fill out your long-range kit then spend as much as you can, buy once cry once applies here. When I bought my Leica 1200 CRF over ten years it was one of the best compact rangefinders you could get and pricey. Now, after a decade of use, it’s a little worse for wear but it works great and still ranges to beyond it’s stated limit so the cost is justified.
For some great laser rangefinder options check out the table below.
| Laser Rangefinder Guide | ||||
| Manufacturer | Range | Angle Compensation | Multi-Mode | Ballistics |
| Bushnell Elite 1 Mile ARC | 5-1760 yards | Yes | Yes | Yes |
| Bushnell Fusion 1 Mile ARC Binoculars | 5-1760 yards | Yes | Yes | Yes |
| Leica Rangemaster 2700-B | 10-2700 yards | Yes | Yes | Yes |
| Leupold RX-1300i | 6-1300 yards | Yes | Yes | No |
| Sig KILO2200MR | 3400 yards | Yes | Yes | No |
| Sig KILO2400 ABS | 3400 yards | Yes | Yes | Yes |
| Vortex Ranger 1500 | 9-1500 yards | Yes | Yes | No |
Editor’s note: FM 21-20 (1946) was the Army’s field manual for physical training, and consisted of exercises and fitness programs developed during World War II, which were then codified after its conclusion. The focus of the recommended exercises was getting men who had been living a fairly cushy lifestyle hardened up and ready to battle the Axis powers. We’ve highlighted many of these WWII-era workouts before, and today we’ll take a look at another aspect of GIs physical training: combative contests.
Combative contests were all-out, rough-n-tumble matches that tested a soldier’s strength, stamina, and “will to win.” They were designed to add some fun leaven to the more routine workouts the GIs did, like calisthenics and running, and to build the men’s competitive spirit. As FM 21-20 observes, “Because of this competitive factor, men will put in more effort than they ordinarily do in conditioning exercises.” Engaged in mano-a-mano or between teams, such contests develop “many valuable character qualities such as initiative, persistence, cooperation, confidence, [and] physical courage.”
The next time you and your buddies get together, try out some of these contests — go toe-to-toe with your bros, find out if you’re as tough as a WWII GI, and see who comes out the victor!
The Value of Combative Contests
This type of activity consists of individual and group contests of a rough and strenuous nature. The purpose of such contests is to develop aggressiveness, initiative, and resourcefulness in personal combat; to develop proper footwork and weight control; and to train the men to react violently with a maximum of energy for the purpose of overcoming an opponent. Regardless of previously developed habits in maneuvering in such contests, the men should be instructed to attempt to over-throw the opponent at once. Hence, in these contests, every man is trained to give his all. Defeats suffered in early practice will be compensated for by habits of aggressiveness and by the quick and adaptive thinking which grow from such practice.
Contests – Individual Competition
1. Pull-Hands
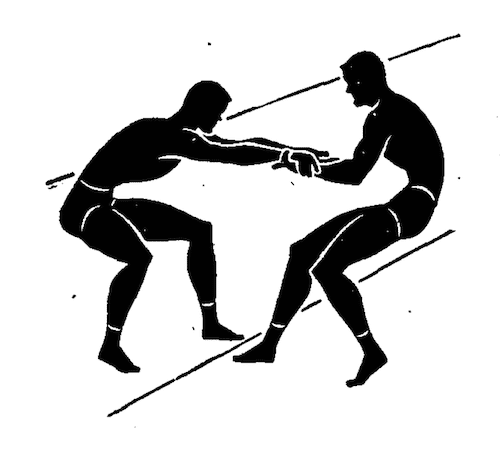
Establish three parallel lines 10 feet apart. The men are paired so they face each other about 3 feet apart, both equally distant from a middle line. They grasp each other’s wrists. At the starting signal, each man attempts to pull his opponent back across his base line. Any contestant pulled across his opponent’s base line is loser. After a predetermined time, any player pulled across the middle line is also the loser. If the hands become separated, they are rejoined at the point of separation as in the beginning. The contestant who first wins three bouts is the winner.
2. Hop and Pull-Hands
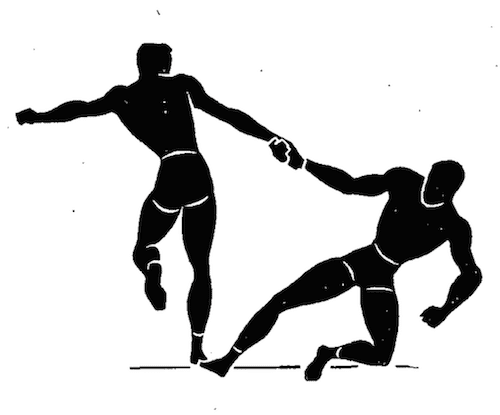
The men are matched in pairs. Each man grasps his opponent’s right hand, and hopping on his right foot, attempts to pull his opponent over the middle line. Either contestant automatically loses if he touches his rear foot to the ground. The contestant who first wins three bouts is the winner. On successive bouts, they alternate hands and feet.
3. Back-to-Back Push
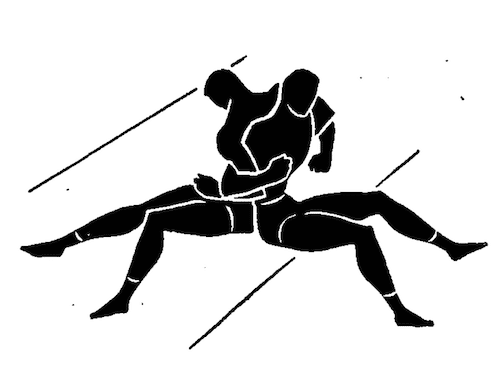
Two contestants stand back-to-back with elbows locked. Each contestant has right arm inside opponent’s left arm. A base line is established 10 feet in front of each contestant. At the starting signal, each, by pushing backward attempts to push the other over his (the opponent’s) base line. The contestants are not allowed to lift and carry their opponents. Pushing only is permitted. A contestant pushed over his own base line loses the bout. The contestant who first wins three bouts is the winner.
4. Back-to-Back Tug
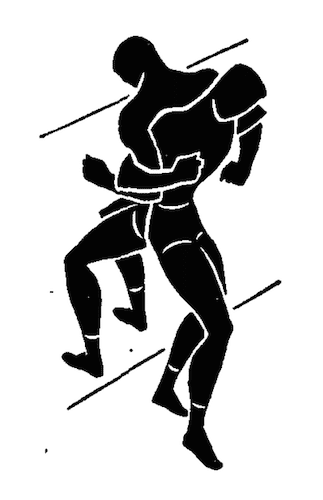
Two contestants stand back to back with both arms linked at the elbows. Each contestant has his right arm inside opponent’s left arm. A baseline is established 10 feet in front of each contestant. At the starting signal, each attempts to drag the opponent over his baseline. Lifting and carrying are permitted. Contestants must maintain original positions with arms linked. Either contestant carried across his opponent’s baseline loses. After a predetermined time, the player carried the farthest is also the loser. The contestant who first wins three bouts is the winner.
5. Back-to-Back, Arms Between Legs
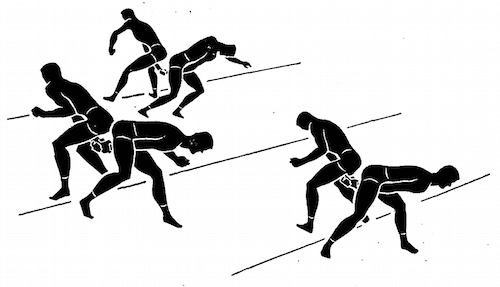
Contestants are paired off, back to back. A baseline is established 10 feet in front of each man. Each bends forward and, extending his right arm between his legs, grasps his opponent’s right wrist. At the starting signal, each attempts to pull his opponent across his baseline. After a predetermined time, any player who has pulled his opponent over his baseline or over to his side of middle line is the winner. Repeat with left hand and then both hands. The contestant who first wins two bouts is the winner.
6. Knock Them Down
At starting signal, each man attempts to knock opponent off his feet in any manner he chooses. He may tackle, push, pull, lift, or wrestle. First man who has any part of body except feet touching ground loses.
7. Step On Toes
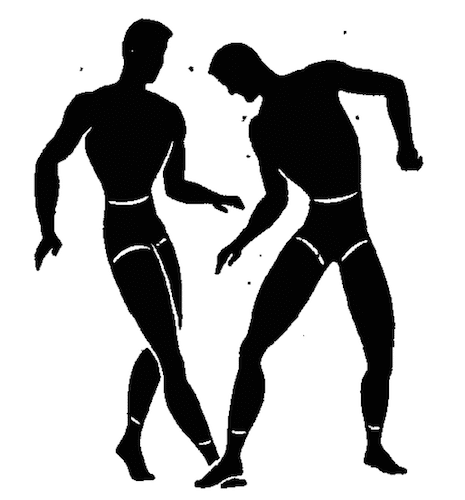
The men are paired off. At starting signal, each man attempts. to step on toes of his opponent. Activity continues until the stop signal. This is a vigorous activity if continued for about a minute.
8. Arm Lock Wrestle
The contestants sit on the floor, back to back, with legs spread and arms locked at the elbows. Each contestant has his right arm inside his opponent’s left arm. At the starting signal, each endeavors to pull his opponent over to the side so that his left arm or shoulder touches the floor. The contestant who first wins three bouts is the winner.
9. Wrestling from Referee’s Hold
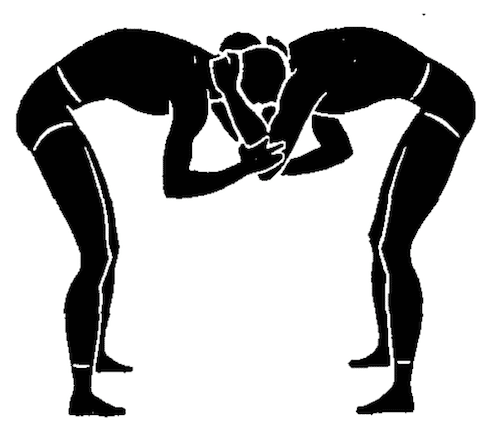
The men assume what is known in wrestling as the referee’s hold. Each contestant grasps back of opponent’s neck with left hand and opponent’s left elbow with right hand. In this position each man attempts to pull or push his opponent across a line or out of a circle.
10. Bulling
The men assume the referee’s hold, each grasping opponent’s neck with left hand and opponent’s left elbow with right hand. Each attempts to force his opponent to move one foot by pushing, pulling, or otherwise manipulating him.
11. Rooster Fight
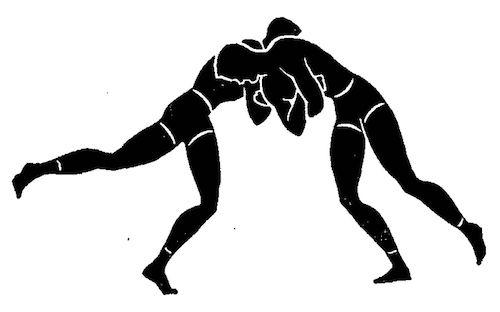
Each contestant, with arms folded across chest, hops on right foot. He uses right shoulder and right side of chest to butt his opponent. The object is to make his opponent lose his balance and fall, to unfold his arms, or to touch his free foot to the ground. The contestant who first wins three bouts is the winner.
12. Rooster Fight (Alternative)
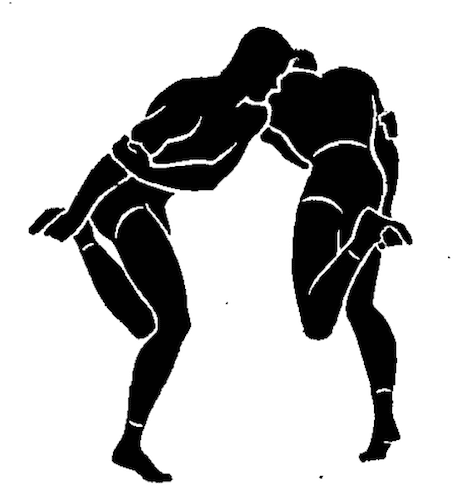
Each contestant grasps his left foot with right hand from behind, and right arm with left hand. He hops on his right foot, and by butting his opponent, or by feinting and sudden evasions, forces him to let go of foot or arm. (The name is derived from the position of left leg.)
13. Stick Pull
Three parallel lines are established 10 feet apart. Two men grasp a wand, stick, or softball bat with both hands. Starting at the middle line, each man attempts to pull his opponent over his base line. The contestant who first wins three bouts is the winner.
14. Pull-Stick Tug-of-War

Two men are seated on the ground with soles of feet in contact. Each contestant grasps a stick or softball bat so that it is directly over their feet. At the starting signal, each contestant tries to pull his opponent from sitting position to feet.
15. Stick-Twist
With right palms upward and left palms downward, both contestants grasp a wand or softball bat. Upon the starting signal, the contestants try to twist the stick to the left, or counter-clockwise. After several bouts of this nature, the position of palms is changed, and the stick is twisted to the right, or clockwise. The contestant who first wins three bouts is the winner.
16. Stick-Wrestle
With right palms upward and left palms downward both contestants grasp a wand or softball bat. At starting signal both wrestle for the stick, attempting to take it away from the opponent by any means.
17. Wrist-Wrestling
Two men lie on backs, side by side, and head to feet, in such a position that the insides of right (left) elbows are side by side; fingers are interlocked; feet are spread and other arm is by side. Each man tries to press his opponents’ wrist down over against his own side. The contestant who first wins three bouts is the winner.
18. Hand-Wrestling
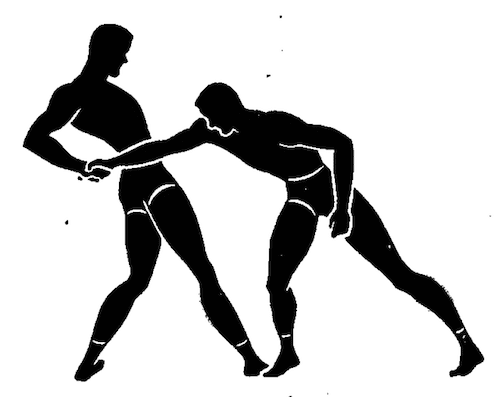
The men stand facing each other. Right feet are forward and braced side by side. The men grasp right hands on the first bout (left in second bout, etc.), with little fingers interlocked. Each attempts by pulling, pushing, making a sideward movement, or otherwise maneuvering to force his opponent to move one or both feet from the original position. The contestant who first wins three bouts is the winner.
19. Harlequin Wrestling
Each man stands on his left (right) foot, holding his opponent’s right (left) hand. The object is to overbalance the opponent or to force him to put his free foot to the ground. Pushing with shoulders is not permitted. A modification of this contest is to hold free foot with free hand.
20. Indian Wrestling

Two men lie on the ground, side by side, with heads in opposite directions. They link right elbows. Upon the signal of the instructor or by mutual agreement, each man raises his right leg, with knee approximately straight, far enough to engage heel of his opponent. To time the contest, each man usually raises his leg three times rhythmically, and the third time engages the opponent’s heel, attempting to roll him over backward. The right leg is used for three bouts, then the left leg for three bouts.
21. Wrist Bending

Opponents pair off and face each other; raise arms forward; and with palms up, lock fingers. At the starting signal, each man attempts to bend his opponent’s wrist. The hands are brought downward between contestants. The man winning three bouts first, is the winner.
22. Wrestling to Lift Off Feet
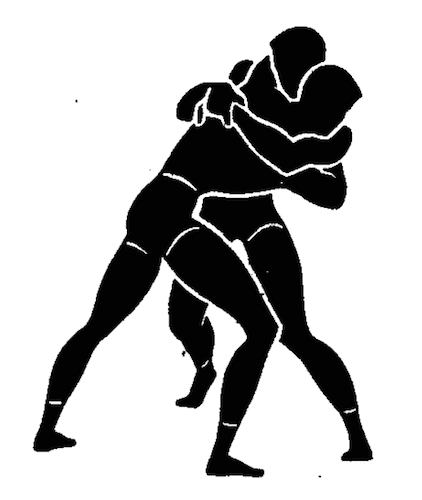
The contestant maneuvers to grasp the opponent with front or rear waist-hold, and to lift him off his feet.
23. Wrestling
Each man tries to force his opponent to touch the ground with some other part of his body than his feet.
Contests – Group or Team Competition
1. Bull in Ring
No equipment needed. Group forms in a circle holding hands. One man, termed the “Bull,” is placed in the center. If there are more than 20 men in the ring, there are two “Bulls.” The “Bull” tries to break out by charging the ring so the clasped hands are forced apart. If the “Bull” gets out, he immediately tags another player who becomes “Bull.” This game may be played by two teams, each of which forms a circle. An opposing player is the “Bull” in each circle. At the starting signal each attempts to break out by going over, under, or through. The first man to break clear wins a point for his side. The contest continues until each man has been a “Bull” in his opponents’ circle.
2. Ring Push

Players are divided into two clearly designated teams, both of which enter a large circle. At the starting signal, players of each team attempt to push all opponents out of circle. Players forced from the circle are eliminated. All players must keep arms folded across the chest throughout. The contest continues until all the members of one team are eliminated.
3. Ring Push (Sitting)
This activity is performed in the same manner as #2 above. However, all men are seated on the ground, back to back.
4. Line Charging
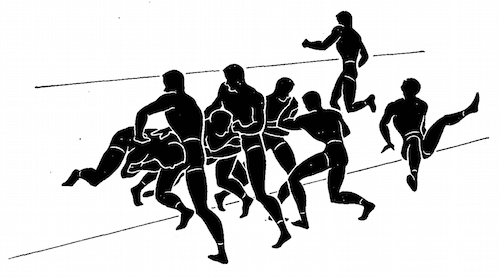
Two teams form lines facing each other about 1 foot apart. The players of each team are 1 foot apart. A line is established 10 feet behind Team “B.” At the whistle, team “A” attempts to break through the line of team “B.” Team “A” may use its hands; team “B” may not. The players of team “B” usually assume a crouched position. After 3 to 5 seconds (usually 3 at first, 5 seconds later), the referee blows his whistle and counts the number of men who have broken through the opponent’s line and reached the baseline. The team which has the greatest number of contestants reach the baseline in three attempts wins. Indoor competition may be conducted on a string of mats.
5. Island
The players are divided into two distinctively marked teams. The teams line up on opposite sides of an area approximately 10 feet square. At the starting signal, all players rush forward to the middle of the area where they attempt to remain. The players attempt to throw their opponents out of the area. If a player is forced from the island he may return if he can before the contest is terminated. The team having the greatest number of players on the island at the end of 2 minutes wins the game. Indoors a mat may be used as the island.
6. Catch and Pull Tug-of-War
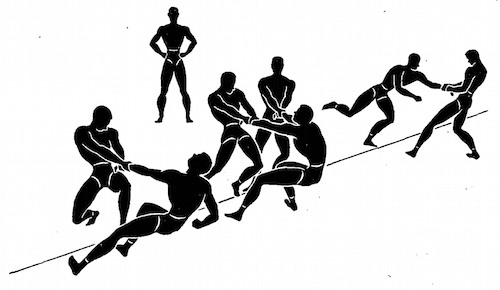
Two teams line up on either side of a line on the ground. The men attempt to grasp an opponent’s hand or wrist and pull him across the line. Two or more of one team may gang up on one opponent. When an individual touches the ground on the other side of the line, he retires to the rear of his captor’s territory as a prisoner. The contest continues until all men of one team have been pulled across the line. If any men refuse to approach closely enough to engage their opponents, the referee declares them defeated. Such practices should be discouraged, however. As a variation, those pulled across the line may join with their opponents in attacking former teammates continuing until no one is left on one side.
7. Goal Line Wrestling
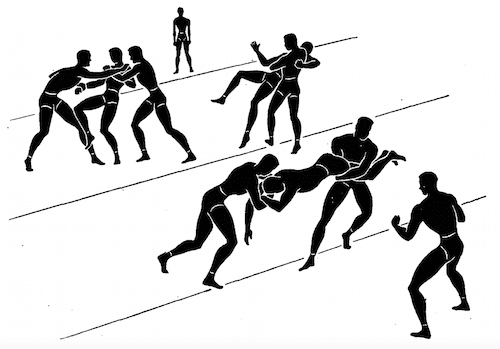
This activity is performed similarly to #6 above except that a line is drawn 15 feet behind each team and when a player is carried or pulled across line behind his opponent’s side, he is declared “dead” and out of competition.
8. Horse and Rider Fights
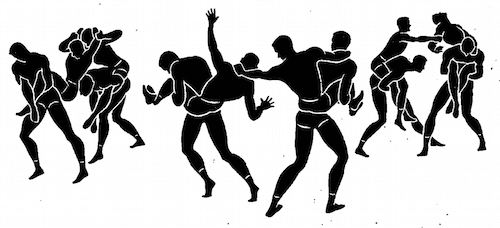
Players are divided into two teams and paired off. One player of each pair sits astride the hips of his partner and locks his feet in front. At the starting signal, the “horses” move forward so that the “riders” can reach each other. Each “rider” attempts to overthrow an opponent. The “horses” are not allowed to help the “riders.” The “riders” are allowed to use all fair wrestling tactics; they are not allowed to interfere with the “horses.” The “rider” who touches the floor in any way, either forced down from his “horse” or overthrown with his “horse” first loses. Last team up is the winner. This contest should only be conducted where it is not dangerous to fall.
9. Human Tug-of-War
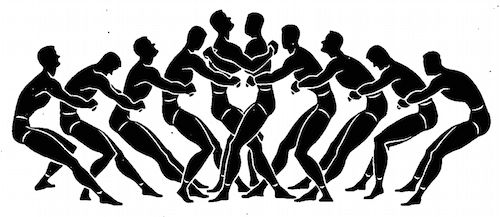
Two teams line up in two columns facing each other. Team members stand close together. Each man places his arms about the waists of the men in front of him (grasping his own left wrist with his own right hand is the strongest grip). The leading man of each team grasps his opponent about neck and shoulders. The team breaking first or having one or more men pulled over the line separating the two teams after 30 seconds is the loser.
Top 10 Nazi Germany Weapons
Ah Monday!

Ruger 77 Rifle in .357 Magnum : Gun Review
Bob Shell test and reviews the Ruger 77 Rifle, a Bolt Action rifle in .357 Magnum.
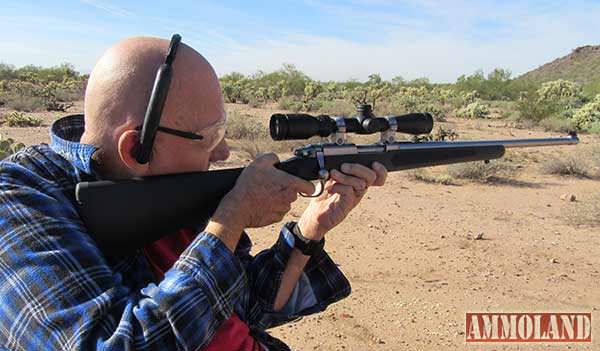
USA –-(Ammoland.com)- The .357 round has been around for many years with good reason. Besides handguns a number of rifles are made for it.
Most are lever actions, but Ruger has taken a different route and produced a bolt action rifle. The Ruger 77 Rifle.
The one obvious advantage of the bolt system is you can safely get the most out of this round. For info on the Ruger rifles you can go to http://www.ruger.com/index.html
The Ruger 77 Rifle sample I received is stainless with a composite stock. My personal preference would be a dull blue barrel which would be less likely to spook a deer. Deer, especially a large one, may see a glint off of a stainless barrel and that will spook him.
They don’t get large by being stupid or ignoring a danger sign. I do prefer the composite stock for hunting. Barrel is 18.5” long, which is plenty to get the maximum performance. For the most part, it is a typical Ruger 77 action, which includes scope rings.
For years, Ruger has used that system and I think it is one of the very best systems for scope mounting. It eliminates the base and the system of the rings going into the action is very sturdy.
It also has a basic set of open sights, which are adjustable though most shooters will probably scope it.
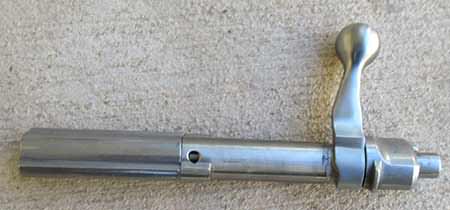
The Ruger 77 Rifle’s bolt is a little unique as it has an extension because of the short cartridge length.
The model 77 is primarily a gun chambered for rifle rounds including full length so this extension is a clever way to make it work with short rounds.
The trigger from the factory has some travel and the pull is decent. It is good enough for the intended purpose.
It has a rotary type of magazine with a five round capacity. There is a large button at the rear that releases the magazine and is easy to use.
The safety is a three position type that locks the bolt in the rear position.
That is handy when going through thick brush to prevent a branch from opening the bolt. If you release the safety in the normal manner, it does make a clicking noise. That will alert an animal to your presence so I would like to see it made more silent.
An animal such as a deer or pig has better hearing then we do and they can hear the safety being released at a distance especially if there is no breeze.
If you slowly release the safety, most of the noise will go away. It might be a good idea if you practiced that maneuver a few times.
It is a light and handy rifle to carry, and with a Ruger Blackhawk in the same chambering you would have a nice combination.
For testing, I put a Hawke 2 X 7 Scope in order to get the best accuracy possible. I have used Hawke scopes on a number of rifles and found them to be top performers for info you can go to http://www.hawkeoptics.com/ That particular scope fits well on this rifle, with the right amount of magnification without over doing it.

The Ruger Model 77/357 offers some versatility because of its ability to handle shorter rounds. Of course, it will shoot .38 specials although they may not always feed. If you don’t mind shooting single shot then you can use .38 short and long Colt rounds as well. With cast bullets in .38 special cases, it can be shot all day and not break the bank. It would be perfect to teach a youngster marksmanship. An interesting thought would be chambering it for a .357 maxi. The gun would be strong enough, although it would be a single shot as they are too long for the magazine. In the .357 maxi chambering ballistics would be close to the .351, which would definitely qualify for some big game with the right bullet. It is a fascinating concept.
For us handloaders, there is a really large variety of bullets and powder that are suitable for the .357 round. I am focusing on hunting loads, as this would be the intent of the Ruger 77 Rifle.
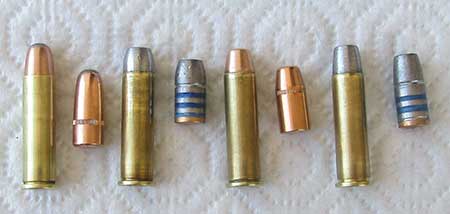
These listed loads should cover everything that a .357 would be suitable for from varmints to deer size game. With the extra velocity obtainable in a rifle, the 180 and 200-grain bullets should perform well in hogs and black bear. The same loads in a revolver give an average of 400 FPS less according to a lot of testing I have done with them. I used new Starline Brass in this test because it is a top quality product with reasonable prices. You can go to www.starlinebrass.com for info on their brass. If you have a .357 or other round to load for I would recommend going to Brownells as they have a good supply of reloading tools and supplies. For parts and other shooting related goodies you can go to www.brownells.com
The .357 magnum rifle has been around for a long time and it is a good idea. Both Winchester and Marlin make lever actions as well as the Uberti model 66 clone.
They are suitable and with a handgun can make for a nice combo. You do give up 300 to 400 FPS when using a handgun especially with heavy loads. I have tested a lot of loads in short and long guns and they all lose a lot of velocity from a handgun to a rifle. Even a 30-30 shows a large difference between a revolver and rifle.
There are many combo-calibers that can be used in a rifle and handgun with the same round. As a rule, they are a good idea because of the flexibility.
If you take a .454 Casull you would have something that could take almost anything in North America, using the proper bullets. At present I have a Taurus lever action .454 rifle and Freedom Arms handgun. If ever I had the opportunity to hunt large bear, or some other large and dangerous game, I would take that over the .357.
As with the .357 there are a lot of ammo options, especially if you roll your own. There are some .41, .44’s and various .45 calibers that are very useful in a number of circumstances. Of course there are a number of .357 combination guns available.

The Ruger 77 Rifle is unique because it is a bolt action as opposed to a lever action, which may give it a little extra strength in case real hot loads are used frequently. Personally, I would carry it with a Blackhawk or another good revolver in the same caliber. A handgun with a 4 to 6” barrel would be the best depending on what would be easier to carry.
As a rule, a longer barrel will give you a little more velocity if that is important.
With good loads, it will handle a lot of hunting especially in the rifle. A good 180 or 200-grain bullet will give you some good penetration on large game. I would recommend this rifle for someone who wants a heavy duty .357 rifle. Hornady and LBT make 200-grain bullets. The Hornady is .358 so it may have to be swaged down to .357 which is very easy.
The 180-grain Sierra or Hornady would also make good candidates for hunting bullets. I am focusing on some heavy bullets, as they would be more suitable for hunting. Since most .357 bullets are made for handguns, they may come apart with the extra velocity afforded by the rifle. I took a Hornady 200 grain RN and swaged to .357. In order to feed they have to be seated past the cannelure, but there is a lot of bullet in the case so they are tight enough to prevent moving.
As a note, I use the same 200 grain Hornady swaged down to .352 in the .351 WSL. It makes a nice bullet in the old model 07.
For small game, I would use a cast semi wad cutter as it would make a good game getter and not destroy a lot of meat. They can be loaded down and still be fine. A 200-grain slug launched at 1400 will produce nearly 900 FT. LBS. of energy at the muzzle and at 100 yards will produce somewhere in excess of 600 FT. LBS. While not earth shattering, they will bring down a deer size animal given a good hit. You should get good penetration on such an animal, which is one factor in successfully harvesting a deer. Giving the lightweight of the rifle and the accuracy, I would definitely use it for close range deer hunting. The 180 grain launched at 1650 will produce 1088 FT. LBS. of muzzle energy. The 158 grain at 1800 FPS will produce 1136 FT. LBS. at the muzzle. That is nothing to sneeze at. Just for comparison a 55-grain .224 bullet launched at 2900 will produce 1027 FT. LBS. of energy at the muzzle. With the 16” barrels used by most folks that is about all you can expect. Since the .223 is the most popular deer round in use, I thought it would be interesting to compare them.
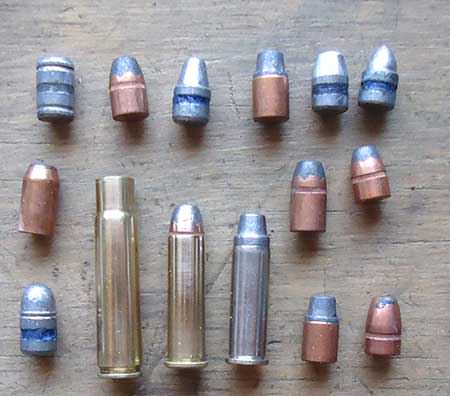
Anyone who makes handgun bullets does so in the .357 caliber. There is virtually any style or reasonable weight available. There are more cast bullets then can be listed and the copper plated slugs. You can mold your own bullets and keep the cost down to next to nothing. Years ago, I use to go to the local outdoor range before sunrise and dig the lead out of the dirt bank. It was a lot of work digging them up, then cleaning them before molding but the ammo cost next to nothing. For those who like to experiment you can buy the equipment and make your own-jacketed bullets. I do it for experimental purposes and you would have to decide if you wanted to sink the considerable amount of cash required to buy the equipment. For various reasons it isn’t for everyone. I did try one load using Remington 7 & ½ small rifle primers and the same using WW small pistol primers.
LOAD ———- BULLET ———- VELOCITY ———- COMMENT
5 grains 231 —– 125 gr SWC 38 case —– 1305.1 —– nice load
HPR 125 —- gr HP —– 1644 —– mild
16 grains 2400 —–140 gr Hornady FTX —–1859 —– deer
Double Tap —–158 gr HP —–1926 —– consistent
Aguila —–158 gr FP —–1708 —– decent load
18 grains Lil’Gun —– 158 gr Sierra FP —– 1819 —– consistent
18 grains Lil’Gun —– 158 gr FMJ —– 1761 —– ok
3.8 grains Bullseye —– 158 gr cast SWC 38 case —– 1016.60 —– consistent
13.7 grains Blackhorn 209 —–160 gr Sierra small rifle primer pistol —– 610.25
13.7 grains Blackhorn 209 —–160 gr Sierra small rifle primer rifle —– 869.7
13 grains IMR 4227 —– 180 gr Sierra —– 1229 —– slow
15 grains IMR 4227 —–180 gr Sierra —– 1435.27 —– consistent
13 grains IMR 4227 —–180 gr LBT —– 1340 —– also slow
15 grains IMR 4227 —– 180 gr LBT —– 1665.98 —– nice
15 grains IMR 4227 —– 180 gr Sierra (pistol) —– 1090.8 —– good load
15 grains IMR 4227 —– 180 gr LBT (rifle primer) —– 1615.3 —– very consistent
11 grains IMR 4227 —– 200 gr LBT —– 1153 —– mild
13 grains IMR 4227 —– 200 gr LBT —–1408.08 —– nice
13 grains IMR 4227 —– 200 gr Hornady RN —– 1366.4 —– consistent
Ruger 77 Rifle
If you want a useful utility rifle the Ruger 77 Rifle may be just the ticket. It is short, light and handy. There are a multitude of bullets and loads that can be used. For a rifle to be carried on a four-wheeler or pickup this would be one of my top picks. Besides being light and handy, it possesses enough power for deer size game at moderate ranges. It would work ok for hogs and black bear, though shot placement would be important. Remington makes a 130 gr FMJ – FP which would do well in some circumstances. The 140-grain FTX would extend the range a little due to the point and high velocity. You have some lead free choices as well as Barnes makes them.
As with guns that I do T & E work on other shooters always get an opportunity to try them out and it was the Ruger 77 Rifle’s turn.
I have several female shooters that I trust to get feedback from, on the products I test. All of the feedback on the Ruger 77 Rifle has been positive as the female shooters like the lightweight good trigger and lack of heavy recoil.
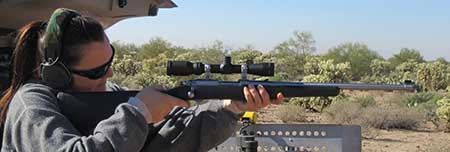
I give the Ruger 77 Rifle a thumbs up, as it will serve well as a nice carbine for woods hunting.
About Bob Shell:
A Custom Reloader of Obsolete and Antique Ammo, Bob Shell, writes about the subject of Guns, Ammo, Shooting and Related Subjects. For more information, visit:www.bobshellsblog.blogspot.com.

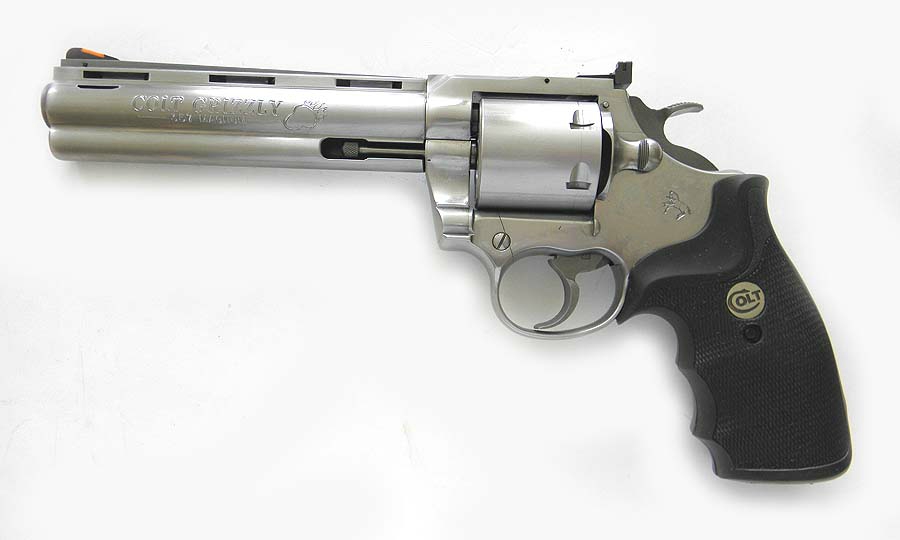
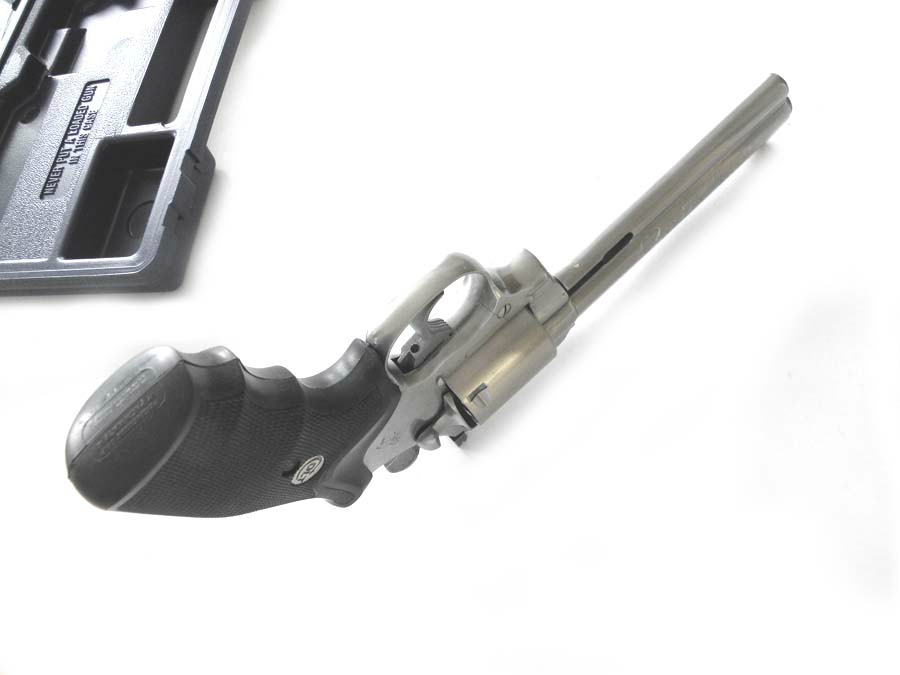
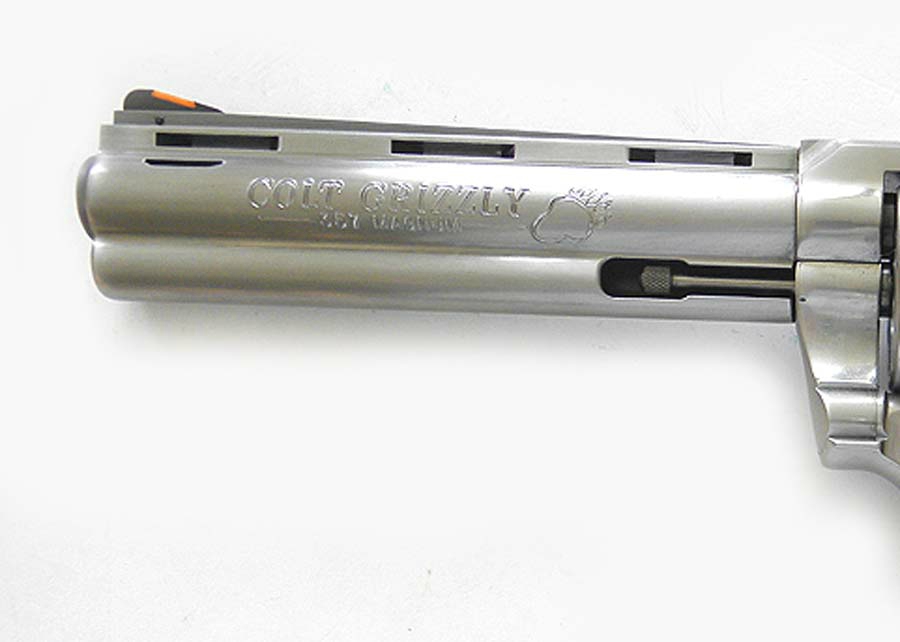
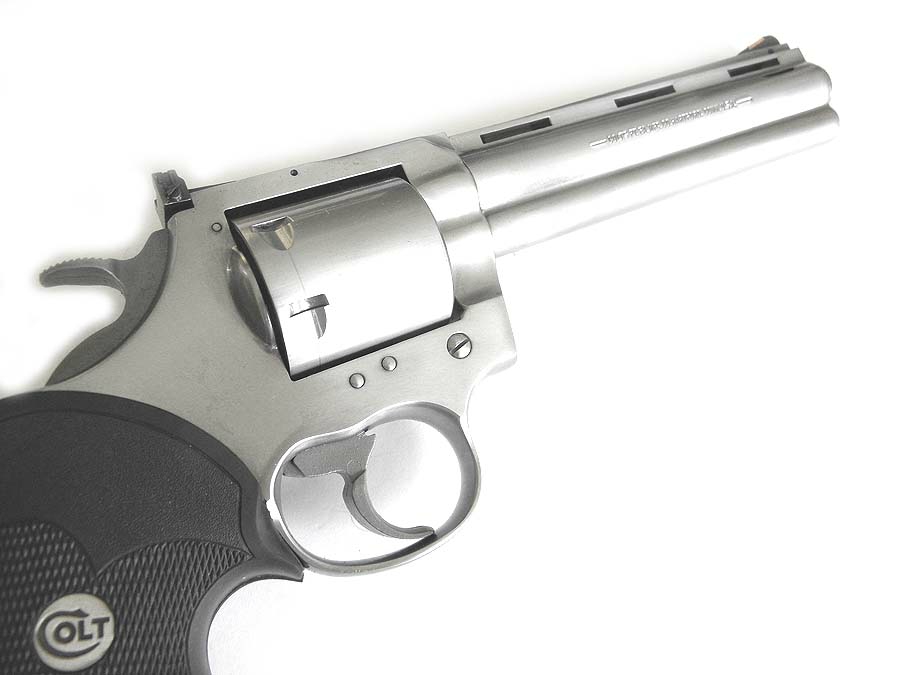
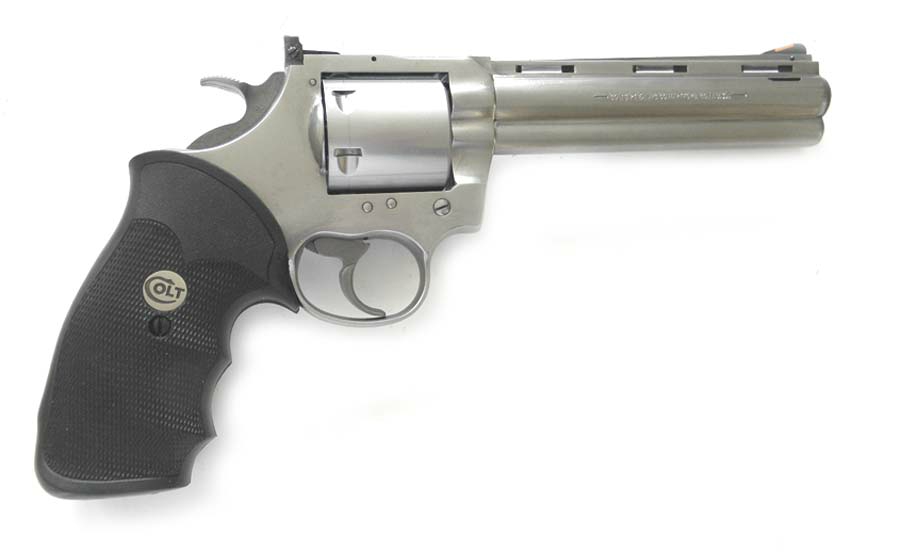

The stainless steel Colt Grizzly of 1994, another limited production .357 Magnum revolver. It used a Python barrel mated to a Colt King Cobra frame.
500 of these revolvers were manufactured, with 6-inch Magna-Ported barrels and smooth, unfluted cylinders. The ported barrel includes a bear footprint.
Similar to the Grizzly was the Colt Kodiak, which was a Colt Anaconda with a Magna-Ported Barrel and an unfluted cylinder. Approximately 2000 Kodiaks were manufactured.[8


